
This post contains affiliate links. If you book through one, I may earn a small commission at no extra cost to you — it helps keep Jet Lag Jelly running. Read my full affiliate disclosure for more.
Vegas isn’t just slot machines and all-you-can-eat buffets — it’s also one of the best home bases for some of the most jaw-dropping landscapes in the American Southwest. Within a few hours’ drive of the Strip, you’ve got salt flats below sea level, fire-red sandstone, towering red rock canyons, slot canyons carved by light, and one of the Seven Natural Wonders of the World. In February, we used Vegas as our launch pad for exactly that kind of trip — trading neon lights for desert silence, one national park at a time.
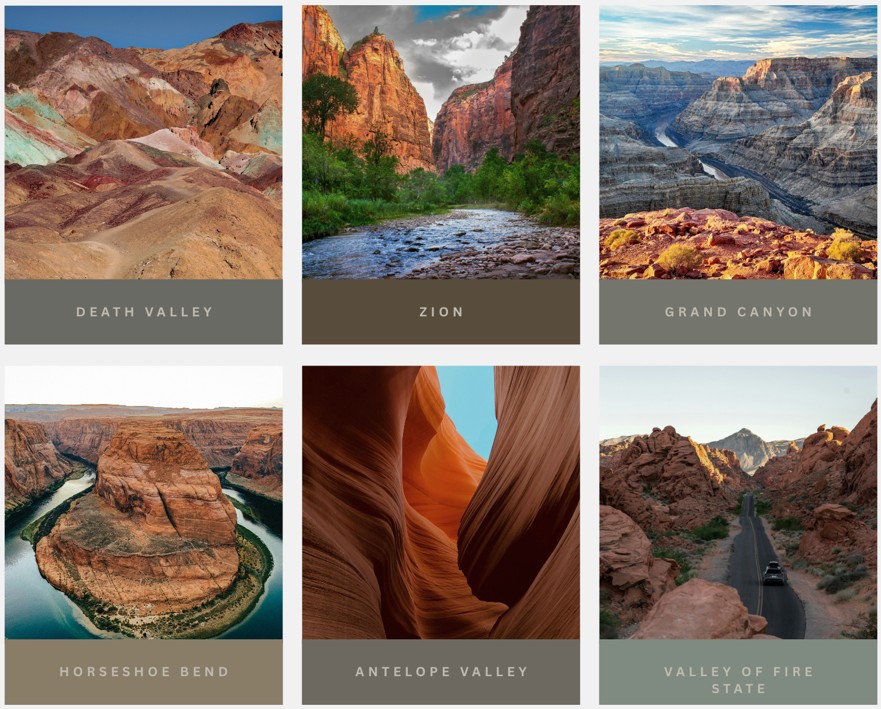
This post rounds up my favorite stops from that road trip: Death Valley, Valley of Fire, Zion, the Grand Canyon, and the Antelope Canyon / Horseshoe Bend / Glen Canyon cluster near Page, Arizona. Consider it your shortlist for what to add to a Vegas itinerary if you’re willing to trade a day (or five) of the Strip for some of the most surreal scenery the US has to offer.
DEATH VALLEY
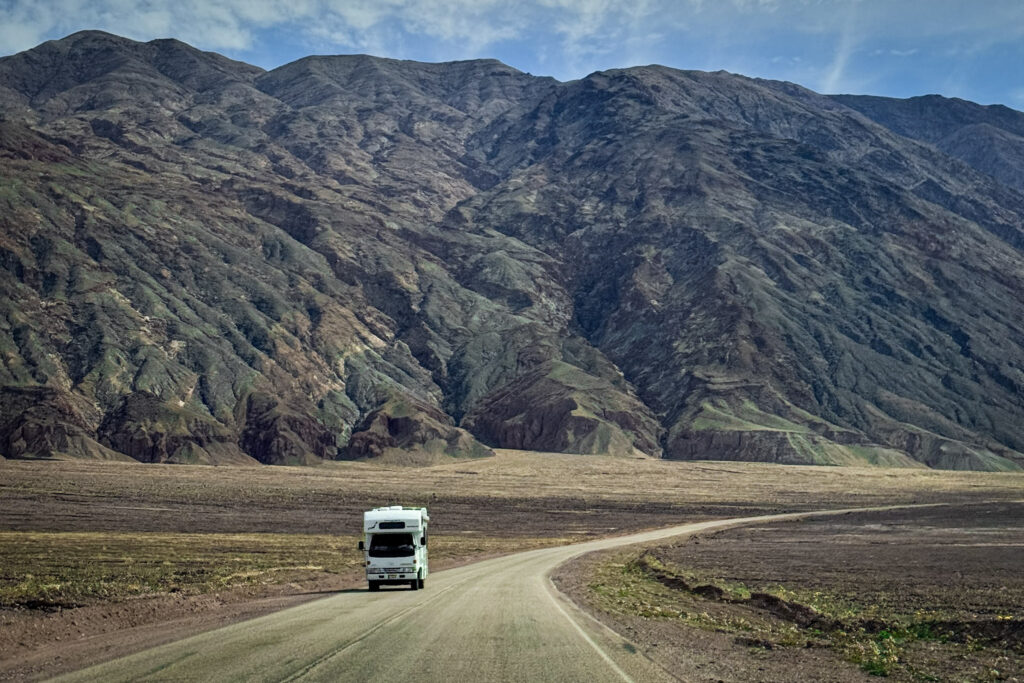
Death Valley doesn’t really do subtlety. One minute you’re driving through empty desert mountains with not another car in sight except a lone RV ahead of you, and the next you’re standing 282 feet below sea level looking at a sign that genuinely says “below sea level” like it needs to remind you. This was one of the most surreal driving days of the whole road trip — and despite the park’s reputation as the hottest place on Earth, visiting in February meant we got it at its most pleasant: cool mornings, mild afternoons, and not a hint of the brutal summer heat this place is famous for.
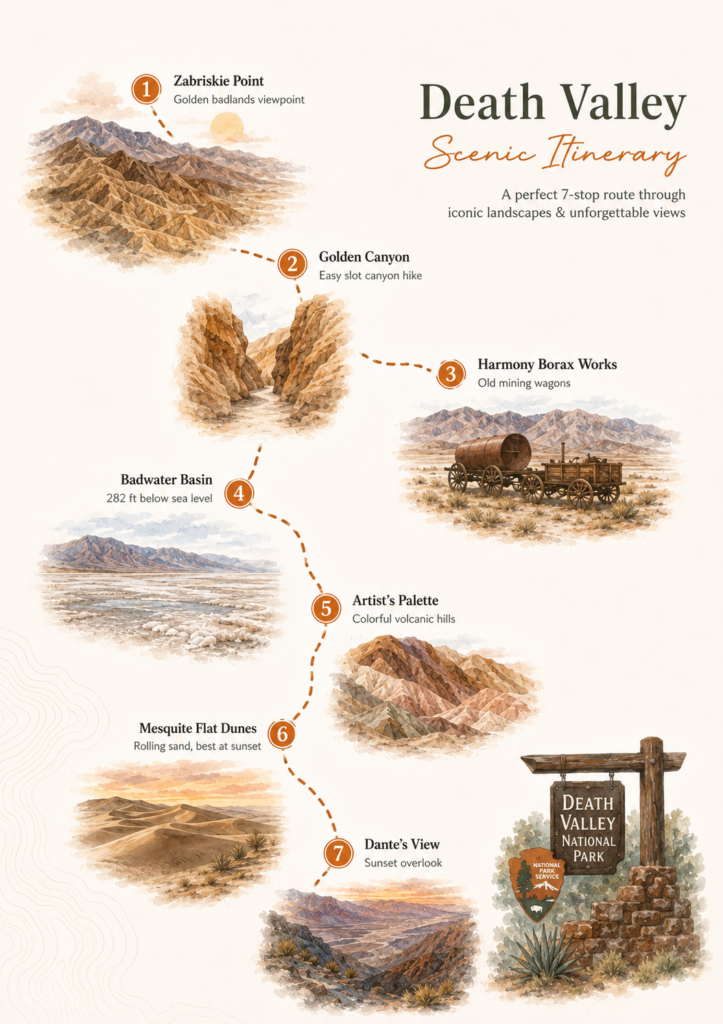
Getting There: From Las Vegas, it's roughly a 2-hour drive — about 111 to 126 miles depending on which entrance you head to. The most straightforward route is NV-160 W through Pahrump, then onto CA-190 W straight into the park. You'll need a car — there's no public transport into the park, so it's either a rental or a tour. Renting a car from Las Vegas is the simplest option.

Entrance Fee: A 7-day vehicle pass costs $30 per car, which covers everyone inside. There are no staffed payment booths at the entrances like in some other parks — it runs more on an honor system, with electronic payment kiosks at most entry points and at the visitor center, card only. If you're planning to hit multiple national parks on this road trip (and with this list, you definitely are), it's worth grabbing the America the Beautiful annual pass instead — it covers entry to all the US national parks for a year.

How Long to Spend There: You can absolutely do the highlights in a single, well-planned day — that's exactly what we did — though if you want to add stargazing or the more remote spots like the high country, two to three days gives you more breathing room. A day trip just means an early start and a route that doesn't backtrack.

Jet Lag Jelly Tip: Cell service is virtually nonexistent once you're inside the park, so download offline maps before you go and don't count on Google Maps rerouting you mid-drive — also fill up your tank in Pahrump, since gas inside the park is limited and noticeably pricier.
1. Zabriskie Point
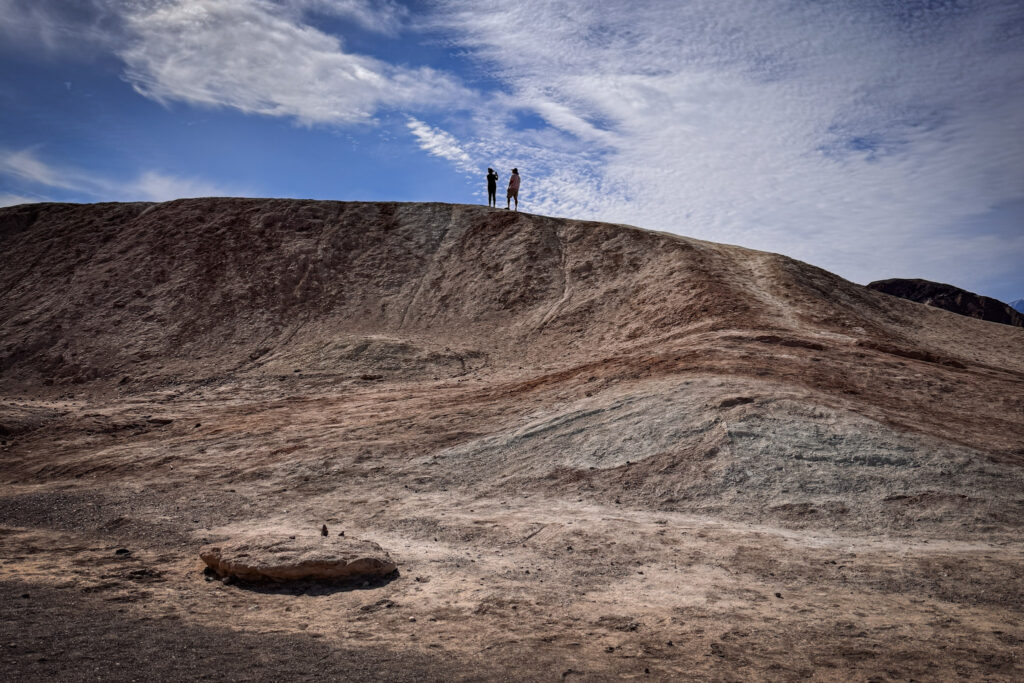
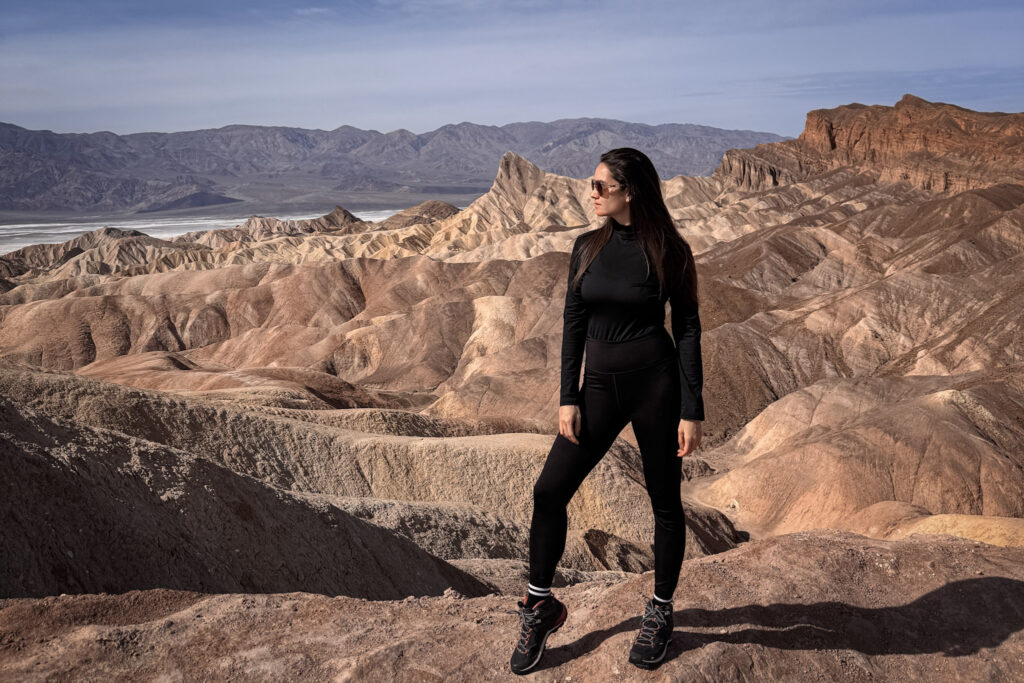
First stop, and already a contender for best view of the day. Standing on top of these golden, rippled badlands, with the canyons folding into each other below — it doesn’t look real. It looks like a movie set for a planet that isn’t Earth.
Fun Fact: These badlands were formed from sediments of a lake that dried up roughly 5 million years ago, and the wrinkled texture is the result of constant erosion ever since.

Useful Information: It's a short, paved walk from the parking lot — no real hike required for this view, which makes it one of the easiest "wow" stops in the whole park.

Jet Lag Jelly Tip: Go early if you can. The light hits the ridges differently throughout the day, and morning gold tones are hard to beat.
2. Badwater Basin
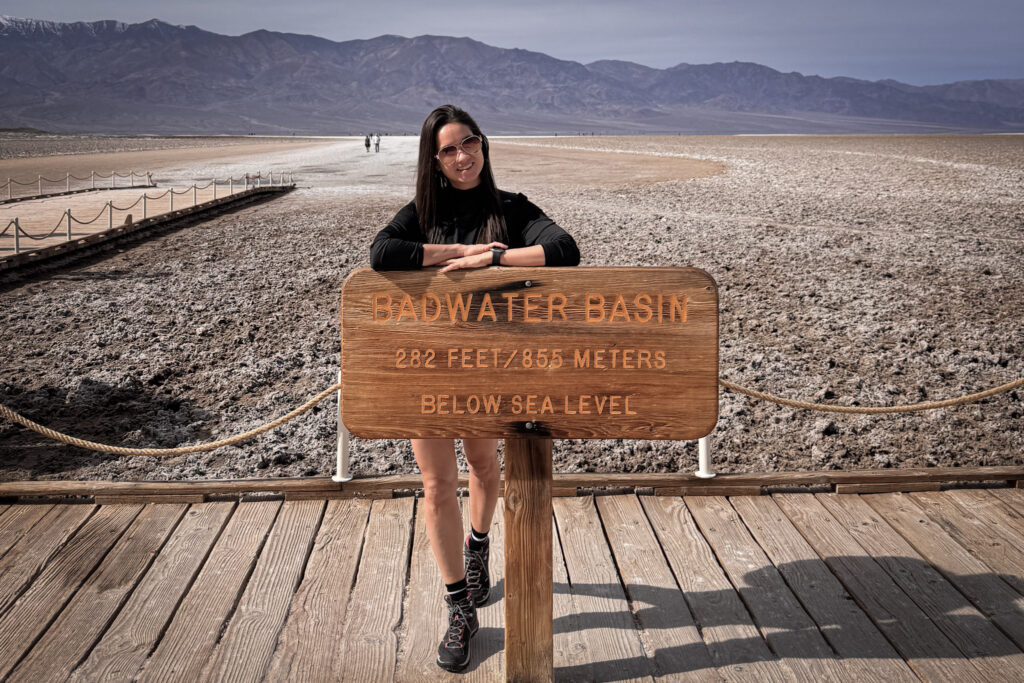
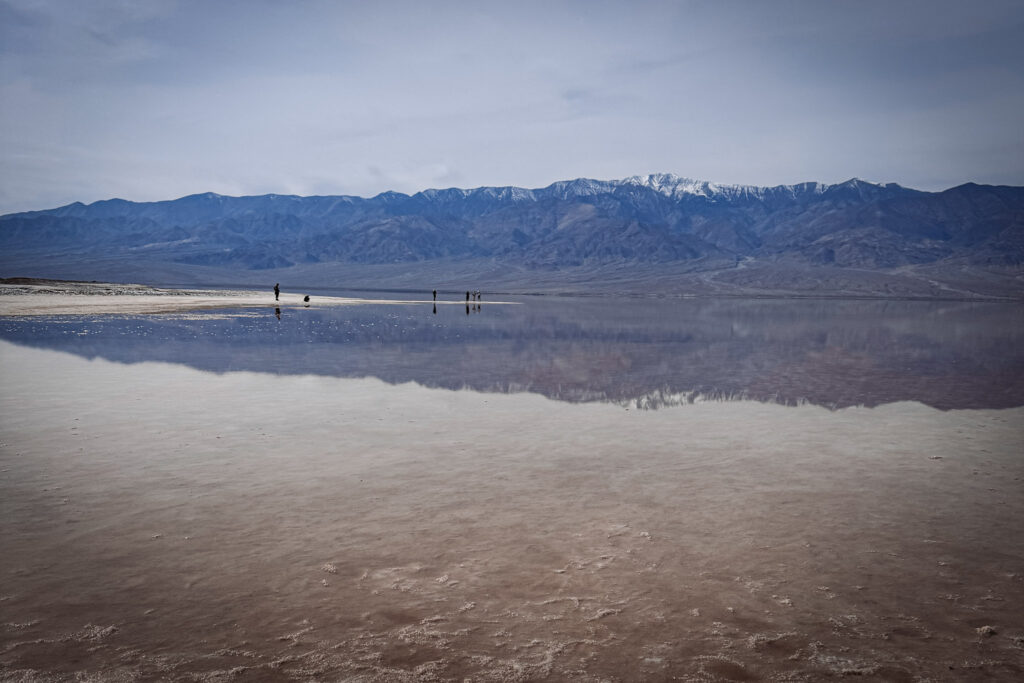
This is the one everyone comes for — the lowest point in North America, 282 feet below sea level, and an endless white salt flat stretching out toward the mountains. Standing at the sign feels like a milestone in itself, but walking out onto the salt flats is where it actually clicks just how vast and empty this place is.
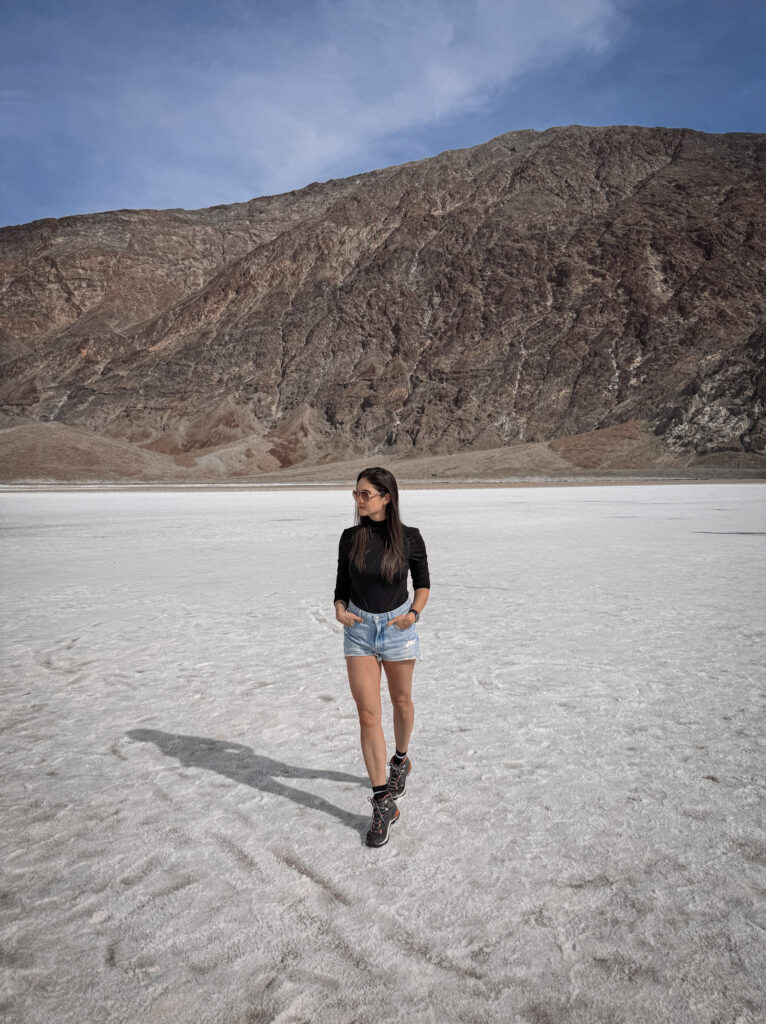
Fun Fact: Badwater Basin sits 282 feet below sea level, and if you look up at the cliffside above the parking area, there's a small "Sea Level" sign marking just how far below you actually are.

Useful Information: The salt flats are a flat, easy walk, but bring water — there's zero shade and the heat (even outside summer) builds fast.

Jet Lag Jelly Tip: Walk out further than the first crowd of people taking photos near the sign. The crowds thin out fast, and the salt flat patterns get more dramatic the deeper in you go. (Visiting in February meant we could comfortably wander without worrying about the heat — this spot is brutal in summer, but a completely different, easy experience in winter.)
3. Artist’s Palette (Artist’s Drive)
A scenic drive through hills streaked with unexpected color — pinks, greens, purples, and yellows splashed across the rock like someone took a paintbrush to the desert. It’s hard to believe it’s natural until you’re standing right in front of it.
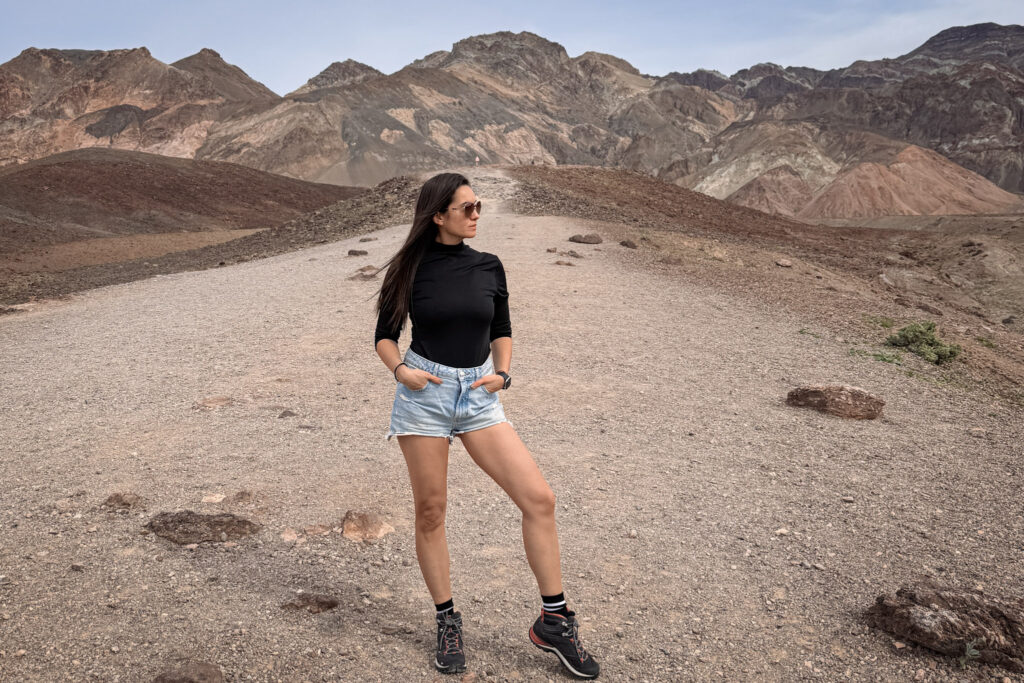
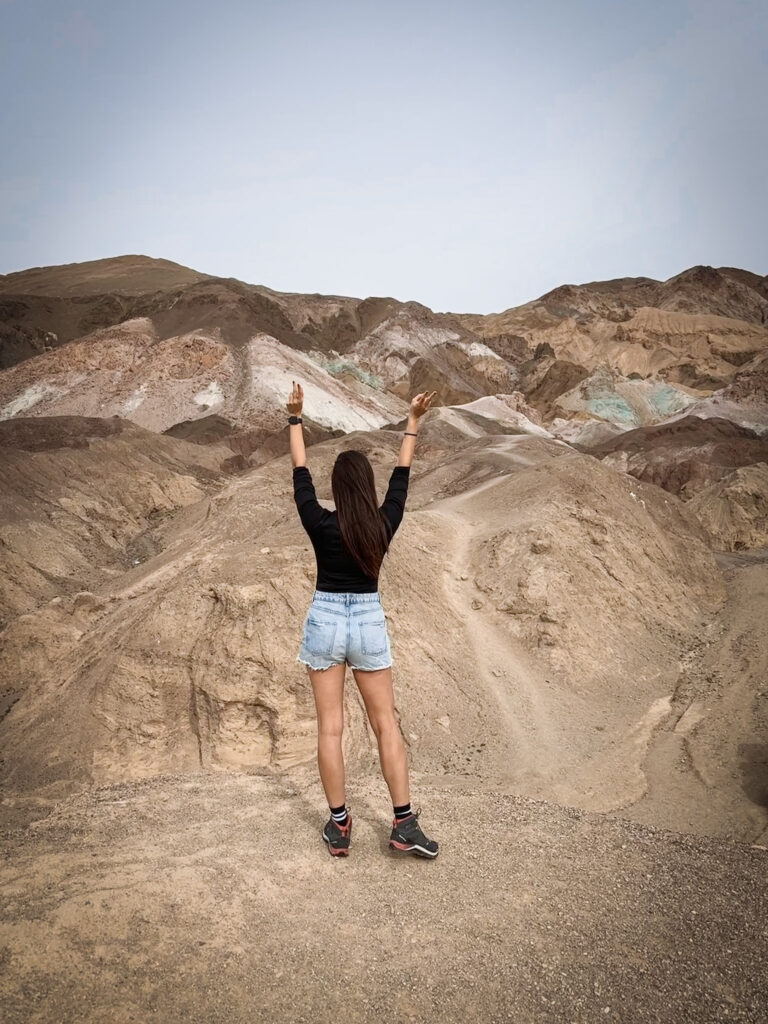
Fun Fact: The colors come from oxidized metals in the volcanic rock — iron oxides create the pink and red tones, while chlorite and mica give the green.

Useful Information: Artist's Drive is a one-way scenic loop, so you'll need a car to do it properly — there's a designated viewpoint partway through for the best photo stop.

Jet Lag Jelly Tip: Midday light actually works in your favor here — it makes the colors pop more than the golden hour does.
4. Golden Canyon
A narrow slot canyon hike with walls rising up on either side, golden and textured like something carved by hand. Walking through it feels quiet and a little otherworldly, especially with no one else around.
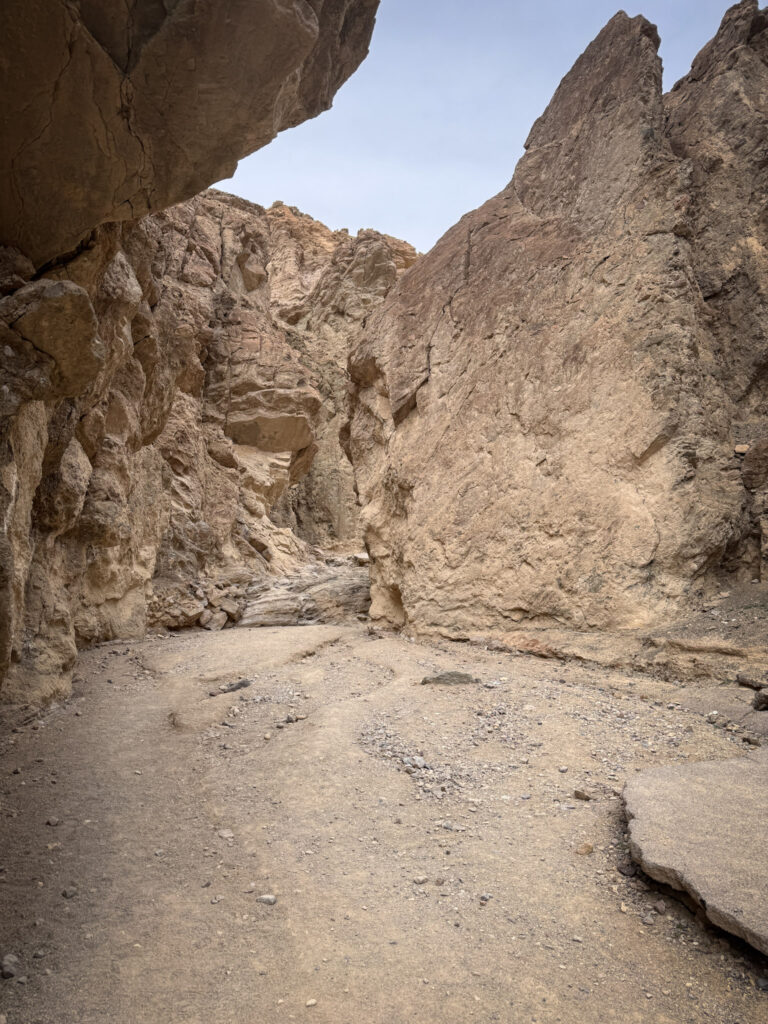
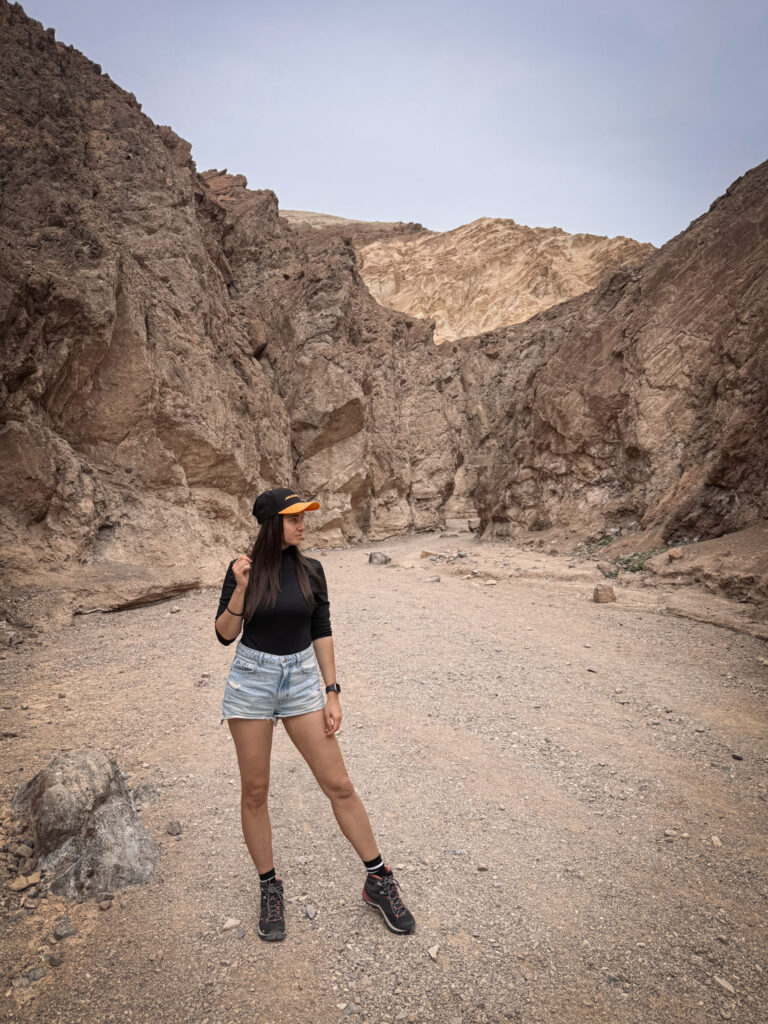
Fun Fact: Golden Canyon is part of the same badlands formation as Zabriskie Point, and the trail actually connects to it if you want to extend the hike.

Useful Information: It's a relatively easy out-and-back trail, a couple of miles round trip depending on how far you go in.

Jet Lag Jelly Tip: Wear proper shoes, not sandals — the gravel underfoot is looser than it looks in photos.
5. Harmony Borax Works
A quick stop at an old mining relic — the original 20-mule team wagons once used to haul borax out of the valley, parked here as a piece of the park’s slightly less glamorous, much harder, mining history.
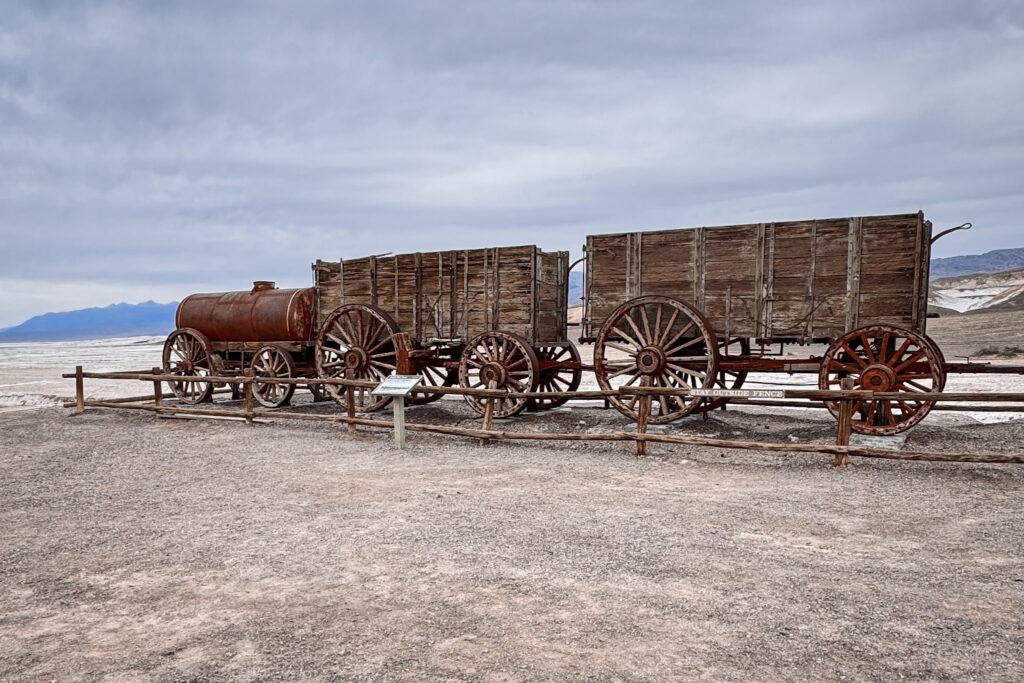
Fun Fact: These wagons were hauled by actual teams of 20 mules across more than 165 miles of desert, all the way to the nearest railroad — a journey that took around 10 days one way.

Useful Information: It's right off the main road, with a short, easy walk to the wagons and the old works site — no hiking boots required for this one.

Jet Lag Jelly Tip: A short detour, but worth the five minutes if you want context for just how brutal this landscape was to work in, not just visit.
6. Mesquite Flat Sand Dunes
Rolling, rippled sand dunes that stretch out toward the mountains — the kind of place where your footprints are the only ones for a while, until they’re not.
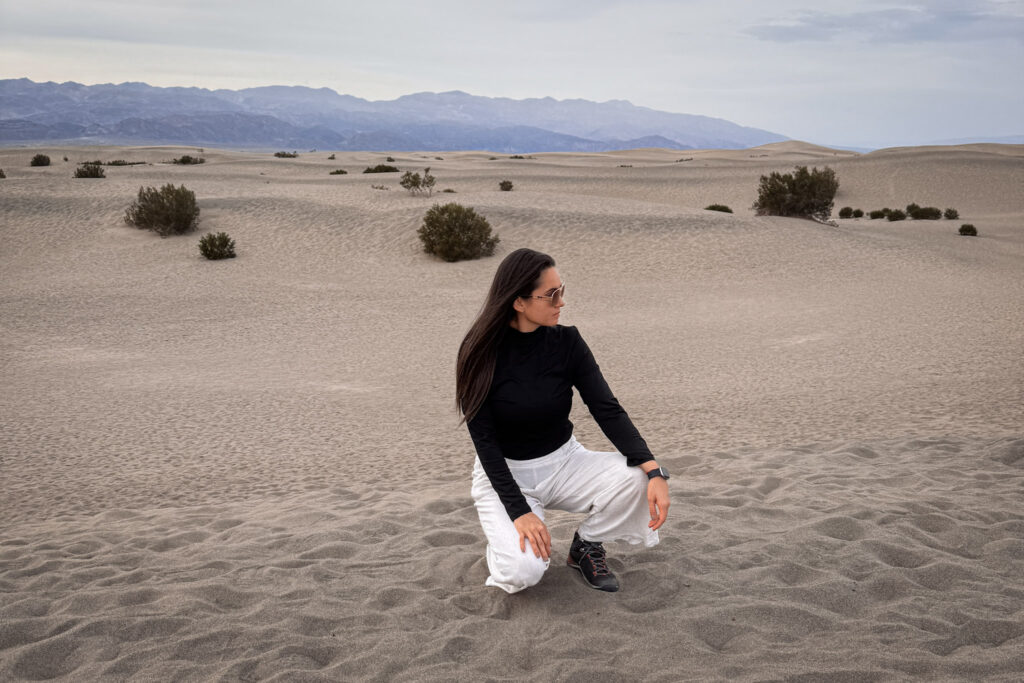
Fun Fact: These dunes are some of the most accessible in the National Park system — no permit, no long hike, just walk in from the roadside parking area.

Useful Information: There's no marked trail; you just pick a direction and walk. The deeper dunes are a 20–30 minute walk from the parking lot.

Jet Lag Jelly Tip: Sunrise or sunset is when the shadows on the dune ridges really come alive — flat midday light makes them look much less dramatic.
7. Dante’s View at Sunset
The perfect way to end the day — a viewpoint high above the valley floor, looking straight down over Badwater Basin as the sun dropped behind the mountains. After a full day at sea level and below, getting up high for this final view put the whole scale of the place into perspective.
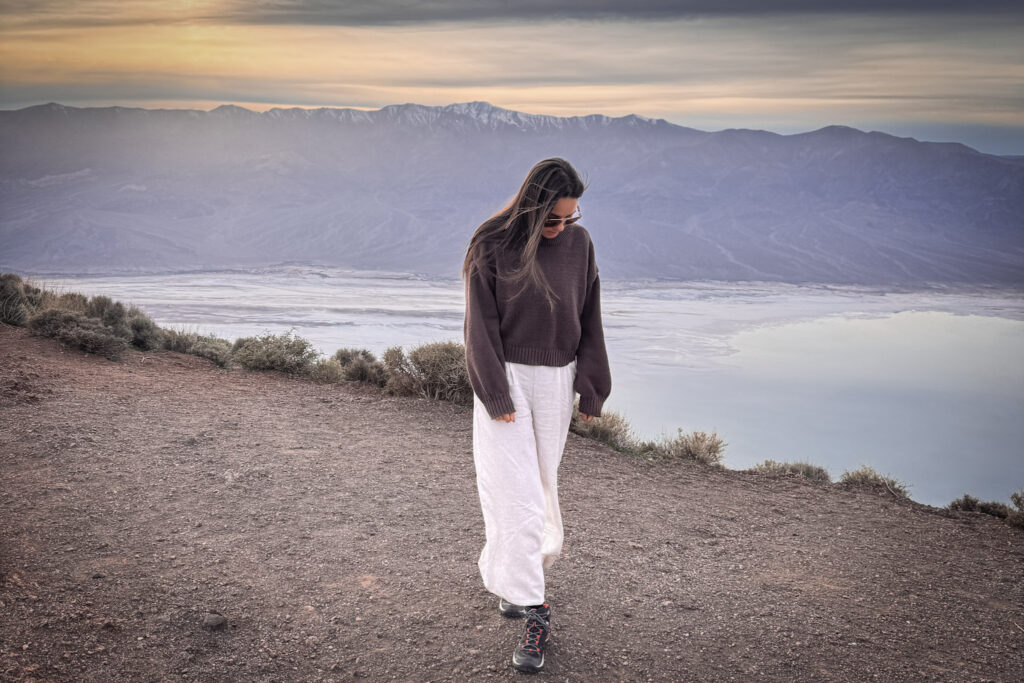
Fun Fact: From Dante's View, you're standing over 5,000 feet above Badwater Basin — meaning you can see both the highest and lowest points of the contiguous US relatively close together (Mount Whitney is visible on a clear day, too).

Useful Information: It's a paved road right up to the viewpoint, so no hiking needed — just time your arrival before sunset to get a parking spot, as it fills up fast.

Jet Lag Jelly Tip: Bring a layer regardless of season — even in February the elevation meant it got noticeably colder once the sun started dropping.
ZION NATIONAL PARK
Zion National Park feels like a completely different planet — towering red and white sandstone cliffs, a canyon you drive (or shuttle) straight into, and a level of greenery that almost feels out of place after a day in the desert. It’s part of Utah’s “Mighty 5,” and it’s easy to see why it’s the most visited of them all.
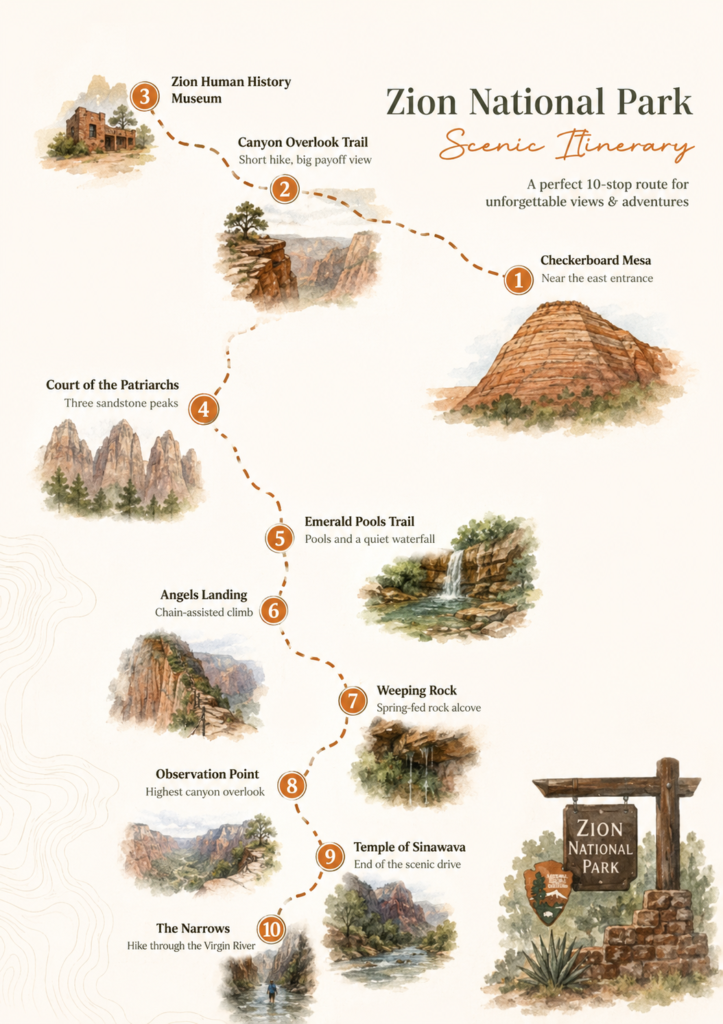
Getting There: From Las Vegas, it's about a 2.5 to 3 hour drive via I-15 N, roughly 160 miles one way. We drove straight from Las Vegas ourselves, which made for an easy, scenic morning behind the wheel before reaching the park. One thing to plan around: you'll lose an hour crossing from Pacific into Mountain Time, so it's easy to misjudge your arrival time if you're not paying attention. Most visitors enter through the south entrance near Springdale. If you need to sort out a car, DiscoverCars is worth checking before you head out.

Entrance Fee: Zion charges $35 per vehicle, valid for 7 days and covering everyone in the car — though as of January 1, 2026, non-U.S. residents aged 16 and older are charged an additional $100 surcharge per person unless you hold a specialized non-resident annual pass. If that applies to you, it might be worth checking the $250 Non-Resident Annual Pass, which covers entry into any of the parks with this surcharge for a year — useful if Zion is just one stop on a bigger national park road trip like this one.

Summer vs. Winter: A Very Different Park: This is the big one to know before you go. From around March through late November, private vehicles are banned from the main Zion Canyon Scenic Drive — you have to park in Springdale or at the Visitor Center and take the free park shuttle in instead, no tickets or reservations needed, just hop on. It's a genuinely well-run system that keeps the canyon's one road from turning into a parking lot, but it does mean less flexibility if you want to stop wherever you like.

In winter, that changes completely: the shuttle typically pauses and you can drive your own car straight into the canyon, stopping at viewpoints and trailheads exactly when and where you want. We visited in February, which meant we got the rare combination of having the scenic drive to ourselves in our own car, no shuttle queues, and far thinner crowds than the park sees in peak season — easily one of the best reasons to visit Zion outside summer.

Jet Lag Jelly Tip: If you do have flexibility on timing, winter is genuinely underrated here. You trade a little bit of foliage and a few closed trails for empty viewpoints and the freedom to drive the canyon at your own pace — a trade I'd happily make again.
1. Zion Canyon Scenic Drive
The drive into Zion Canyon is a destination in itself — towering red and white cliffs rising up on both sides of the road as it winds deeper into the park. Since we visited in February, we had the rare luxury of driving this in our own car, no shuttle required, stopping wherever the view demanded it.
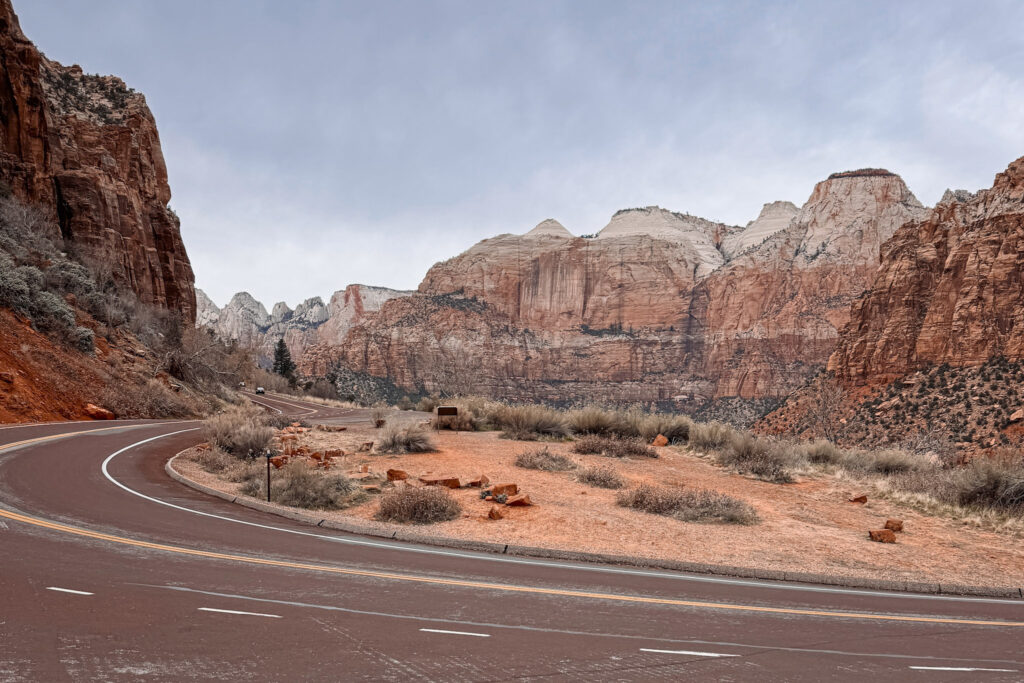
Fun Fact: The canyon's signature red-and-white striped rock is Navajo sandstone, formed from ancient sand dunes over 150 million years ago — the colors come from iron oxide staining at different depths.

Useful Information: From spring through late November, this road is shuttle-only; outside that window (like our February visit), you can drive it yourself, which makes a huge difference for flexibility.

Jet Lag Jelly Tip: Even if you're just driving through, pull over at the marked viewpoints — the canyon looks different around every bend, and the road itself is one of the most scenic in the park.
2. Canyon Overlook Trail
A short but properly rewarding hike that climbs up through a narrow, rocky canyon before opening onto one of the best views in the entire park — Zion Canyon laid out below, with the scenic road switchbacking down through it like a ribbon.
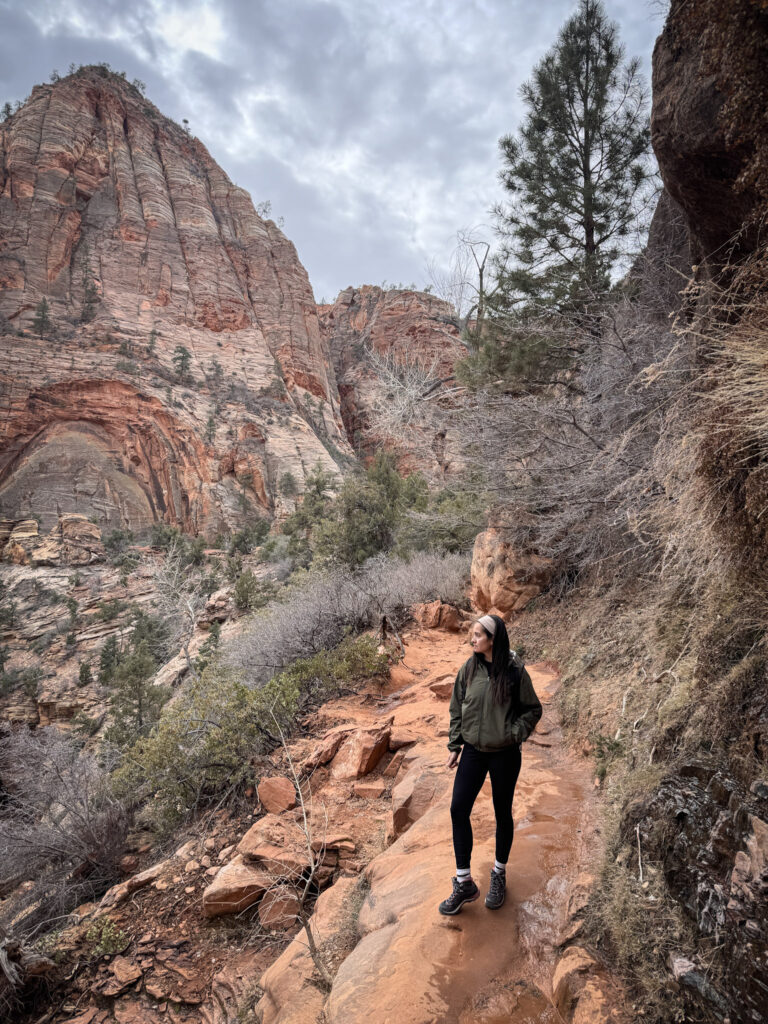
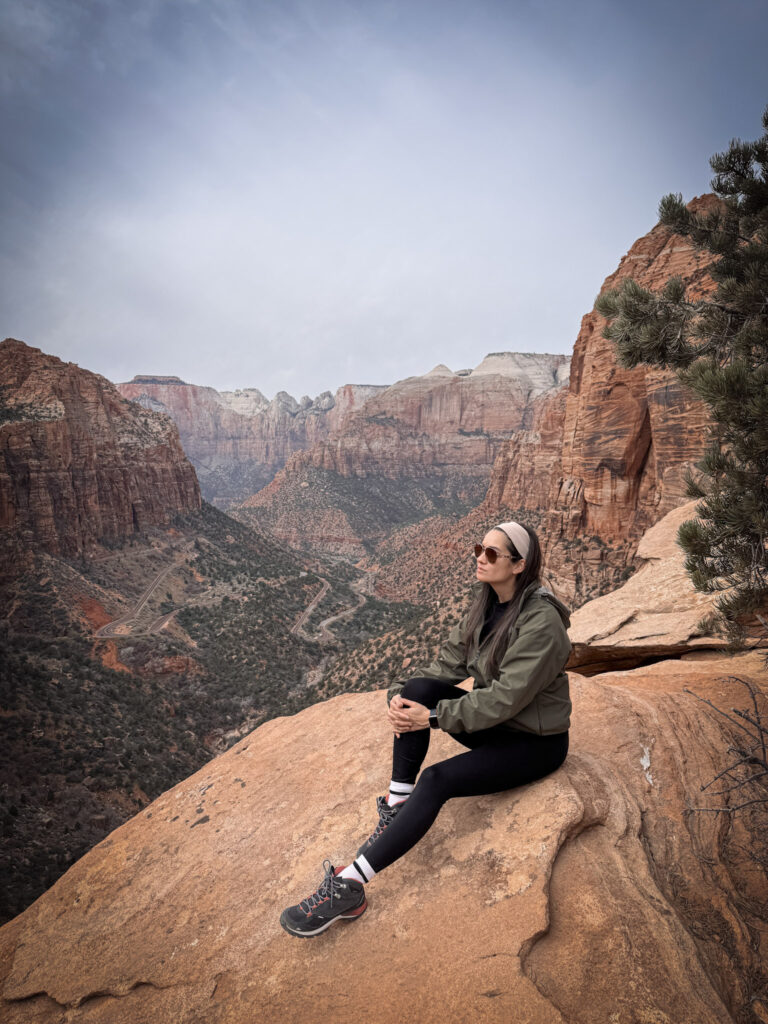
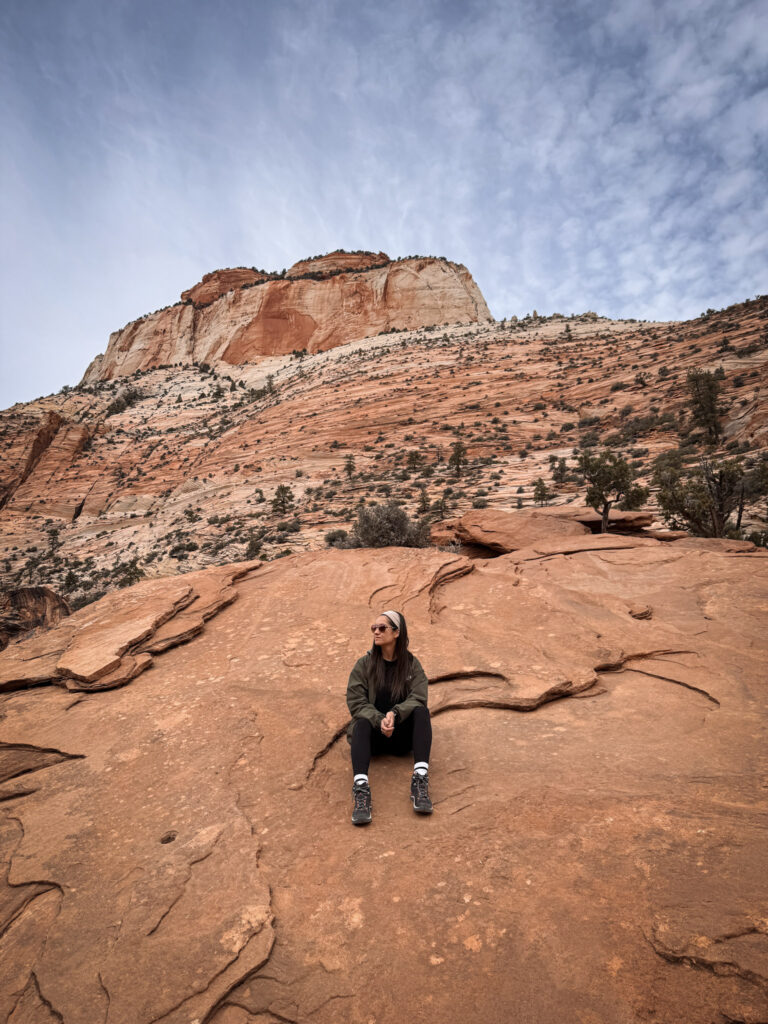
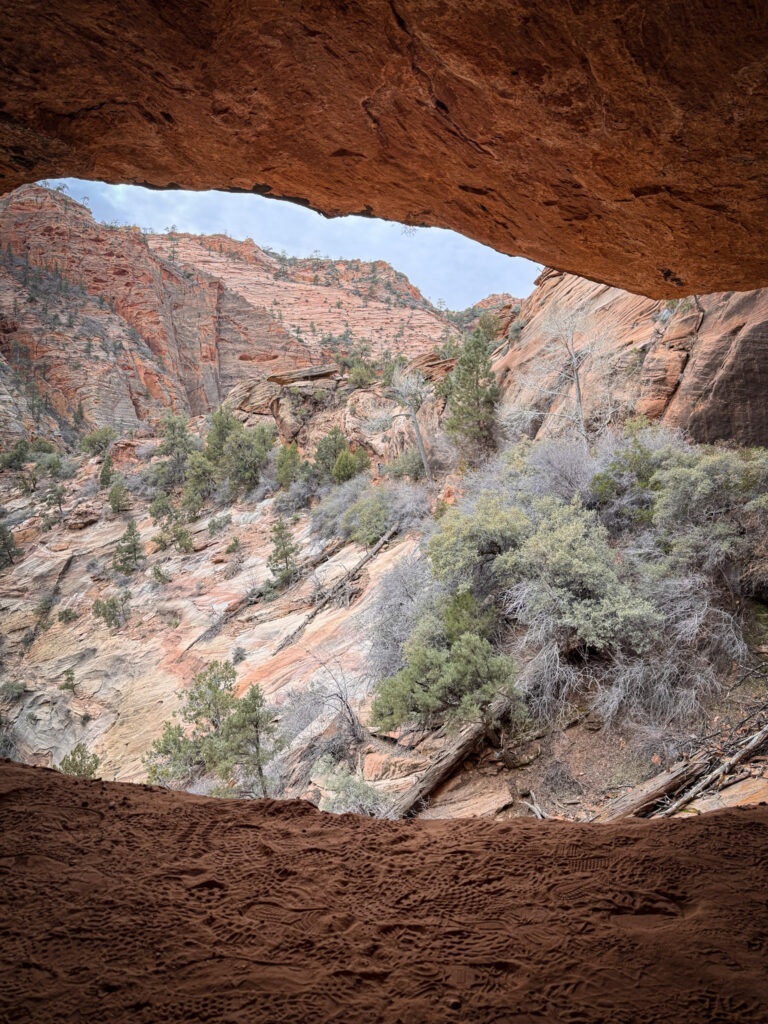
Fun Fact: Despite the dramatic payoff, this trail is only about a mile round trip — one of the best view-to-effort ratios in Zion.

Useful Information: The trailhead is right near the east entrance, just past the Zion-Mount Carmel Tunnel; parking is limited, so an early start helps even in quieter winter months.

Jet Lag Jelly Tip: Don't stop at the first lookout you reach — keep going to the very end of the trail, where the view opens up fully over the switchbacks below.
3. Court of the Patriarchs
Three massive, named sandstone peaks standing shoulder to shoulder above the Virgin River — Abraham, Isaac, and Jacob. It’s one of those classic Zion views where the scale only really hits you once you’re standing right below them.
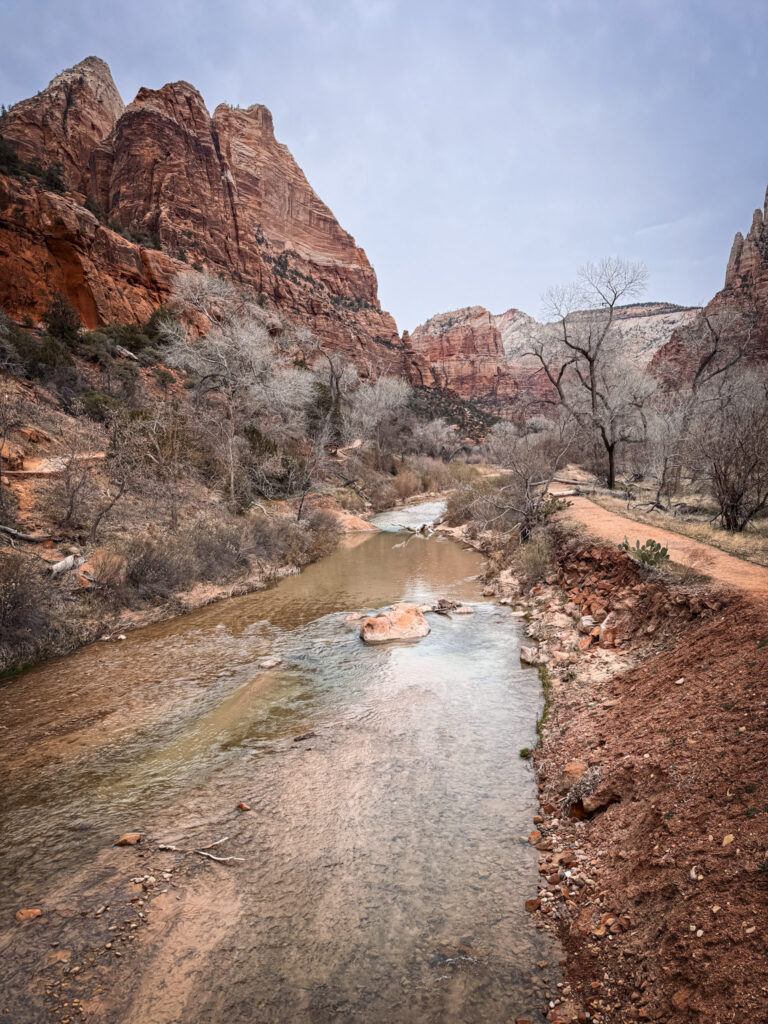
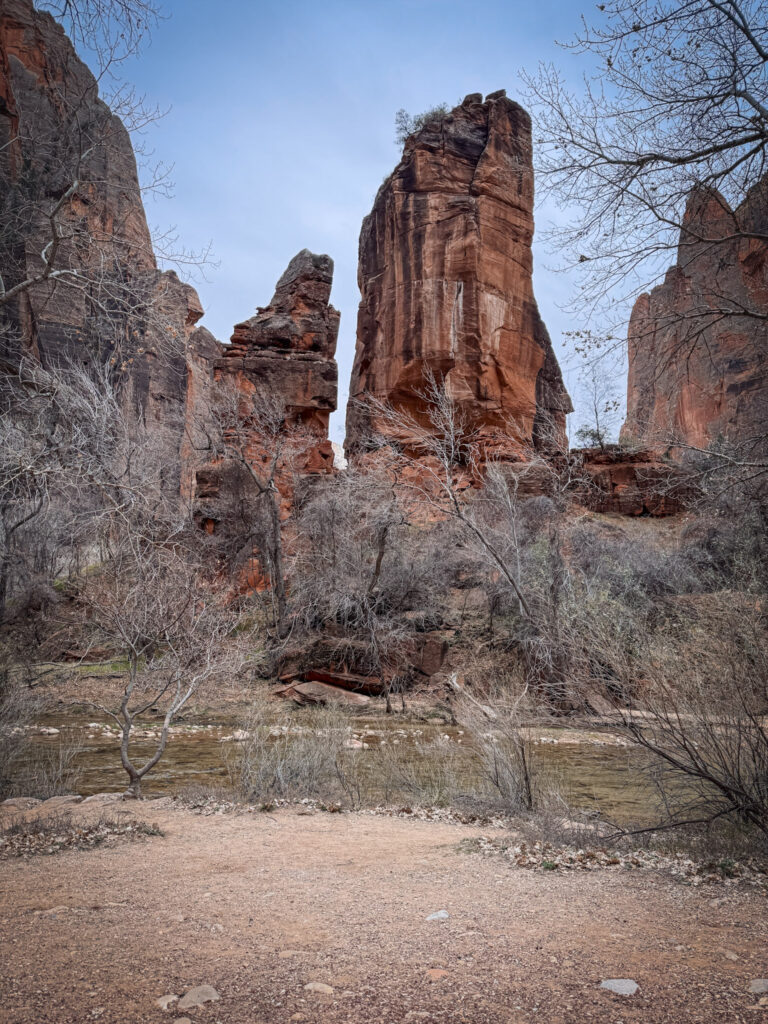
Fun Fact: The peaks were named in 1916 by a Methodist minister after the biblical patriarchs, and the name stuck.

Useful Information: There's a short, easy viewpoint trail right off the main road — no serious hiking required for this one.

Jet Lag Jelly Tip: Walk down toward the river instead of just the main viewpoint — having the water in the foreground with the peaks behind makes for a much better photo.
4. Lower Emerald Pools Trail
A relatively easy trail leading to a series of pools and a quiet waterfall tucked beneath a sweeping rock overhang — a nice change of pace after the bigger viewpoints, with a more intimate, almost secretive feel to it.
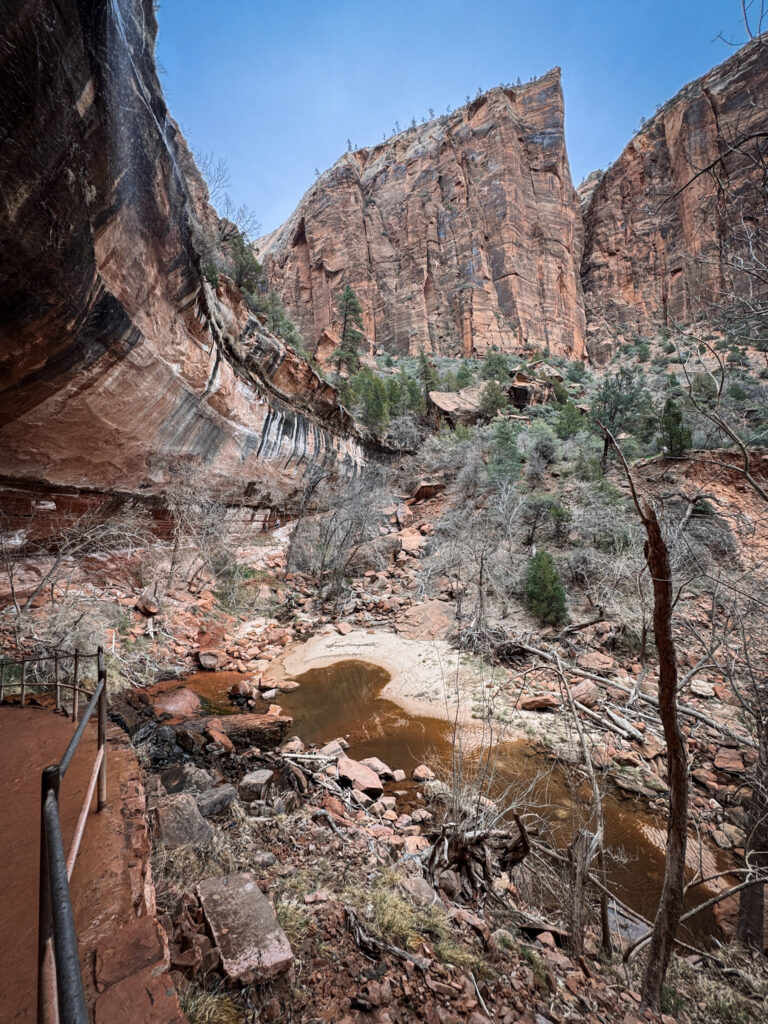
Fun Fact: The trail gets its name from the green-tinted pools, colored by algae growing in the still water.

Useful Information: This is one of the easier trails in the park, well-maintained and suitable for most fitness levels, making it a good option if you want a shorter hike to round out the day.

Jet Lag Jelly Tip: Time it for late afternoon if you can — the light coming through the overhang and reflecting in the pool was honestly one of my favorite quiet moments of the whole day.
5. Temple of Sinawava and the Riverside Walk
The end of the scenic drive, where the canyon narrows dramatically and the North Fork of the Virgin River cuts right through the valley floor — this is also the starting point for The Narrows, Zion’s famous river hike, though we kept it to the paved Riverside Walk instead.
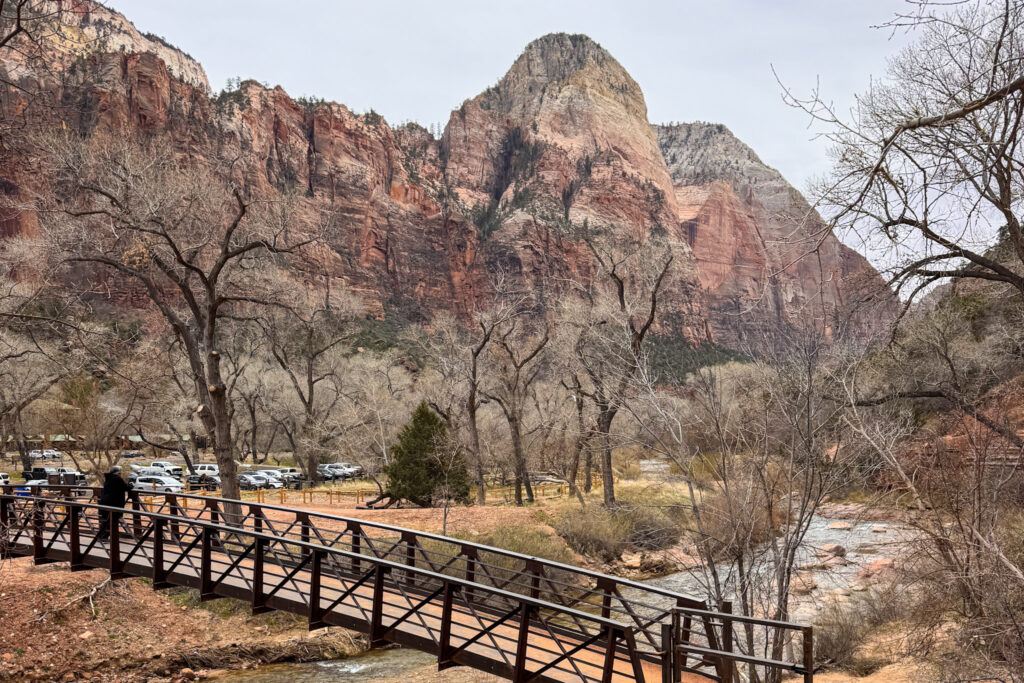
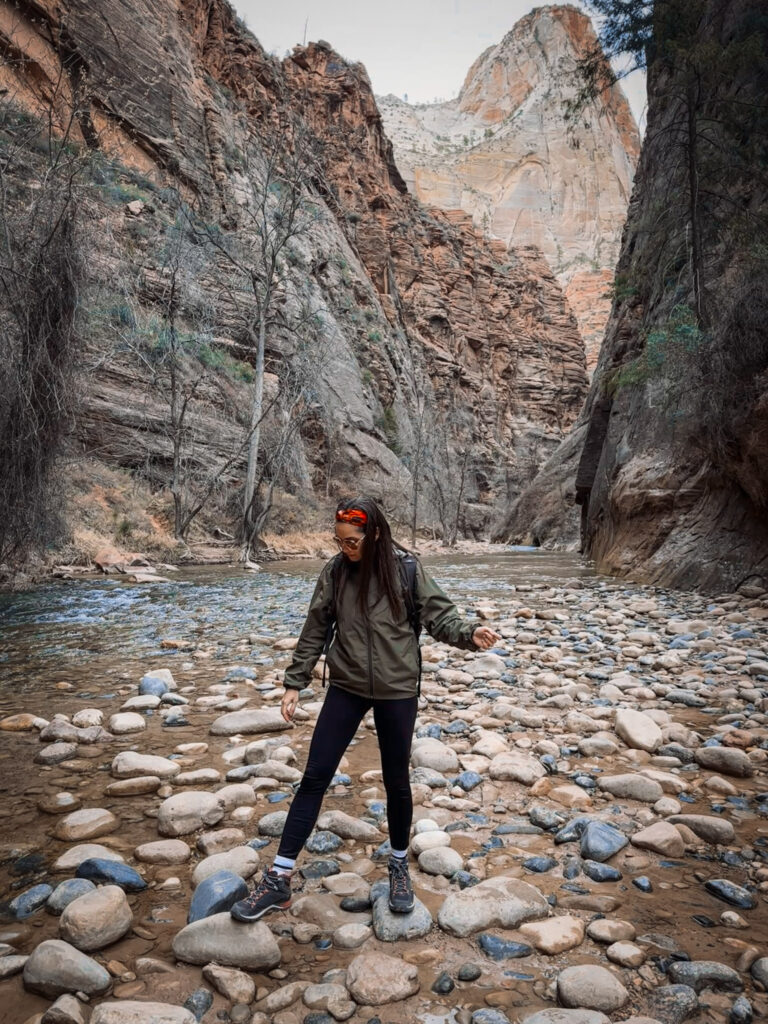
Fun Fact: "Sinawava" refers to a wolf god figure in Southern Paiute mythology, and the soaring rock walls here were considered a natural amphitheater by early visitors — hence the "temple" name.

Useful Information: The Riverside Walk is an easy, flat, paved trail along the river — a great way to experience the canyon's narrowest point without needing to wade into the water like Narrows hikers do.

Jet Lag Jelly Tip: This is the spot in the park where the canyon walls feel the most dramatic and closed-in — go in the late afternoon when the crowds have thinned and the light starts catching the upper cliffs.
GRAND CANYON
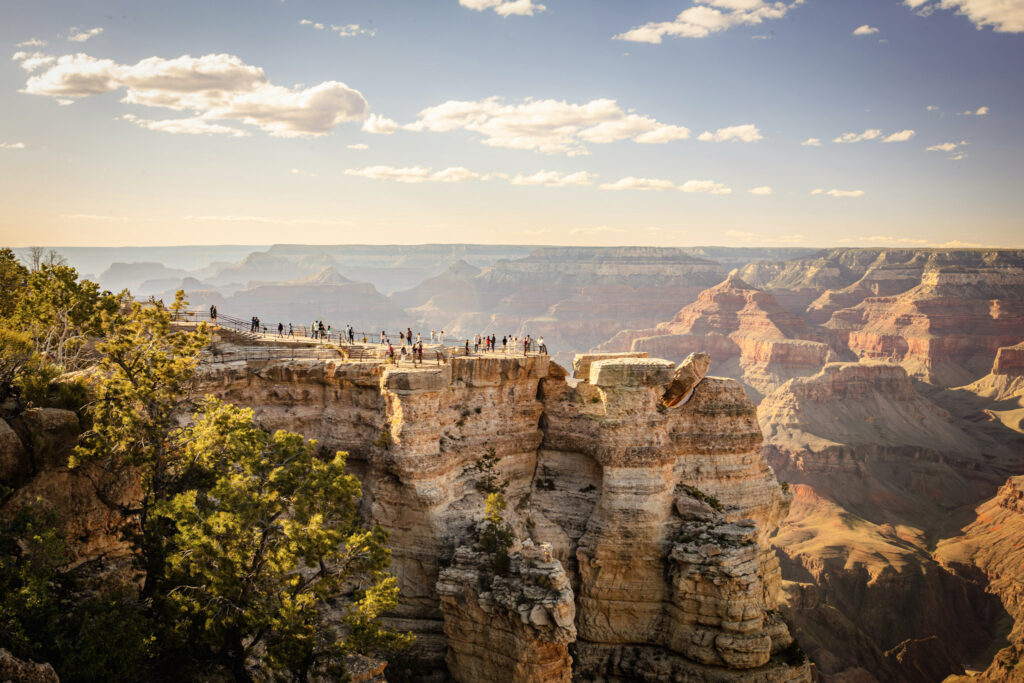
There are places that disappoint you slightly in real life because you’ve seen too many photos of them. The Grand Canyon is not one of those places. Standing at the rim for the first time, the sheer scale of it — the layers, the depth, the Colorado River looking like a tiny silver thread at the bottom — genuinely short-circuits your brain for a moment. No photo, including mine, does it justice.
We visited in February, which meant cold, dramatic clouds rolling over the canyon and far thinner crowds than peak season — honestly the best possible conditions. Bring layers.
Getting There: The South Rim is approximately 280 miles from Las Vegas, and the drive takes about 4.5 to 5 hours via US-93 S through Kingman, then I-40 E and AZ-64 N. Worth noting: the West Rim is only about 130 miles from Las Vegas and takes around 2.5 hours, but it's managed by the Hualapai Tribe, not the National Park Service, and offers a very different (and more limited) experience — the South Rim is where you want to go for the full Grand Canyon. Renting a car from Las Vegas is the easiest way to make this trip.

Entrance Fee: $35 per vehicle, valid for 7 days. Same non-resident surcharge rules apply as Zion — if you're hitting multiple parks on this road trip, the America the Beautiful annual pass pays for itself fast.

Winter vs. Summer: In summer, the free shuttle system runs along Hermit Road (closed to private vehicles March through November). In winter, you can drive your own car all the way along the rim, stopping wherever you like — which is exactly what we did in February, and it made a huge difference in flexibility and crowd levels.

How Long to Spend: A full day covers the South Rim highlights comfortably. Two days gives you breathing room for longer hikes or a sunrise/sunset at the canyon, which is genuinely on another level.
1. Mather Point
The first stop for most visitors coming from the South Entrance, and the one that delivers that first proper “oh” moment. Standing here with the entire canyon opening up in front of you, layers of red, pink, and grey rock stretching all the way to the North Rim — it’s the kind of view that makes you go quiet for a moment, which doesn’t happen often.
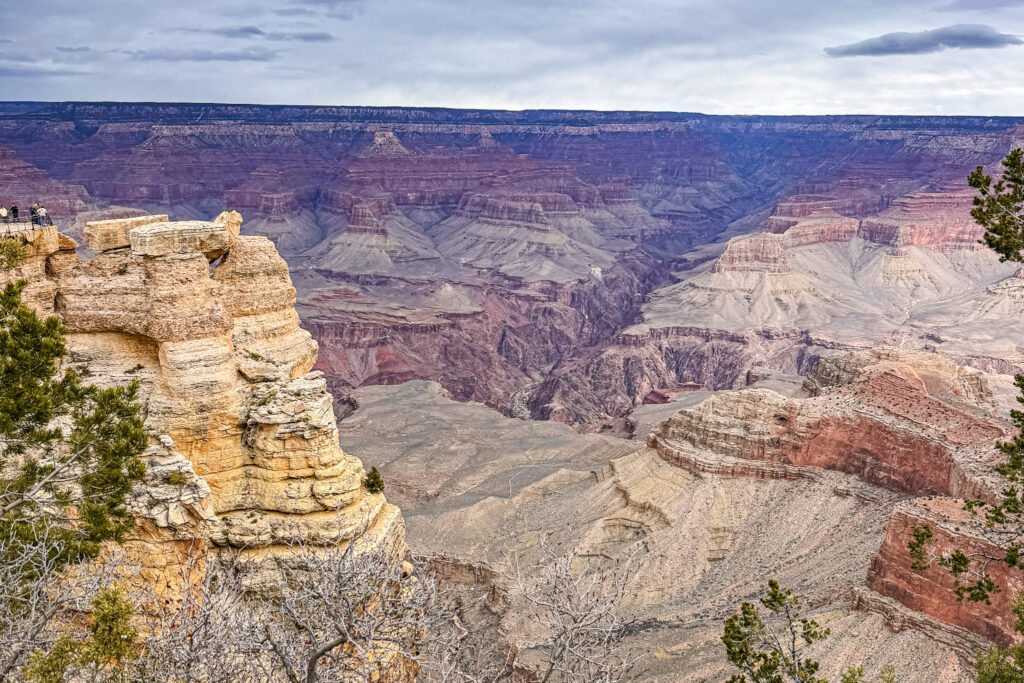
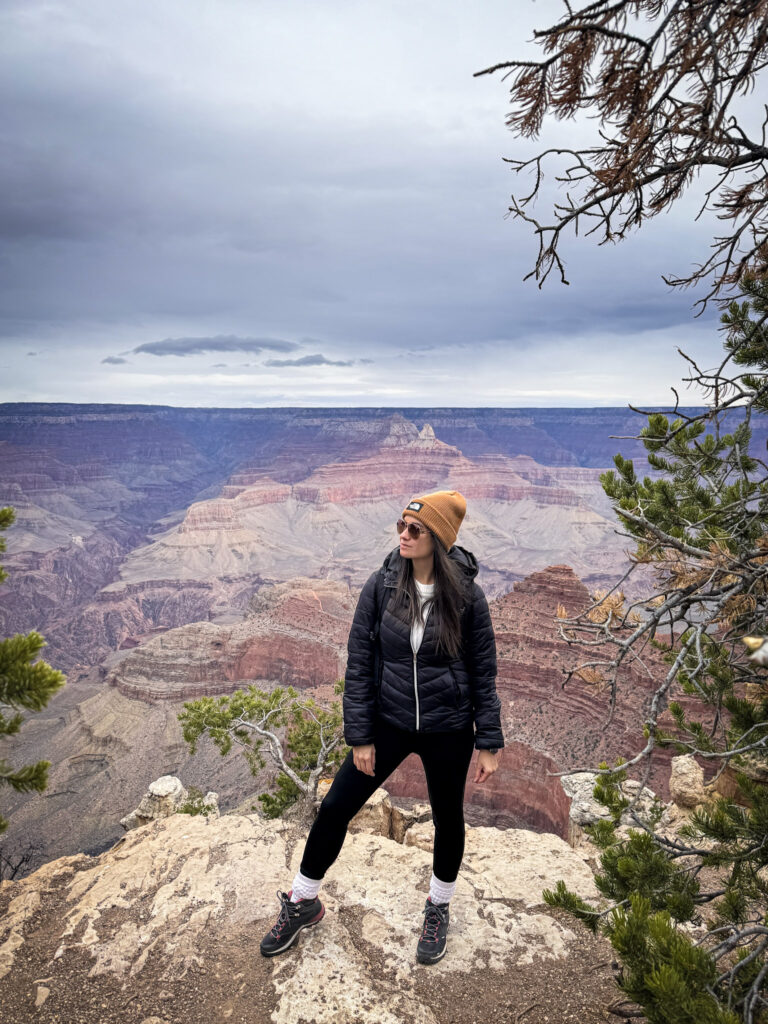
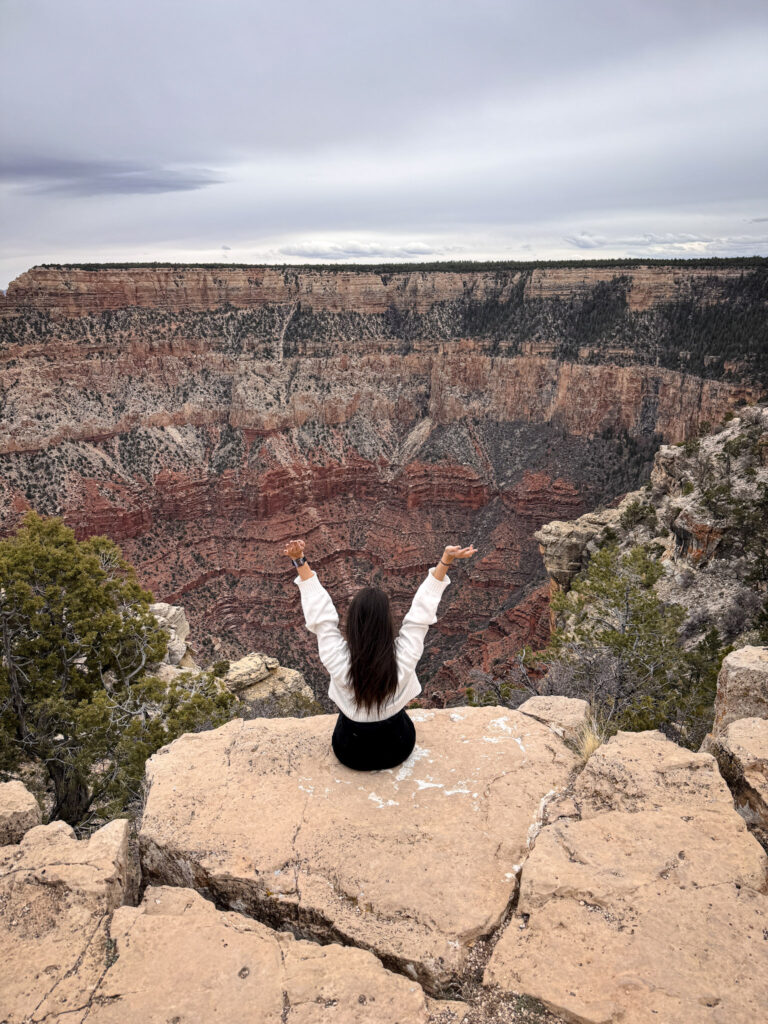
Fun Fact: Mather Point is named after Stephen Mather, the first director of the National Park Service, and sits at an elevation of around 7,120 feet above sea level — yet you're still looking down into a canyon that drops another mile below you.

Useful Information: It's the closest major viewpoint to the Visitor Center and the first one most people hit after parking — which also means it's the busiest. Still absolutely worth it.

Jet Lag Jelly Tip: Don't just stop at the main railing. Walk the short trail that loops around the point — the views shift dramatically with every few steps and the crowds thin out fast.
2. Yavapai Point and Geology Museum
A short walk west along the Rim Trail from Mather Point, Yavapai Point offers one of the most expansive panoramic views on the South Rim — and the small Geology Museum here actually makes the canyon make sense, with exhibits explaining the 1.8 billion years of rock layers you’re looking at.
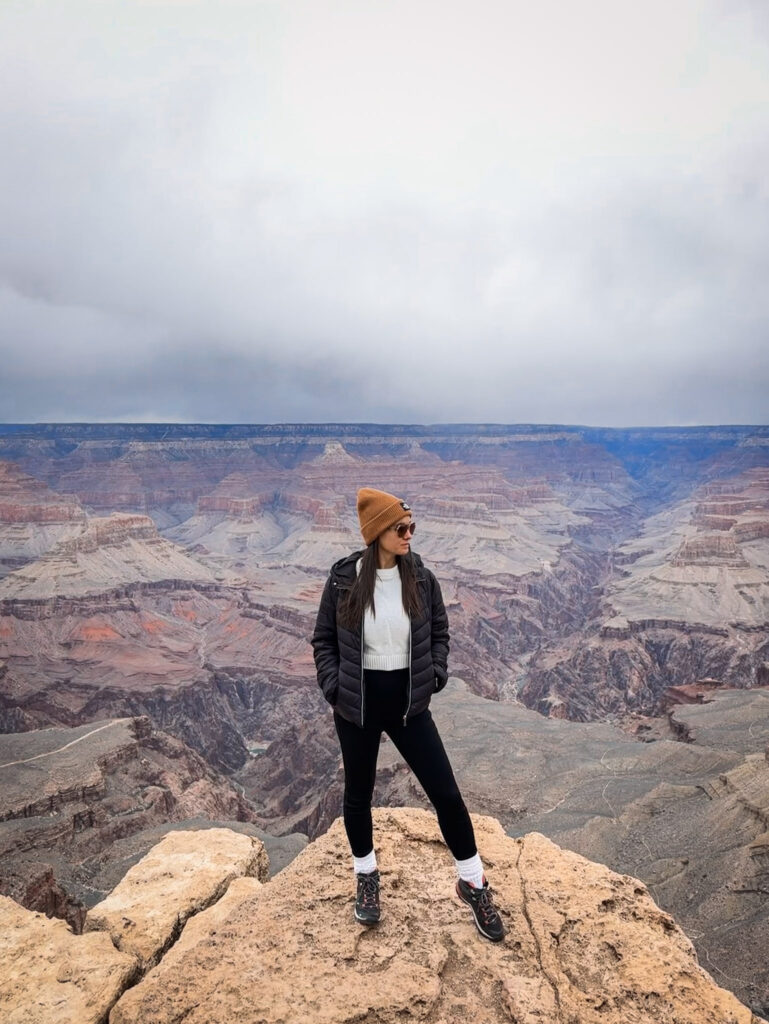
Fun Fact: The oldest exposed rock at the bottom of the Grand Canyon — the Vishnu Schist — is nearly 1.8 billion years old, making it some of the oldest exposed rock on Earth.

Useful Information: The Geology Museum is free with park entry and gives fantastic context for what you're seeing. The viewpoint here is also less crowded than Mather Point despite being just a short walk away.

Jet Lag Jelly Tip: If you only read one information panel in the whole park, make it the rock layer diagram here — it reframes the entire canyon from "very big hole" into something genuinely mind-bending.
3. The Bright Angel Trail (Upper Section)
We didn’t go all the way down — and honestly, you shouldn’t either unless you’ve planned for it — but even the first stretch of the Bright Angel Trail, descending into the canyon walls through a carved rock tunnel, gives you a completely different perspective on the scale of the place. From up on the rim everything looks flat and wide; once you’re descending into it, it closes around you fast.
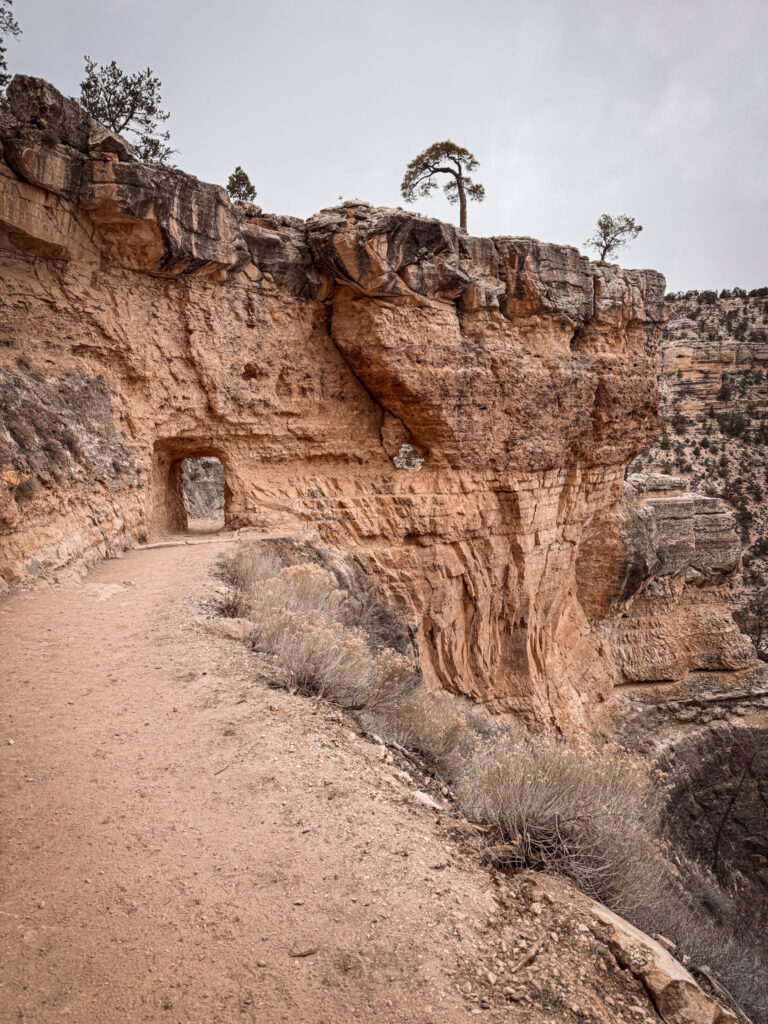
Fun Fact: The Bright Angel Trail follows an ancient Havasupai route used for thousands of years before it became one of the park's main hiking corridors.

Useful Information: The upper section down to the first rest house (1.5 miles in) is doable as a short out-and-back, but the NPS strongly advises against hiking to the river and back in a single day — it's a 9-mile round trip with brutal elevation change and many people have needed to be rescued attempting it.

Jet Lag Jelly Tip: Even just going 15 minutes down the trail is worth it — the rim disappears above you, the canyon walls close in, and suddenly the whole perspective shifts completely.
4. Hermit Road Viewpoints: Hopi Point, Mohave Point, Pima Point
In the afternoon we headed west along Hermit Road, which runs along the rim for about 7 miles and is closed to private vehicles from March through November (shuttle only during peak season) but open to cars in winter — another win for February timing. The western viewpoints along this road are where the Colorado River becomes properly visible, glinting at the bottom of the canyon far below.
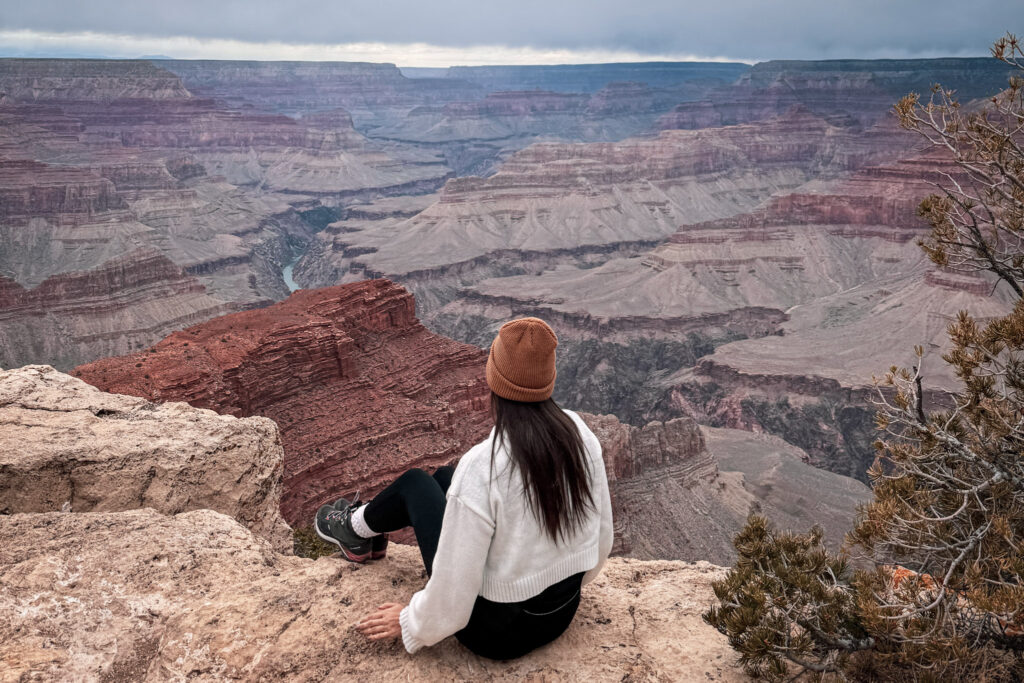
Hopi Point is the standout — one of the furthest-reaching views on the South Rim, with the river curving dramatically below — but Mohave Point and Pima Point both deliver their own jaw-dropping angles, each one feeling slightly different from the last.
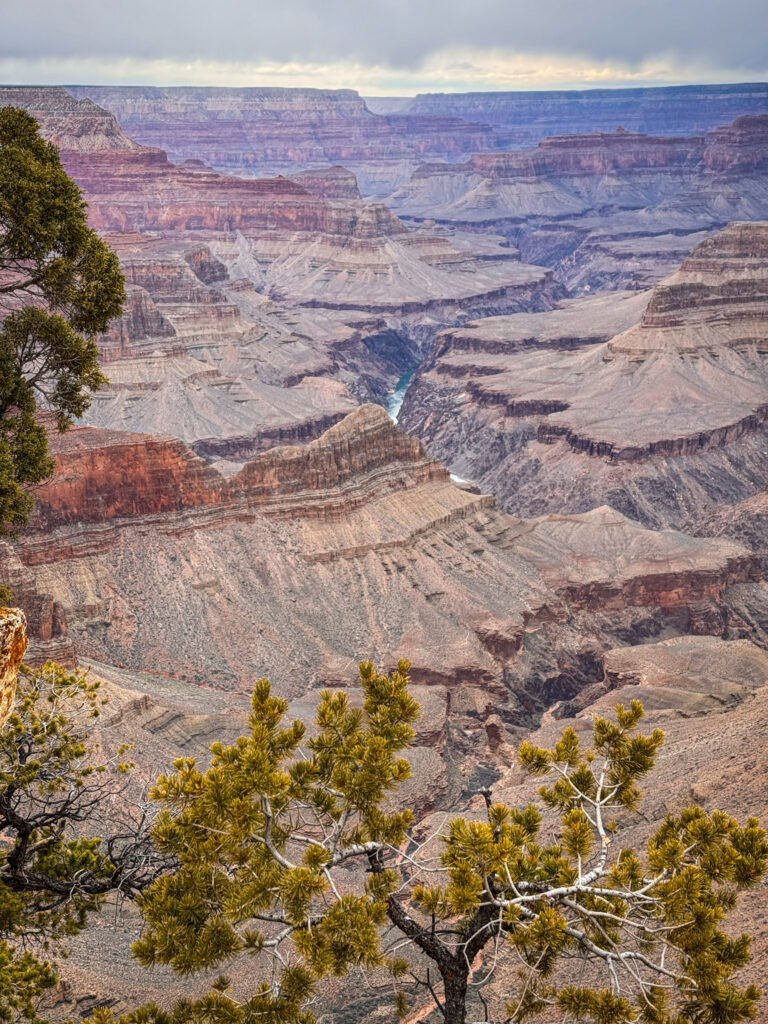
Fun Fact: Hermit Road was originally built in 1912 as an alternative to the toll road at Bright Angel Trail, allowing visitors free access to the western viewpoints.

Useful Information: In winter, you can drive the full length yourself and stop wherever you want. In spring through autumn, you'll need the free Hermit Rest Route shuttle — still easy, just less flexible.

Jet Lag Jelly Tip: The Colorado River is only visible from certain western viewpoints — if seeing the river is on your list (and it should be), don't stop at Mather Point and call it a day. Drive or shuttle all the way to Pima Point.
5. The Scrub Jay
I’d be doing the Grand Canyon a disservice if I didn’t mention the wildlife. At one of the rim viewpoints, a Woodhouse’s Scrub Jay landed about two feet from us on a park bench and looked at us like we were the attraction, not it. Bold as anything, bright blue, completely unbothered.
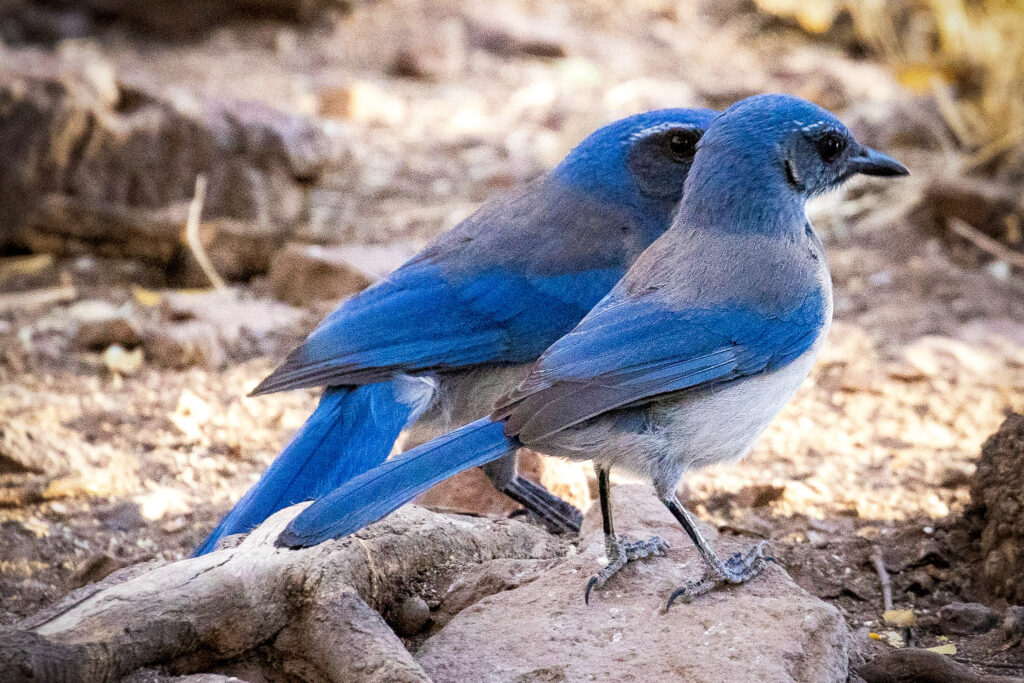
Fun Fact: The California Condor, one of the rarest birds in the world, was reintroduced to the Grand Canyon in 1996 after being nearly extinct — there are now over 100 flying free in the area, and spotting one from the rim is genuinely possible.

Jet Lag Jelly Tip: Keep an eye out for the Scrub Jays — they're endemic to the canyon area and practically part of the furniture at the South Rim viewpoints. Less dramatically, also keep an eye out for condors soaring above the canyon walls.
HORSESHOE BEND
There are some viewpoints where you know exactly what you’re going to see before you get there — you’ve scrolled past the photo a hundred times on Instagram — and you still stop dead when you actually reach the edge. Horseshoe Bend is that place. The Colorado River curving almost perfectly around a sandstone island, 1,000 feet below you, the water so dark blue it looks unreal against all that burnt orange rock.
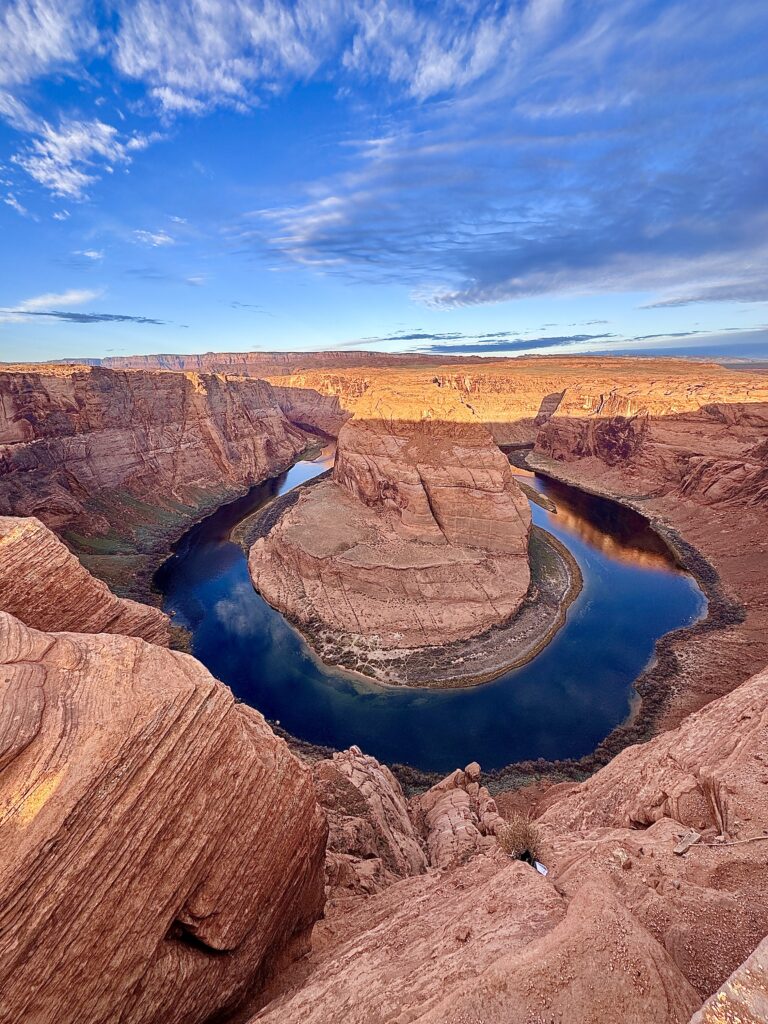
Getting There: Page, Arizona — where Horseshoe Bend is located — is about 270 miles from Las Vegas, roughly a 4 to 4.5 hour drive. The most straightforward route takes you via I-15 N through St. George, then US-89 S down into Page. It also sits nicely between Zion and the Grand Canyon geographically, making it a natural overnight stop on a Southwest road trip rather than a day trip from Vegas. Renting a car from Las Vegas covers this whole route easily.

Entrance Fee: There's no national park entry fee here — Horseshoe Bend is managed separately by the Navajo Nation. There is a $10 parking fee at the trailhead lot, payable by card at the kiosk.

The Walk: About 1.5 miles round trip from the car park on a flat, sandy path — easy for most people, though fully exposed with zero shade. Bring water, sunscreen, and a hat regardless of season.
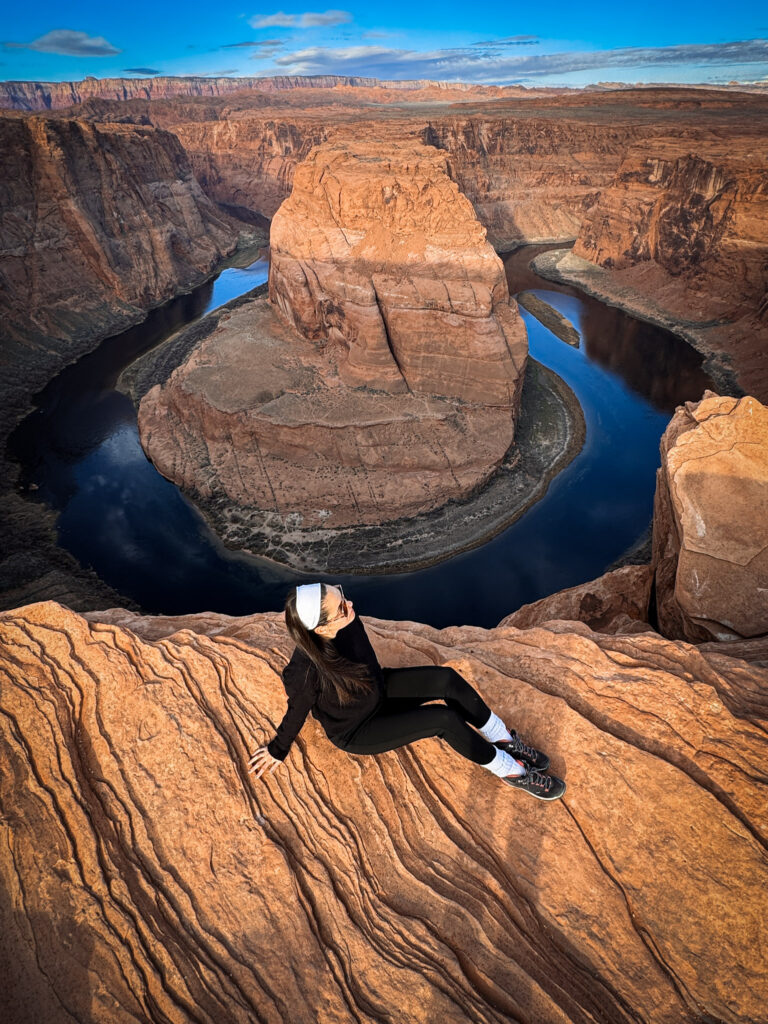
Sunset and golden hour are the classic times to go, but blue-sky midday light makes the river colour pop in a completely different way — that deep cobalt blue against the red rock is almost impossible to get at golden hour when everything turns warm. Both are worth it for different reasons, but an early morning visit for fewer crowds beats all of them.
Stay Overnight in Page: This is genuinely the best piece of advice for Horseshoe Bend: stay the night in Page and go to the overlook first thing in the morning, before the tour groups and day-trippers arrive. By mid-morning it gets very busy, but at sunrise or just after, you can have the viewpoint almost to yourself — which makes an already incredible view feel completely different.
Page has plenty of accommodation options at reasonable prices, and it also puts you perfectly positioned for Antelope Canyon tours (which also run early morning) without any rush. If you want to browse options yourself, here's a general search for hotels in Page.
LOWER ANTELOPE CANYON
I’d seen hundreds of photos of Antelope Canyon before visiting. I still wasn’t prepared for it. Walking through those narrow, winding sandstone walls — the rock curving and swirling around you in deep orange and red, with just a thin strip of blue sky visible far above — is one of those experiences where you genuinely keep stopping and just staring because your brain can’t quite process that it’s natural and not sculpted by hand.
I chose Lower over Upper, and I’d make the same call again. While Upper Antelope Canyon is famous for its dramatic light beams (which only appear at certain times of day and season), Lower feels more intimate and adventurous — narrower passages, more varied shapes, and a layout that opens up differently around every corner.
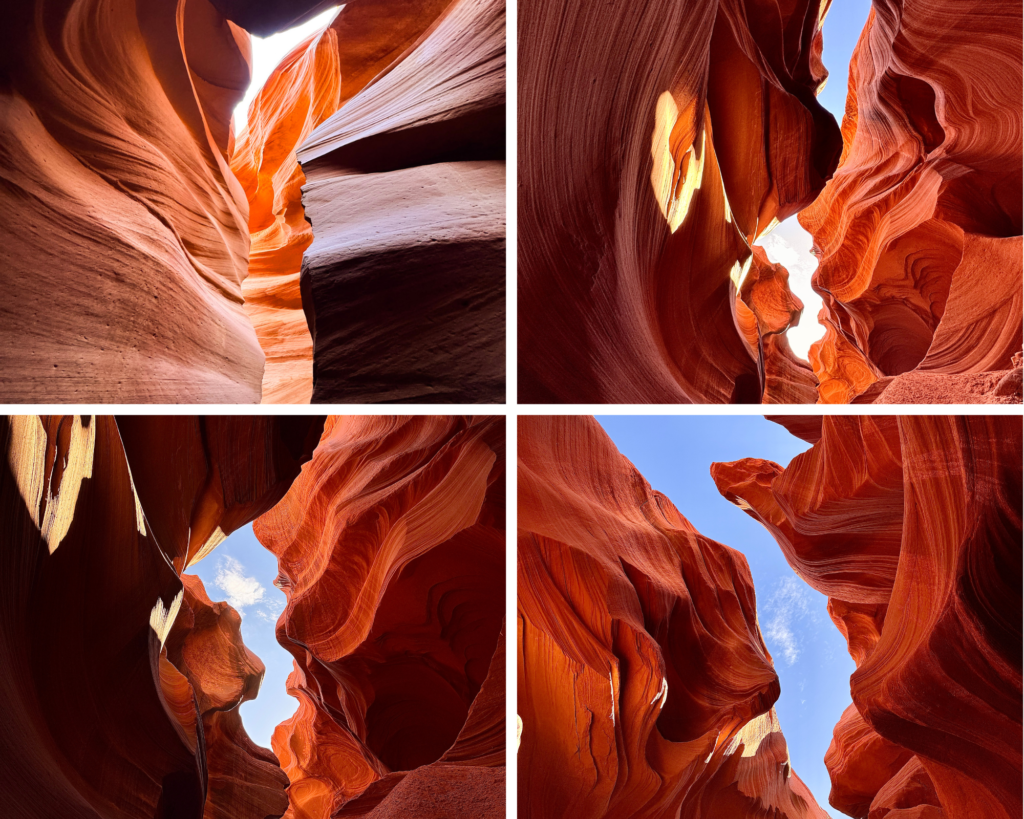
The Tour: Antelope Canyon is located within the Navajo Nation and can only be visited with a Navajo Tribe-authorized guide service — you cannot enter independently. Tours are run by several Navajo-operated companies based in Page, and the experience typically lasts around 1 to 1.5 hours inside the canyon. Your guide will stop at the best spots for photos and share the history and geology of the canyon along the way.
How to Book: Book well in advance — advance reservations are an absolute must, especially in spring and summer when slots sell out weeks or months ahead. We booked through GetYourGuide, which is a straightforward option, but you can also book directly with the Navajo tour operators in Page.
A Note on Staying in Page: If you’re doing Antelope Canyon, Horseshoe Bend, and Glen Canyon all in the same area, there’s really no reason to drive back to Las Vegas in between. Stay one night in Page — that’s exactly what I did — get a proper rest, and take the canyon tour first thing in the morning. Not only does it save you hours of driving back and forth, but the light inside the canyon is genuinely better in the morning, with the colours feeling warmer and richer before the midday crowds pile in. Page has plenty of affordable accommodation options and it’s a much more relaxed base for this cluster of stops than trying to do it all as a long day trip from Vegas. Here’s a general search for hotels in Page.
Getting There: Page is about 270 miles from Las Vegas, roughly a 4 to 4.5 hour drive. Note that the Navajo Nation and Arizona operate on Mountain Standard Time — factor in time zones when traveling from Nevada, as the time difference can catch you out. Renting a car from Las Vegas is the simplest way to cover this drive.

Useful Information: There is a $15 per person Navajo Nation entry fee on top of your tour cost. There are no restroom facilities inside the canyon, so use the toilets at the tour office before you leave. No tripods, selfie sticks, or drones allowed inside.

Jet Lag Jelly Tip: Lower Antelope Canyon involves ladders and stairs — it's not difficult, but wear proper shoes and don't bring a large bag. Also, your phone camera will do a surprisingly good job in there — the canyon practically lights itself.
GLEN CANYON DAM OVERLOOK
After all the natural wonders of the Page area, the Glen Canyon Dam is a reminder that humans are occasionally capable of something equally jaw-dropping.
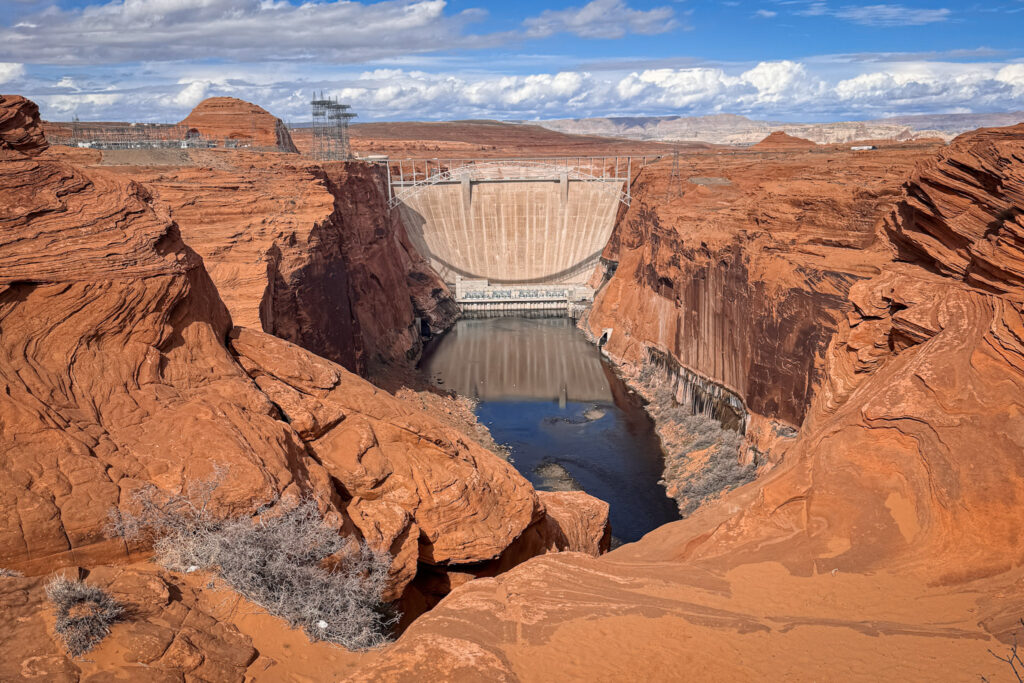
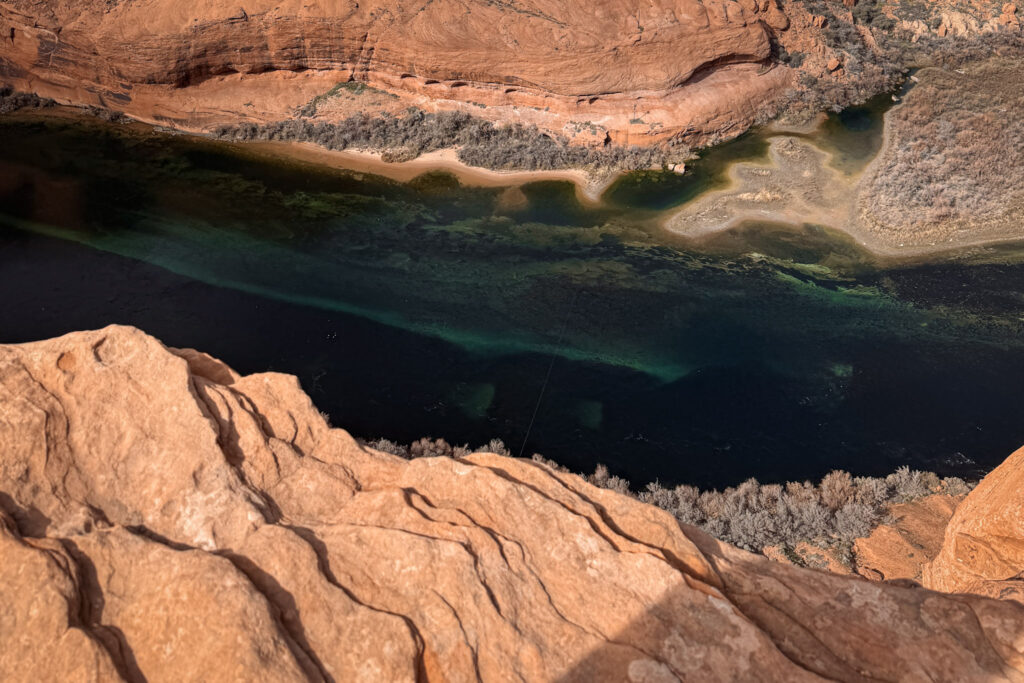
Standing at the overlook, looking down at this 710-foot concrete arch dam holding back the entire Colorado River — with the impossibly blue-green water of Lake Powell stretching out behind it — is genuinely impressive in a completely different way from everything else on this road trip. A short walk of just 0.2 miles brings you to a railed viewpoint nearly 1,000 feet above the Colorado River, with sweeping views of the dam, Lake Powell, and the first bends of Glen Canyon.
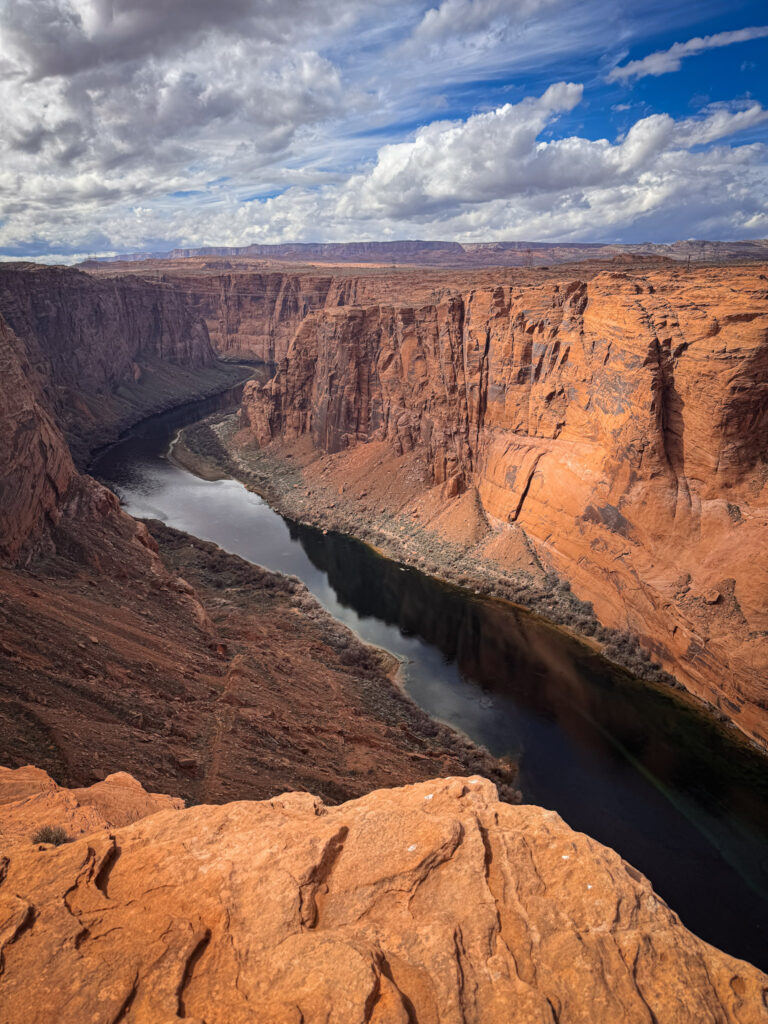
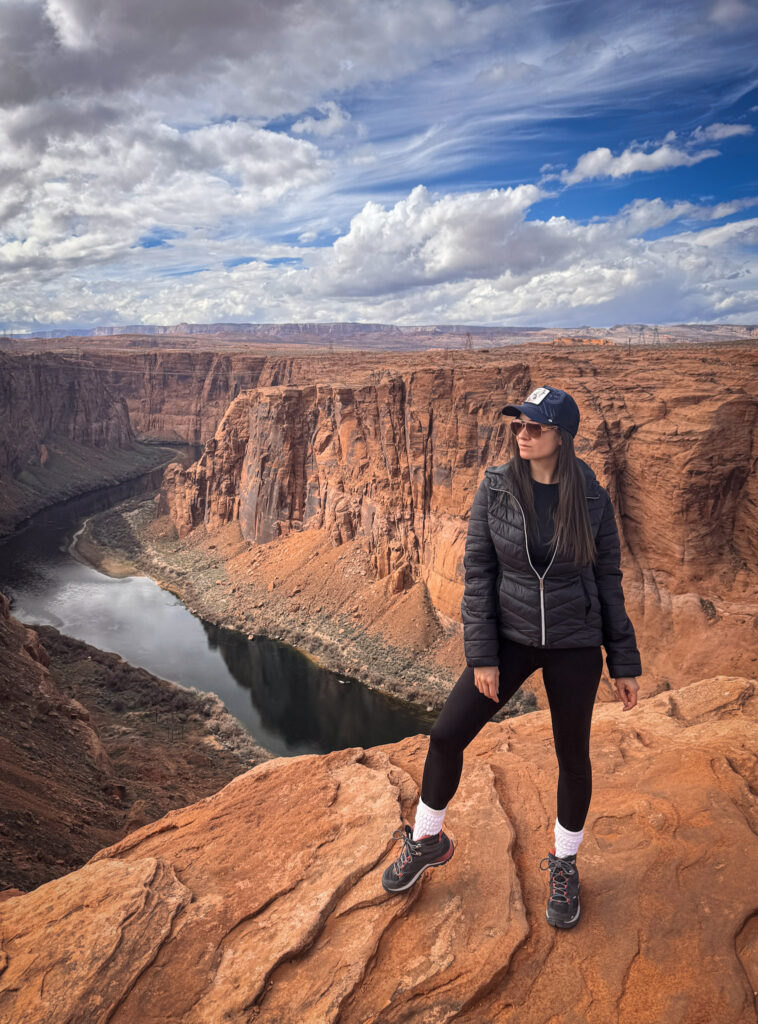
Fun Fact: The dam was built by the U.S. Bureau of Reclamation between 1956 and 1966 and forms Lake Powell, one of the largest man-made reservoirs in the US.

Useful Information: The overlook is free to visit, open Monday to Sunday 9am to 5pm (closed Thanksgiving, Christmas and New Year's Day). The Carl Hayden Visitor Center next to the overlook is worth stepping into — the exhibits on the dam's construction and the geology of Glen Canyon are genuinely interesting and take less than an hour.

Jet Lag Jelly Tip: The walk down involves uneven rock steps with metal railings — wear shoes with grip, as the surface can get slippery. Sunrise is the best time for photos, with warm light catching the canyon walls.
LONE ROCK
About 19 kilometres north of Page, just across the Utah border, Lone Rock is exactly what it sounds like — a giant, solitary sandstone butte rising out of Lake Powell, surrounded by a wide sandy beach where you can drive your car right up to the water’s edge. It’s the most low-key stop of the whole Page cluster, but the combination of red rock, blue lake, and open desert sky is genuinely stunning.
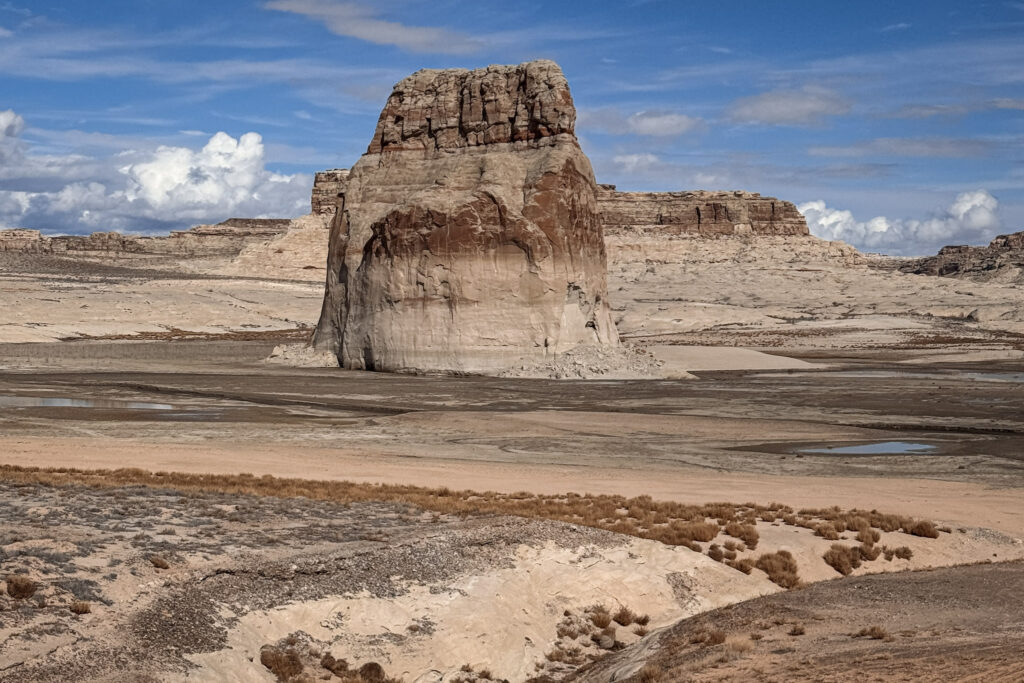
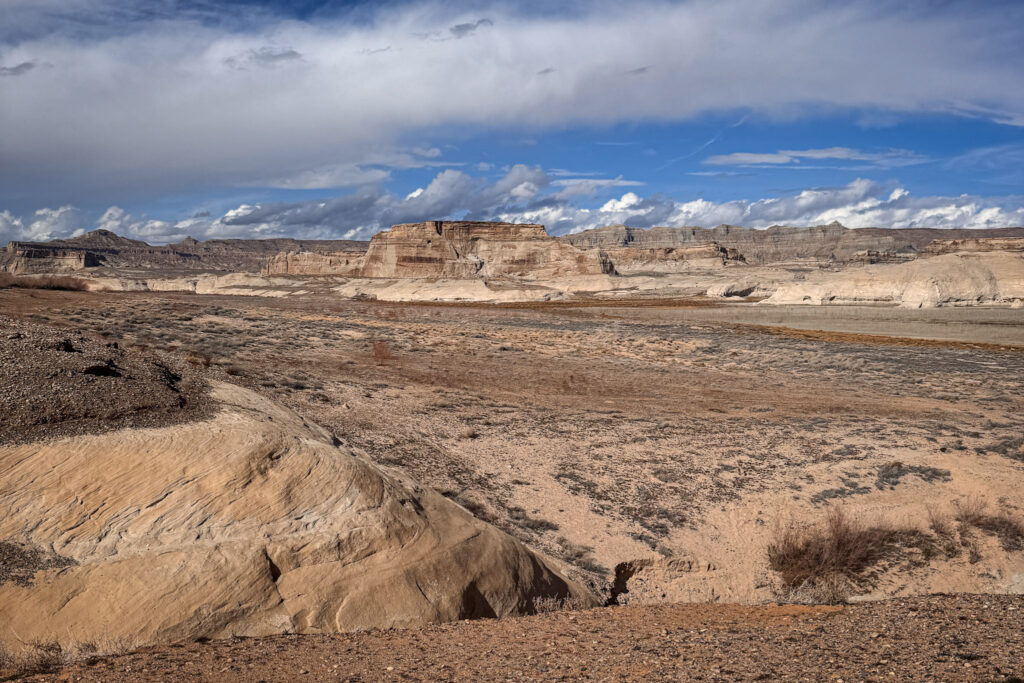
The golden and red light illuminating Lone Rock at sunrise and sunset is particularly beautiful, and the crystal clear waters are perfect for a swim in warmer months.
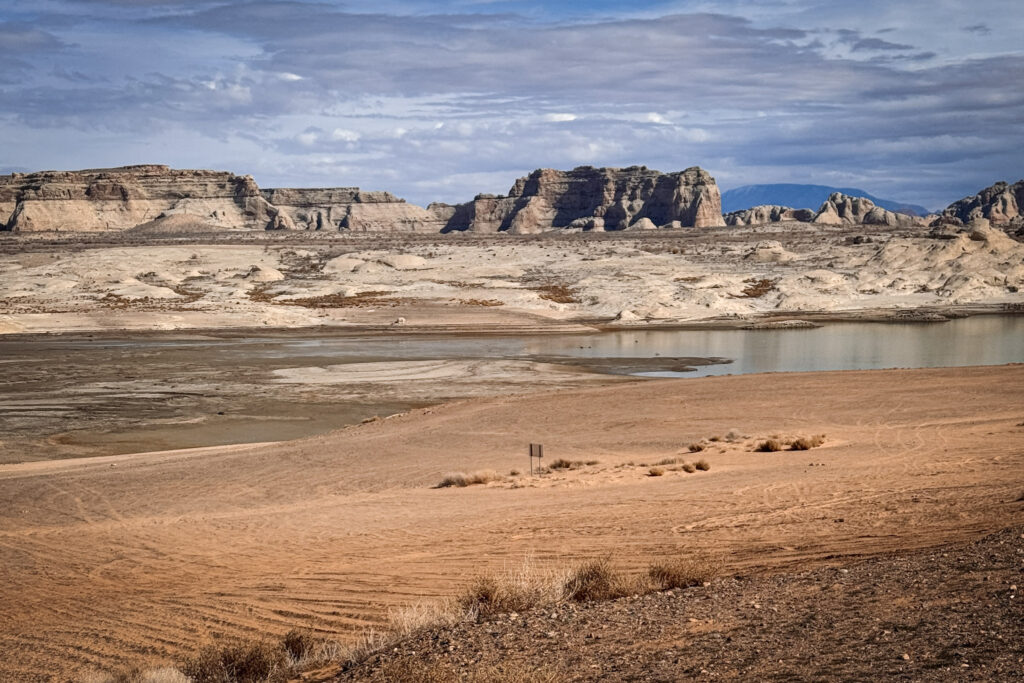
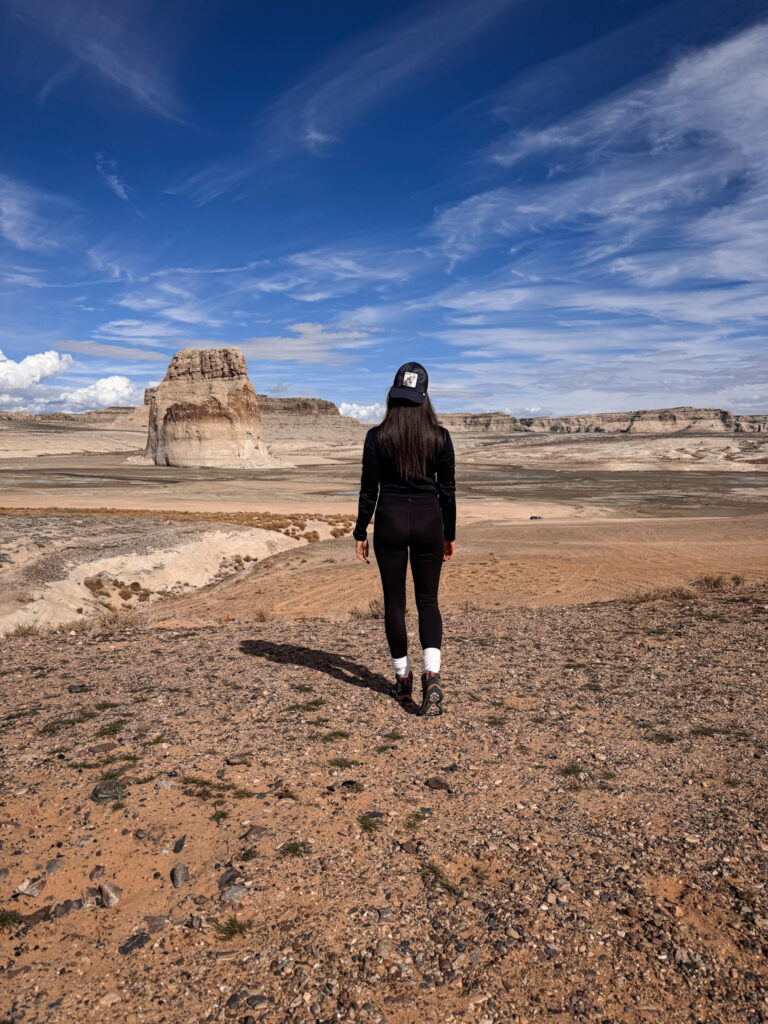
Fun Fact: Lone Rock is a classic example of a resistant sandstone outlier formed from Navajo Sandstone, deposited approximately 190 to 180 million years ago during a period of arid desert conditions on what is now the Colorado Plateau.

Useful Information: Lone Rock Beach is open year-round and accessible by vehicle — you can drive right onto the sand. There's a $14 per night fee if you want to camp, but day visits are included with the Glen Canyon National Recreation Area entry fee. Basic facilities include seasonal restrooms and an outdoor shower.

Jet Lag Jelly Tip: Be careful driving onto the sand — soft patches can swallow a regular car surprisingly fast, especially closer to the water. Stick to the more compacted sand near the entrance unless you have a 4WD vehicle.
VALLEY OF FIRE STATE PARK
By the time we got to Valley of Fire, we’d already seen salt flats, towering canyon walls, the Grand Canyon, slot canyons, and horseshoe bends. I wasn’t sure what was left to surprise me. And then we drove into this park — all blazing red Aztec sandstone, blue sky so deep it looks fake, and not a fraction of the crowds you’d find at any of the national parks — and I was reminded that Nevada has been quietly sitting on one of the most spectacular landscapes in the Southwest all along, an hour from Las Vegas.
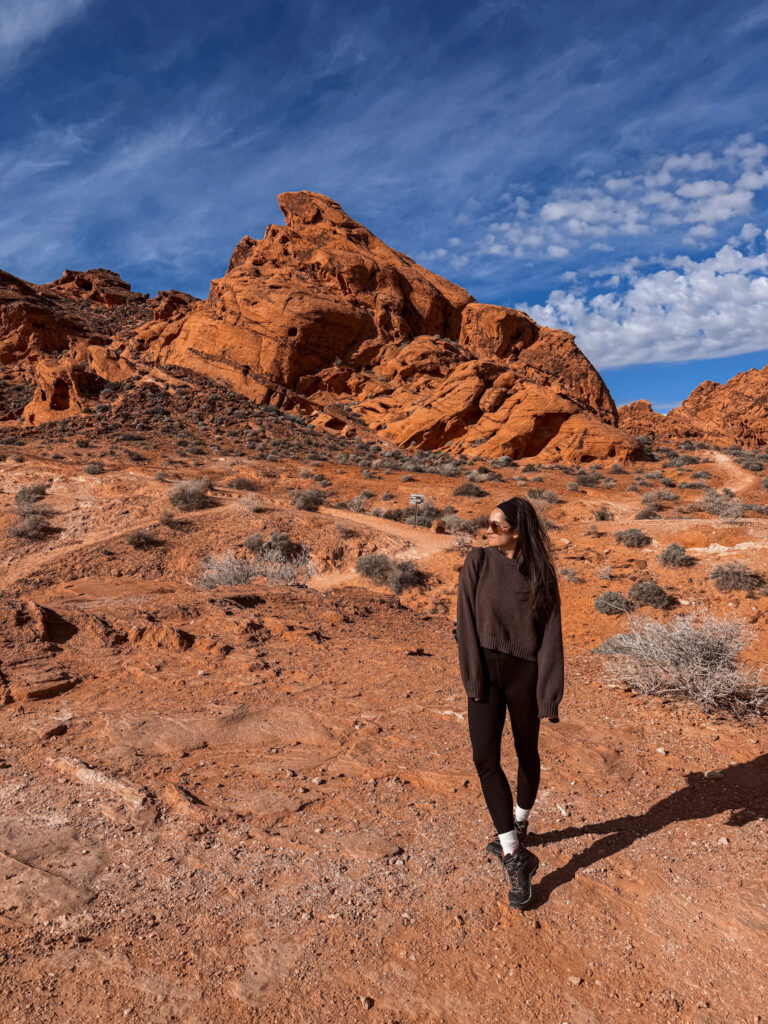
1. Visitor Center
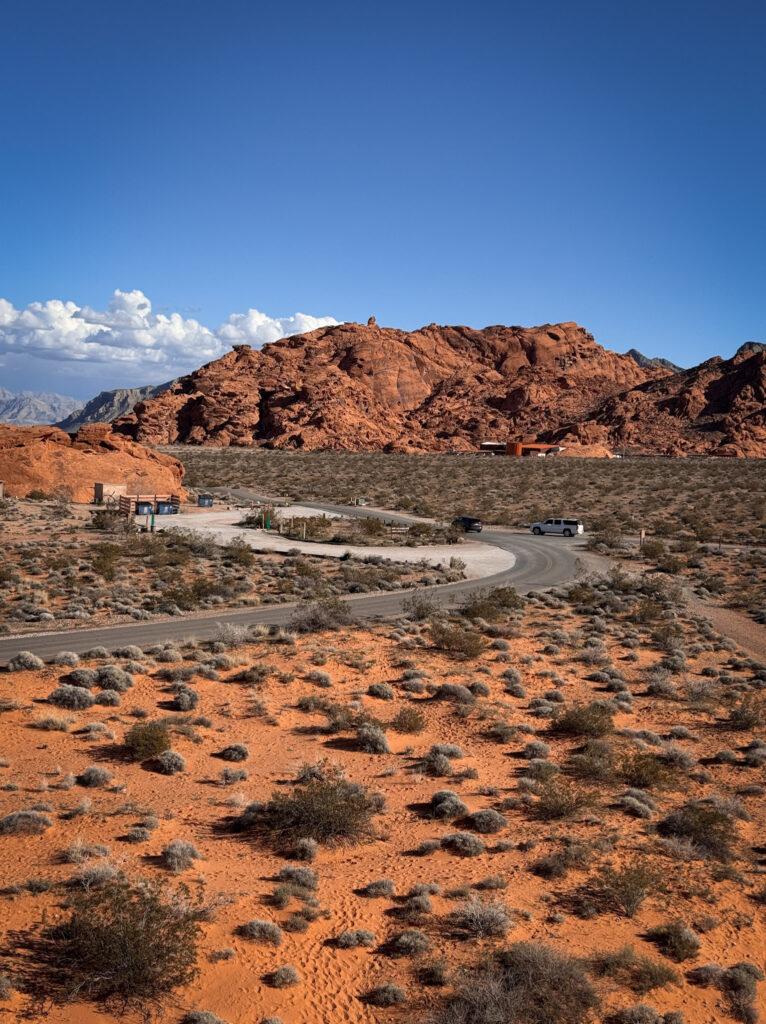
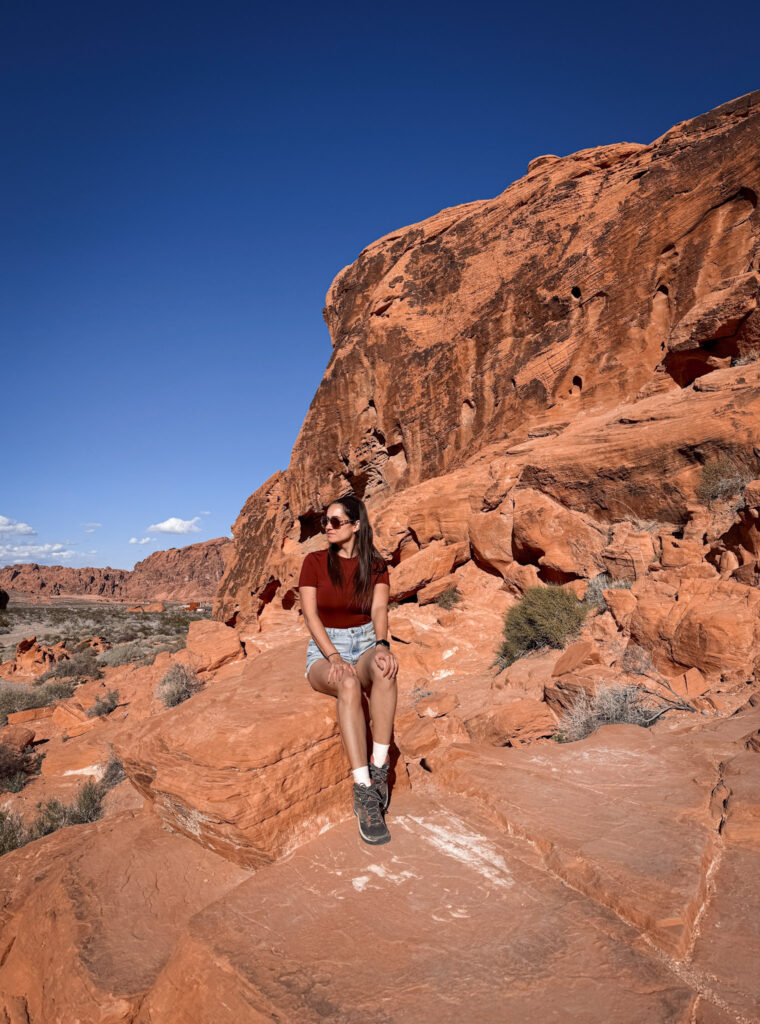
Getting There: Valley of Fire is only about 90 kilometres northeast of Las Vegas — roughly an hour's drive via I-15 N and NV-169 E, making it the easiest day trip on this entire road trip. It's also the perfect last stop before heading back to Vegas at the end of the trip. Renting a car from Las Vegas makes this an easy add-on to your itinerary.

Entrance Fee: $15 per vehicle for Nevada residents, $20 for non-residents. No annual pass covers it since it's a Nevada State Park rather than a National Park — but at $20 it's exceptional value for what you get.

How Long to Spend: A half day is enough for the highlights, but a full day lets you explore more trails and soak it in properly without rushing.
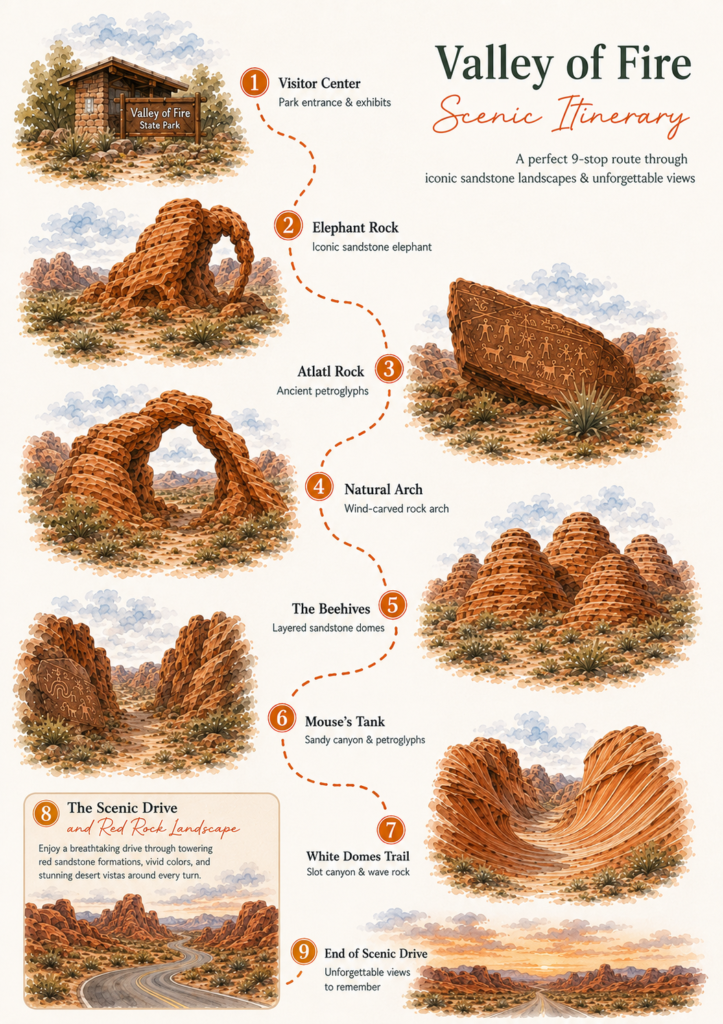
2. Elephant Rock
One of Valley of Fire’s most iconic formations and honestly one of the easiest “wow” moments in the whole park — a massive sandstone rock that has been eroded into the unmistakable silhouette of an elephant, trunk and all, standing against the blue Nevada sky. Once you see it, you can’t unsee it.
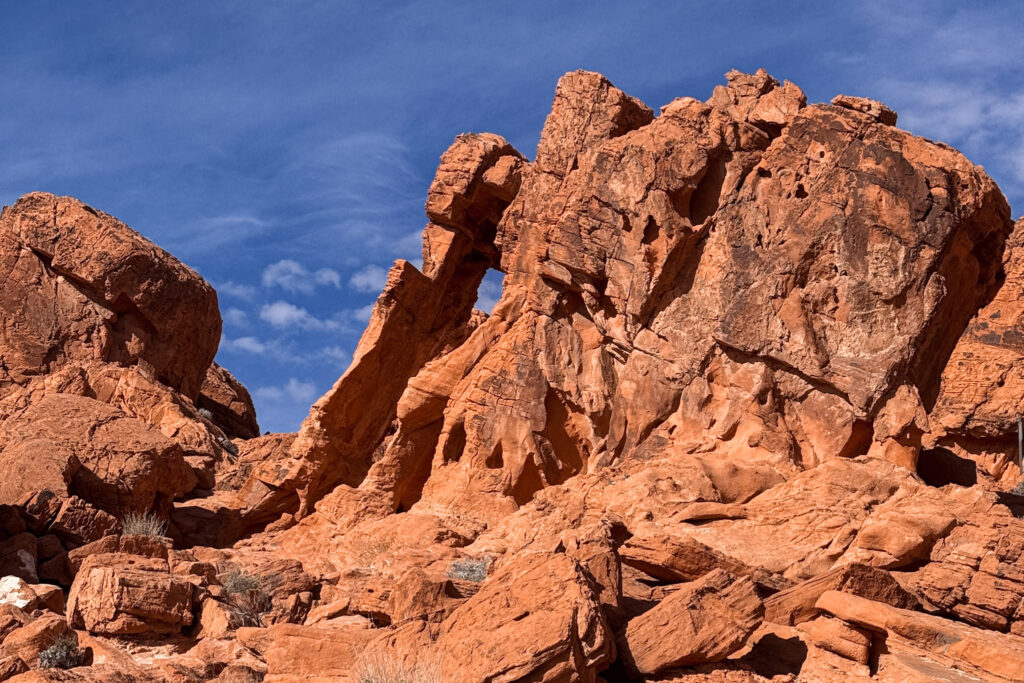
Fun Fact: Elephant Rock is one of the most photographed formations in Valley of Fire and sits right near the east entrance, making it one of the first dramatic sights you encounter driving in from Las Vegas.

Useful Information: There's a very short, easy loop trail (less than 1 kilometre) right off the main road to reach it — accessible for all fitness levels and no scrambling required.

Jet Lag Jelly Tip: Walk around to different angles — the elephant silhouette is most obvious from slightly to the left of the formation, and the shape changes dramatically depending on where you're standing.
3. Atlatl Rock
Atlatl Rock is one of those stops that sneaks up on you. You climb a short metal staircase bolted into the sandstone, reach the top, and suddenly you’re face to face with an extraordinary panel of petroglyphs — animals, human figures, spirals, hands, symbols — carved into the rock by the Ancient Puebloans somewhere between 2,000 and 4,000 years ago. Standing there reading them, trying to figure out what each symbol means, is one of the quietest and most powerful moments of the whole park.
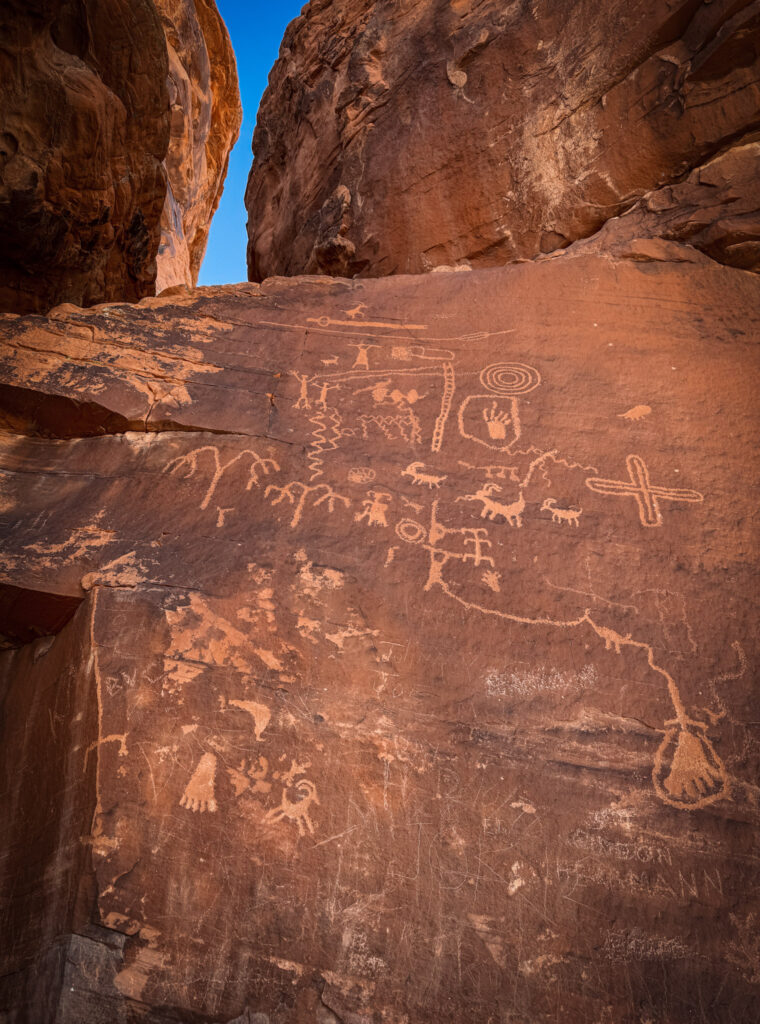
Fun Fact: The name "Atlatl" refers to a spear-throwing device depicted in the petroglyphs — one of the oldest hunting weapons used in North America, and a clue about the daily life of the people who carved these images.

Useful Information: There's a staircase with a metal railing that takes you right up to the petroglyph panel — no serious hiking required, accessible for most people. There's also a small parking area and restrooms at this stop, making it one of the most convenient in the park.

Jet Lag Jelly Tip: Take your time with the individual carvings rather than just photographing the whole panel from a distance — the detail in some of the figures is extraordinary and easy to miss if you're just glancing.
4. Natural Arch
Valley of Fire has an “Arch Rock” near the visitor center that everyone stops at, and then it has the Natural Arch — tucked away near the east entrance, not on the main handout map, seldom crowded, and well worth the extra effort to find. Valley of Fire actually has several natural arches and windows carved by wind and water erosion over millions of years, scattered through the canyon rather than one single dramatic centrepiece. Standing underneath one and looking up through the frame of deep red rock to the blue sky above is one of those views that genuinely doesn’t need a filter.
The approach through Fire Canyon wash — broad, sandy, surrounded by sculpted canyon walls — is half the experience even before you reach the arch itself.
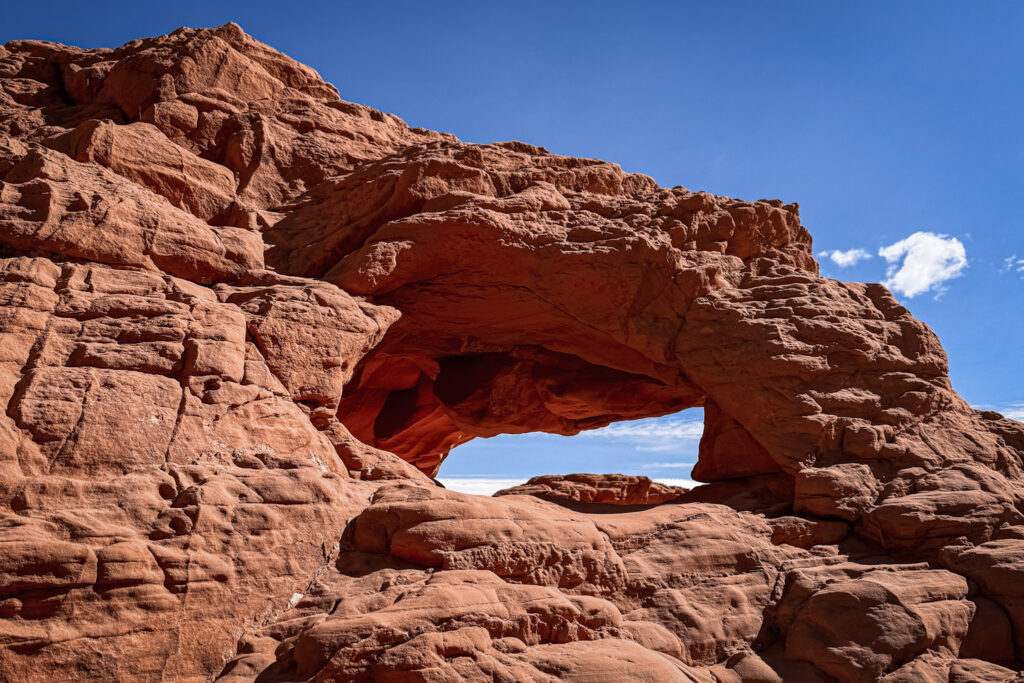
Fun Fact: Fire Canyon, which the Natural Arch trail runs through, contains numerous natural arches and balancing rocks all the way to the Silica Dome area — making the whole canyon worth exploring beyond just the arch itself.

Useful Information: The trail is not included on the standard park handout map and is seldom used — the parking area is a small gravel lot on the north side of the main road, with a tiny trailhead marker near the road. The full trail is about 4.2 miles out and back, but even a short walk into the canyon wash gives you a taste of the formations. Be warned — the sand is soft and loose, the kind that gives way under every step.

Jet Lag Jelly Tip: The light coming through the arch in late afternoon turns the rock almost glowing orange — if you can time your visit for late afternoon, it's worth it. And download the trail on AllTrails before you go since there are no markers along the route once you're in the wash.
5. The Beehives
The Beehives are a cluster of rounded, conical sandstone domes that genuinely, unmistakably look like giant beehives — the horizontal banding and grooved lines running across their surfaces making them look almost hand-stacked rather than naturally formed.
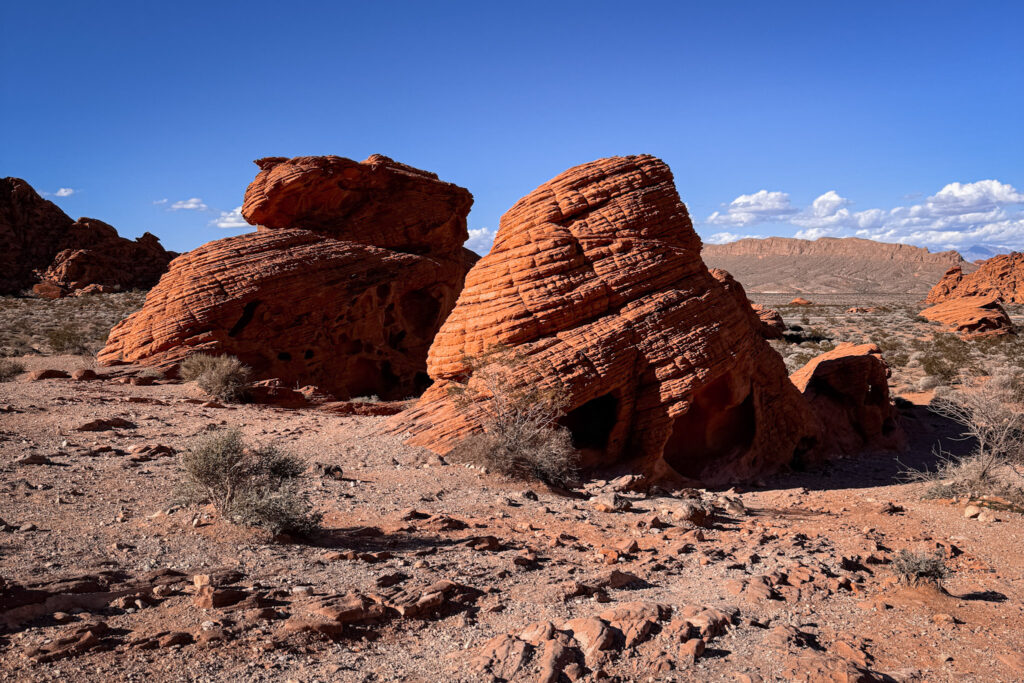
What makes them geologically interesting is that those distinctive grooved lines aren’t just decorative — they’re a textbook example of cross-bedding, where different layers of ancient sand were deposited at different angles by shifting winds over millions of years. Geologists can read formations like the Beehives like a book, tracking how the sandstone was laid down layer by layer from ancient desert dunes. The colours range from deep red and orange to softer pinks and yellows depending on the light and the iron oxide content in each layer. There’s no marked trail around them, but you can freely wander around the bases of the formations and explore up close — which is worth doing, because the texture and scale of the layering is much more impressive in person than from the road.
Fun Fact: The Beehives owe their vivid colours to iron oxide and other minerals present in the rock, creating shades of red, orange, yellow and pink — and their rounded, smooth shape is the result of millions of years of wind and water erosion sculpting the Navajo Sandstone.

Useful Information: The Beehives are right off the main road near the west entrance with a small parking area and an information kiosk explaining the geology. No hiking required — you can see them clearly from the car park, though getting closer is well worth the extra few minutes.

Jet Lag Jelly Tip: Morning light hits the Beehives from the east and makes the layered banding really pop — if you're entering from the west entrance first thing in the morning, this is a great opening stop before the rest of the park.
6. Mouse’s Tank
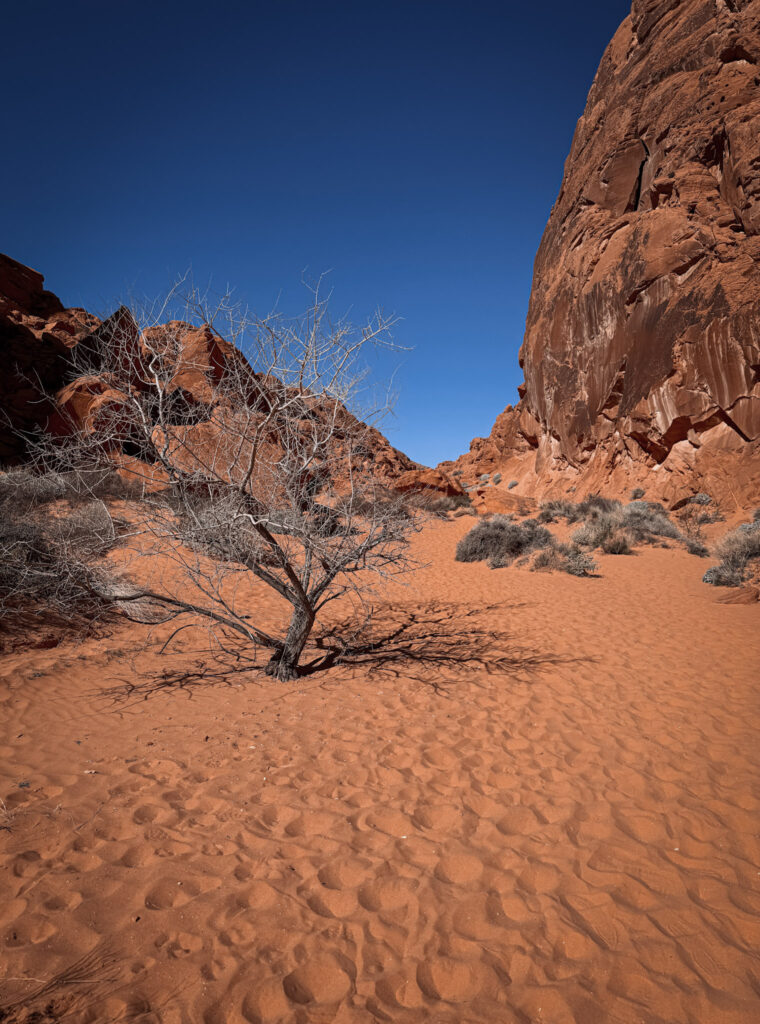
The Mouse’s Tank trail that leads you to the main petroglyph panels is a journey in itself — a wide, sandy wash winding between tall red sandstone walls with the sky opening up above you, completely silent except for the wind.
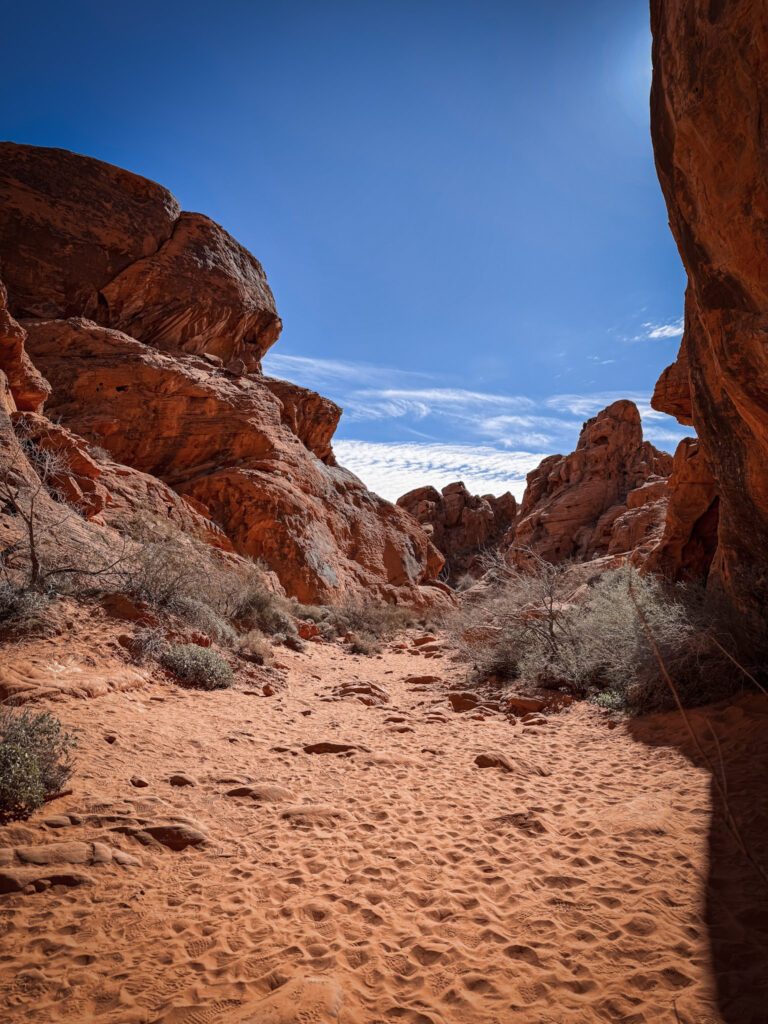
It feels like walking through a place that hasn’t changed in centuries, which is exactly the right mood before you come face to face with carvings that are thousands of years old.
Fun Fact: Some of the petroglyphs in Valley of Fire are estimated to be over 3,000 years old, carved by the Ancient Puebloans who lived in the area long before European contact.

Useful Information: The main petroglyph sites are Atlatl Rock (with a staircase for easier viewing) and Mouse's Tank trail, which passes multiple panels along a short canyon walk of about 1.2 kilometres return.

Jet Lag Jelly Tip: Look closely — the carvings are easy to miss if you're just scanning the rock face from a distance. Take your time and let your eyes adjust to the texture of the stone.
7. White Domes Trail: Slot Canyon and Wave Rock
This is the trail that made Valley of Fire feel like a miniature greatest hits of the whole road trip — a short loop that takes you through a narrow slot canyon with smooth, striated walls, then out onto broad sweeping slabs of smooth pink and white rock that you can scramble up freely, with the whole valley spread out below you.
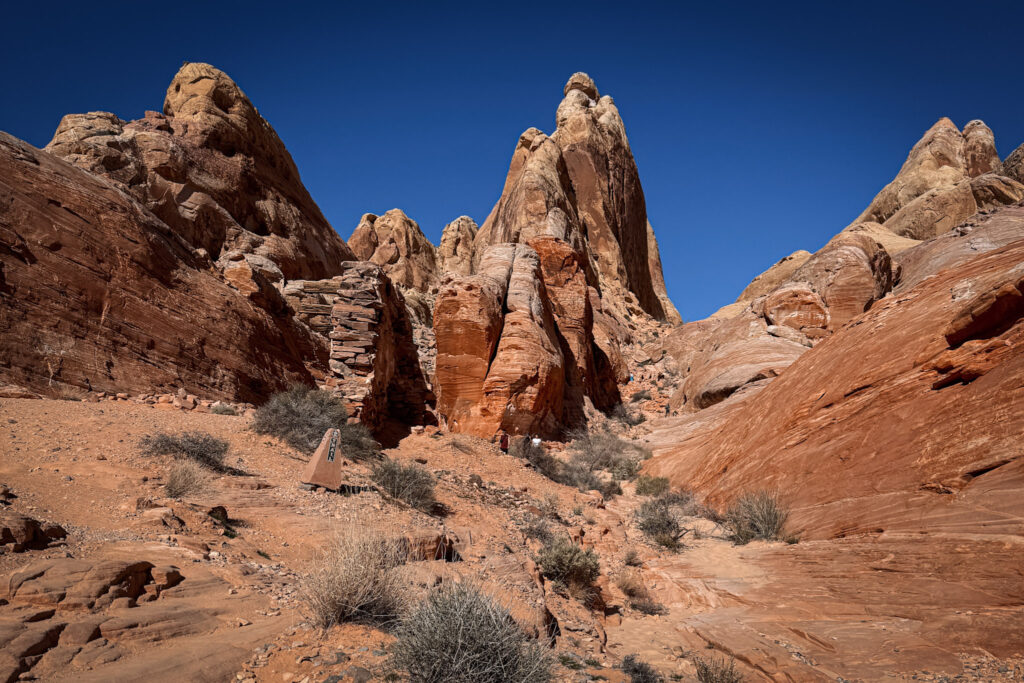
Before you even reach the slot canyon, the trail opens up into a dramatic natural amphitheatre of towering rock spires — red, orange and cream-white formations rising up on all sides, with tiny figures of other hikers at their base reminding you just how massive these things actually are. It sets the scene perfectly for everything that follows.
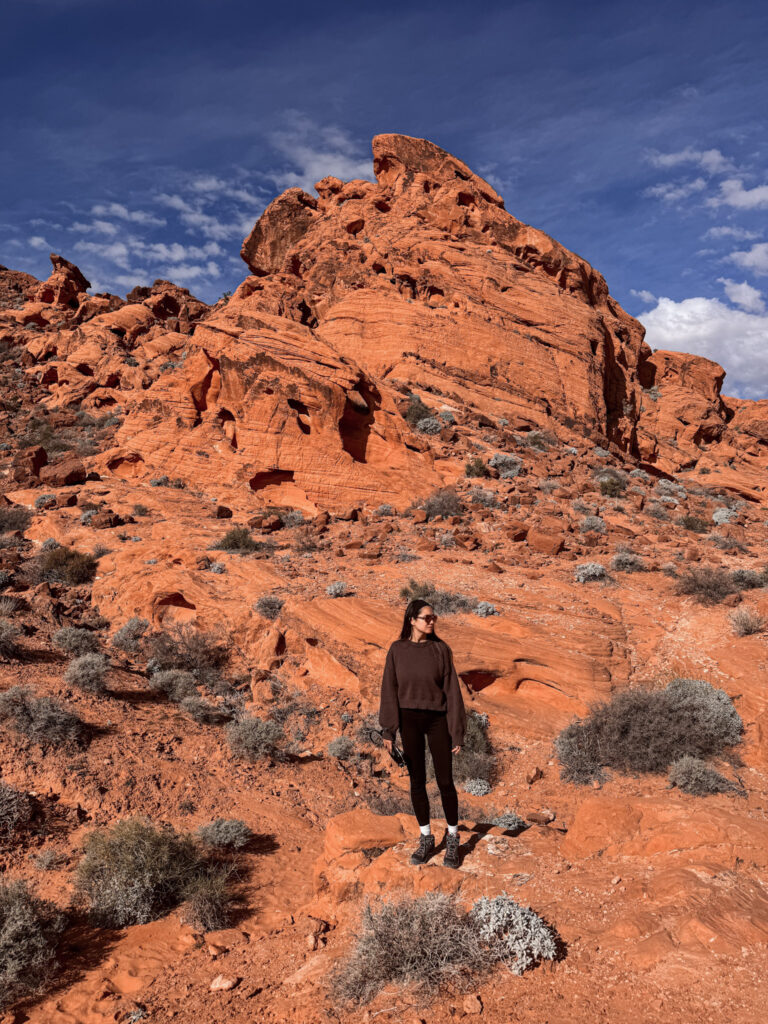
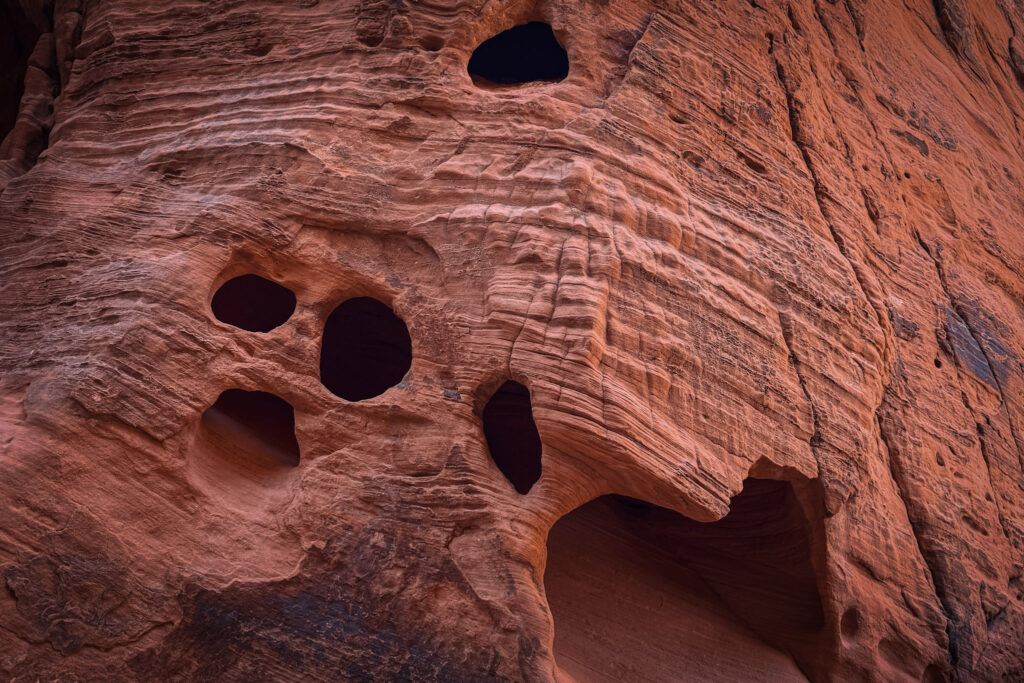
Along the trail you’ll also come across rock faces covered in what looks like the stone has been slowly eaten from the inside — round, dark holes of all sizes pockmarking the smooth layered sandstone in clusters. These are called tafoni, a type of cavernous weathering where wind, moisture, and salt slowly hollow out softer pockets in the rock over thousands of years, leaving behind these cave-like openings. It looks almost like the rock is staring back at you — and if you look closely at the slot canyon walls themselves, you’ll spot them there too, tucked into the smooth striated rock right next to you as you walk through.
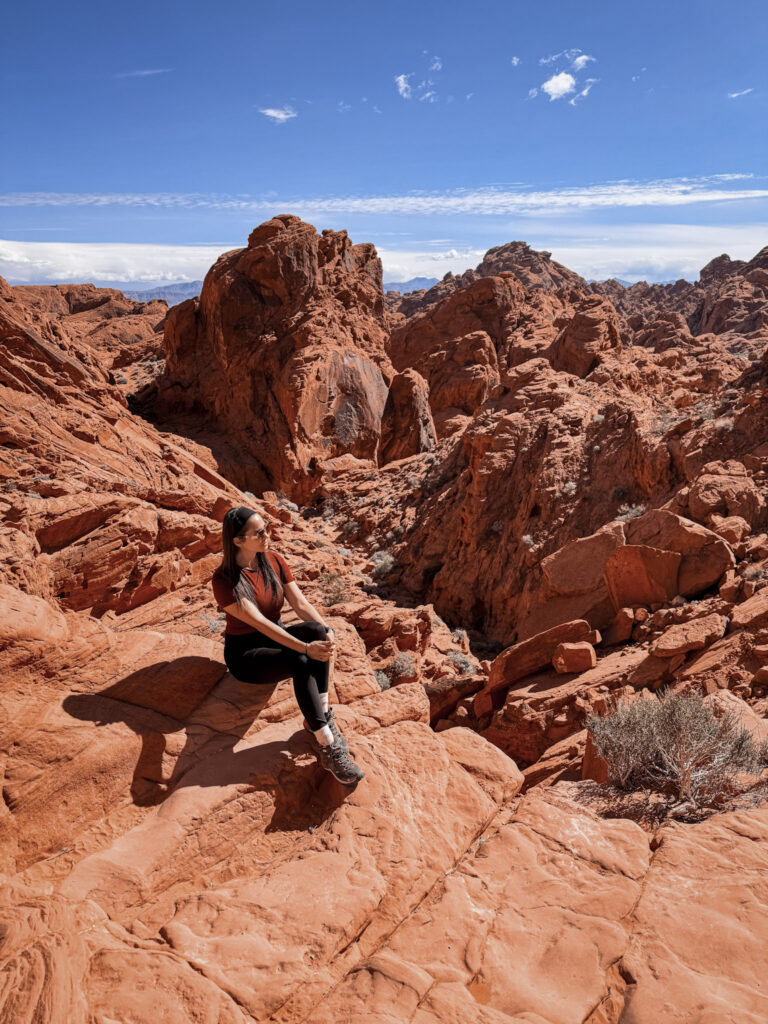
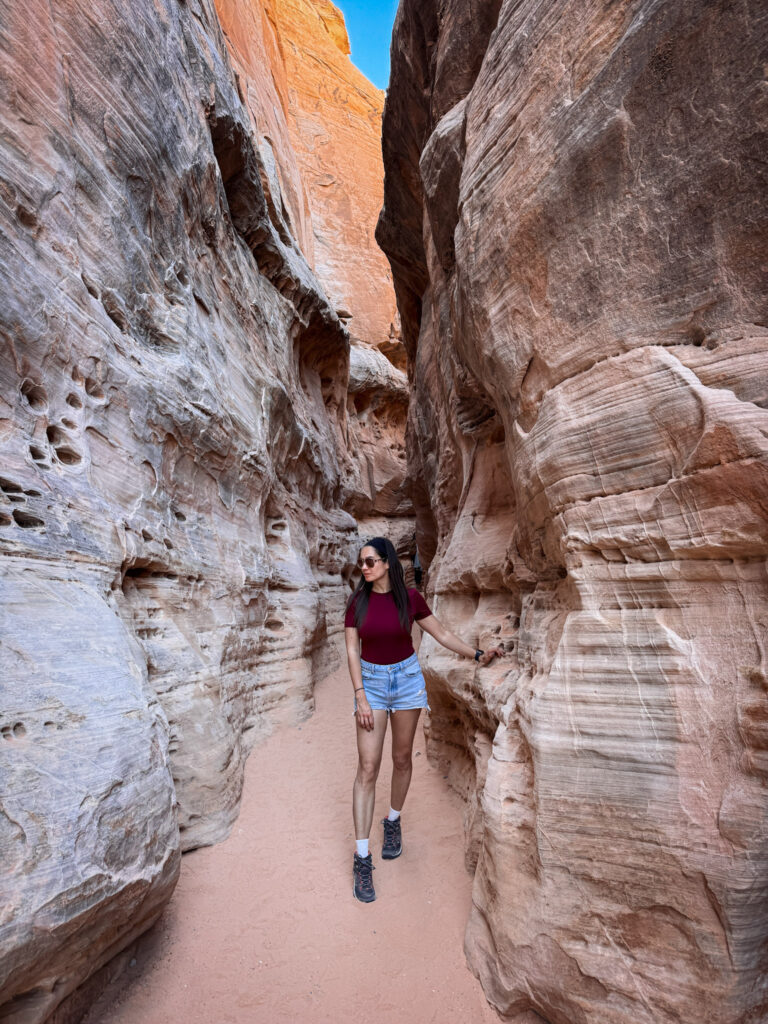
Then the walls close in. The slot canyon section of White Domes is short but genuinely beautiful — pale, smooth sandstone rising up on both sides, the walls almost close enough to touch with both hands, just a thin strip of blue sky far above. And unlike Antelope Canyon, completely free and unticketed. The smooth rock slabs afterwards are the kind of place you could sit for an hour and just look out at the desert — which is exactly what I did. Sitting up on those broad red slabs with the whole jumbled valley of red rock formations spreading out in every direction around you, not another sound except the wind, is one of those moments that sneaks up on you as the highlight of the day.
Fun Fact: The White Domes area gets its name from the lighter-coloured sandstone in this part of the park, which contrasts dramatically with the deep red formations elsewhere.

Useful Information: The White Domes loop is about 2 kilometres, easy to moderate, and one of the most varied and rewarding short trails in the park.

Jet Lag Jelly Tip: Wear shoes with grip for the smooth rock sections — the slabs look flat but have enough pitch to be slippery in spots.
8. The Scenic Drive and Red Rock Landscape
The park’s main scenic road winds through formations of deep red Aztec sandstone that look like they’ve been set on fire — hence the name. Every bend in the road reveals a different rock shape, a different shade of orange and red, a different angle of blue sky above. Even from the car window it’s extraordinary, but you really need to get out and walk among the formations to feel the scale of it.
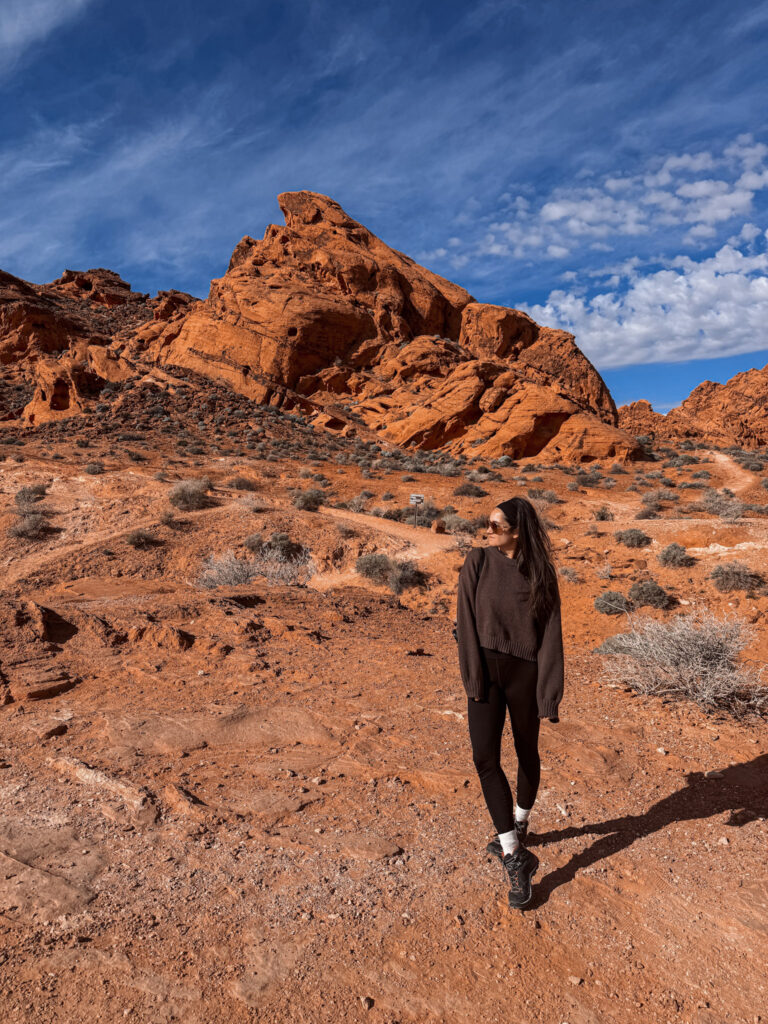
Fun Fact: The red colour comes from iron oxide — essentially rust — in the Aztec sandstone, which was formed from ancient sand dunes around 150 million years ago.

Jet Lag Jelly Tip: Don't just drive through — pull over at any of the unmarked spots and just walk into the rock formations. The park is very hike-friendly and the best views are often a five-minute scramble from the road rather than at the formal car parks.
Best Time to Visit
Vegas desert heat is no joke — summer temps regularly hit 40°C+ (104°F+), which makes hiking in Death Valley or Zion pretty miserable, if not dangerous. The sweet spot is spring (March–May) or fall (October–November), when daytime temps are mild and the parks aren’t packed with peak-summer crowds. Winter (December–February) is also doable and often quieter, though some higher-elevation spots like Zion can get chilly or icy.
Jet Lag Jelly Tip: Death Valley is one of the hottest places on Earth in summer — if you're road-tripping from Vegas between June and August, go early morning or skip it altogether.
Where to Stay
Since most of these parks work as day trips (Death Valley, Grand Canyon South Rim, Horseshoe Bend, and Valley of Fire), basing yourself in Las Vegas for the whole trip is the simplest approach — you get one hotel, no repacking, and easy access to the Strip or Downtown in the evenings after a long drive.
If you’re doing Zion or Horseshoe Bend/Grand Canyon back-to-back, though, it’s worth breaking up the drive with an overnight in Springdale or Page rather than doing the full round-trip from Vegas in one day — you’ll get much better light for photos and a lot less time behind the wheel.
Browse hotels in Las Vegas to find a base close to the Strip or Downtown depending on your plans.
Budget
Most of these parks are easy day trips or short overnight stays from Vegas, so costs stay pretty manageable:
- Backpacker: ~$40–60/day — camping or budget motel, gas, park entrance fees, self-catered meals
- Mid-range: ~$100–180/day — rental car, 3-star hotel or Airbnb near the parks, mix of dining out and groceries
- Luxury: $250+/day — guided tours, higher-end lodges near Zion/Grand Canyon, private transfers
Jet Lag Jelly Tip: Most national parks charge a per-vehicle entrance fee (usually $20–35), but an America the Beautiful annual pass ($80) covers unlimited entries to all US national parks for a year — worth it if you're hitting more than 2-3 parks on this trip.
FAQ
What are the best national parks to visit from Las Vegas? The best options are Death Valley National Park, Zion National Park, and Grand Canyon National Park. For something different, add Valley of Fire State Park, Horseshoe Bend, and Antelope Canyon to your itinerary. Each offers a completely different landscape, from salt flats and red-rock canyons to slot canyons and desert scenery.
Can you visit a national park from Las Vegas in one day? Yes. Death Valley and Zion are both realistic day trips from Las Vegas if you start early. Valley of Fire is even easier, at around an hour from the city. The Grand Canyon South Rim and the Page area are much farther away, so they are better as overnight stops rather than rushed day trips.
What is the closest national park to Las Vegas? Death Valley National Park is one of the closest major national parks to Las Vegas, taking roughly two hours to reach depending on your destination within the park. Zion National Park is around 2.5–3 hours away, while the Grand Canyon South Rim takes approximately 4.5–5 hours.
What is the best time of year to visit the national parks near Las Vegas? Spring and fall are generally the best seasons, with milder temperatures for hiking and sightseeing. Winter can also be excellent, especially for Death Valley and Zion, with fewer crowds and cooler temperatures. Summer is much more challenging because desert temperatures can become dangerously hot, particularly in Death Valley.
Do you need a car to visit the national parks from Las Vegas? A rental car is the easiest and most flexible way to explore these destinations. Some parks can be visited on organized tours from Las Vegas, but having your own car gives you much more freedom to combine multiple stops and explore at your own pace.
Is the Grand Canyon a day trip from Las Vegas? Technically, yes, but I wouldn’t recommend it if you want to enjoy the South Rim properly. The drive from Las Vegas to the Grand Canyon South Rim takes around 4.5–5 hours each way, making for a very long day. If you have the time, spending at least one night near the canyon is a much better option.
How many days do you need for a Las Vegas national park road trip? I’d recommend at least 4–5 days if you want to combine several of the destinations in this guide without spending the entire trip behind the wheel. A longer trip of 6–7 days gives you enough time to include Death Valley, Zion, the Grand Canyon, and the Page area without rushing.
Is Valley of Fire worth visiting if you’re already going to Zion? Absolutely. Although both destinations are famous for red rock scenery, they feel surprisingly different. Valley of Fire is much smaller and easier to explore in a few hours, with bright red sandstone formations, petroglyphs, slot canyons, and short trails. It’s also only about an hour from Las Vegas, making it an easy addition to your itinerary.
Summary
I genuinely cannot pick a favourite stop from this road trip. And trust me, I tried. Every single park had its own completely different personality — Death Valley felt like another planet, Zion was all towering red walls and river trails, the Grand Canyon was the kind of scale that just makes you go quiet, Antelope Canyon was pure magic underground, Horseshoe Bend made me stop and just stare, and Valley of Fire turned out to be one of the biggest surprises of the whole trip.
Every single one of them was worth it. Every single one felt completely different from the last. And every single one is sitting right there, a few hours from Las Vegas, waiting for you to show up. That’s the thing about the American Southwest — it just keeps delivering. You think you’ve seen the most dramatic landscape of the trip and then you turn a corner and there’s something completely new, completely different, and equally unforgettable.
Here’s the quick rundown of everything we covered:
Death Valley — Another planet, down on Earth. Don’t miss Dante’s View at sunset.
Zion National Park — Red canyon walls, river trails, and a scenic drive that changes around every bend.
Grand Canyon — Nothing prepares you for the actual scale of it. Just go.
Antelope Canyon — Book Lower, stay the night in Page, go in the morning.
Horseshoe Bend — Exactly as beautiful as the photos. Every single angle.
Glen Canyon and Lone Rock — Easy half day from Page, don’t skip it.
Valley of Fire — One hour from Vegas, completely different from everything else, and absolutely unforgettable.
Do yourself a favour — next time you’re in Las Vegas, rent a car, get on the road, and go see all of this for yourself.
Want the full breakdown on each of these? Check out my in-depth guides: Exploring Antelope Canyon, Horseshoe Bend Overlook Guide, Grand Canyon South Rim Guide, Valley of Fire Day Trip from Las Vegas, Zion National Park: The Complete Guide, and Death Valley Must-See Stops.