
This post contains affiliate links. If you book through one, I may earn a small commission at no extra cost to you — it helps keep Jet Lag Jelly running. Read my full affiliate disclosure for more.
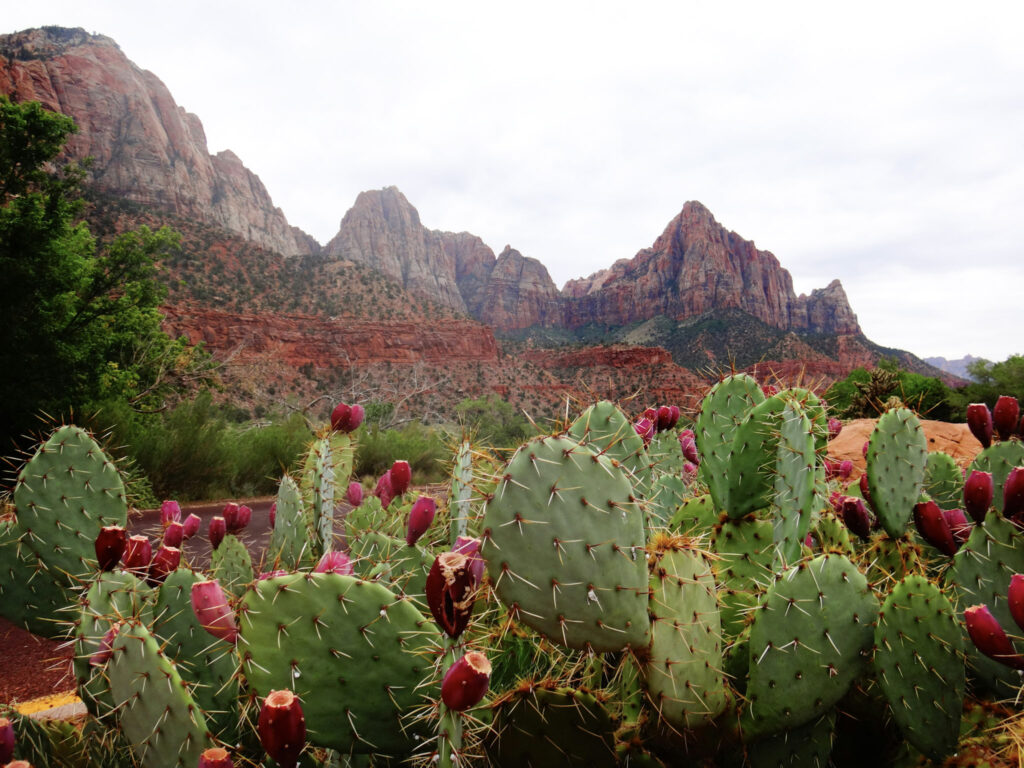
After the otherworldly emptiness of Death Valley, Zion National Park feels like stepping into a completely different kind of extreme — towering red and white sandstone cliffs rising hundreds of metres above the canyon floor, the Virgin River winding through it all, and some of the most dramatic hiking in the American Southwest right at your feet. It’s the most visited of Utah’s “Mighty 5” national parks, and after spending a day here, it’s very easy to understand why.
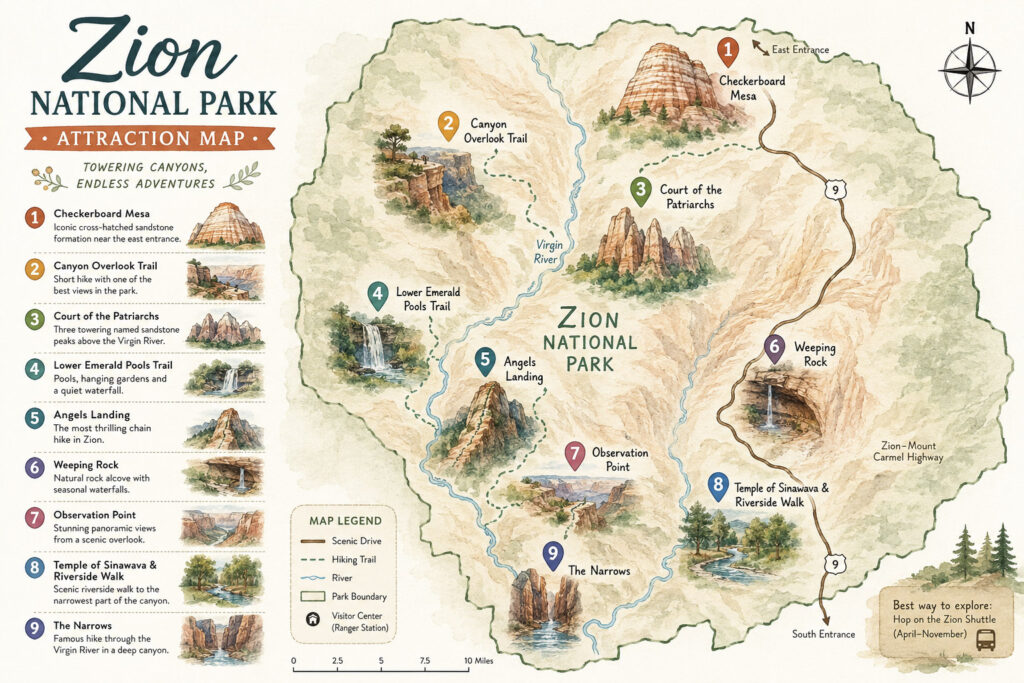
Zion National Park: Scenic Itinerary
- Checkerboard Mesa: Iconic cross-hatched sandstone formation near the east entrance
- Canyon Overlook Trail: Short hike with one of the best views in the park
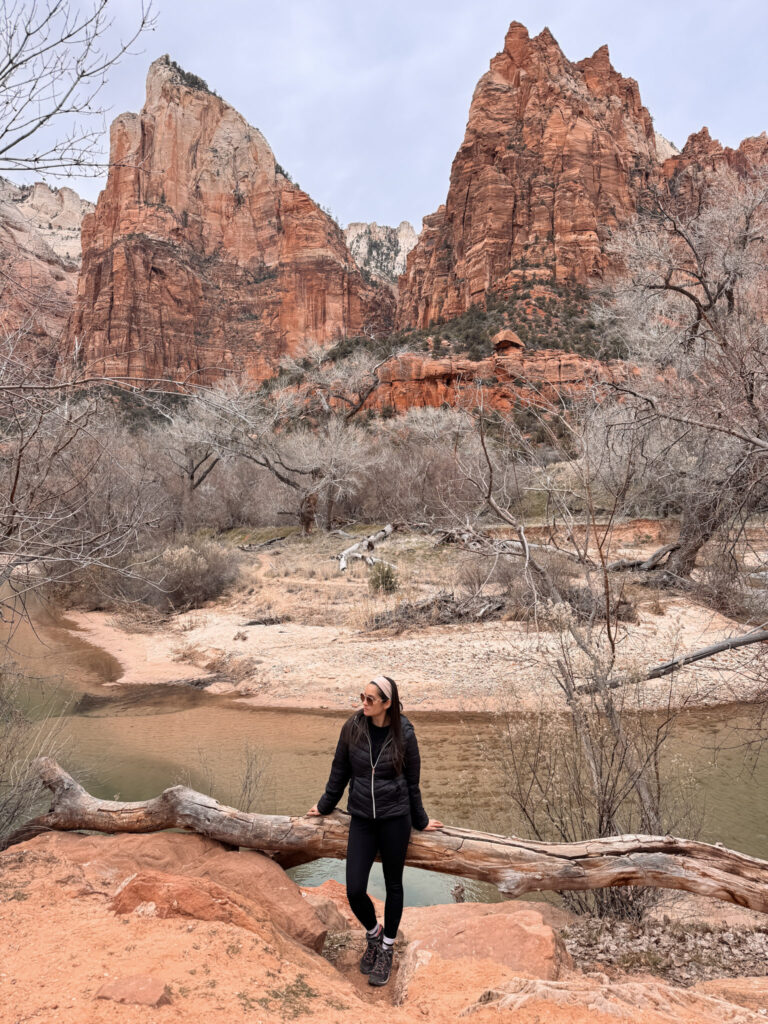
- Court of the Patriarchs: Three towering named sandstone peaks above the Virgin River
- Lower Emerald Pools Trail: Pools, hanging gardens and a quiet waterfall
- Angels Landing: The most thrilling chain-assisted hike in the US (permit required)
- Weeping Rock: Spring-fed rock alcove with lush hanging gardens
- Observation Point: Highest canyon overlook — looking straight down on Angels Landing
- Temple of Sinawava & Riverside Walk: End of the scenic drive, gateway to The Narrows
- The Narrows: Hike through the Virgin River in the narrowest slot canyon in Zion
Did you know?
- Zion is Utah’s most visited national park, welcoming over 4.5 million visitors a year
- The Navajo Sandstone cliffs rise up to 900 metres above the canyon floor
- The Virgin River carved Zion Canyon over millions of years — and is still cutting deeper today
- Located in southwestern Utah, about 260 kilometres from Las Vegas
- Best seasons: March–May and September–November (avoid peak summer heat and crowds)
- In winter, private vehicles can drive the full scenic canyon road — no shuttle required
Getting There: From Las Vegas, it's about 2.5 to 3 hours via I-15 N, roughly 260 kilometres one way. Plan around the time zone change — you'll lose an hour crossing from Pacific into Mountain Time when you enter Utah, which catches most people off guard. Most visitors enter through the south entrance near Springdale. Renting a car from Las Vegas is the simplest way to make this drive.

Entrance Fee: $35 per vehicle, valid for 7 days. As of January 2026, a non-resident surcharge of $100 per person also applies to visitors aged 16 and older who are not US residents at certain peak periods — check the NPS website before you go. The America the Beautiful annual pass covers the standard entrance fee.

Summer vs. Winter — A Very Different Park: This is the most important thing to know before planning your visit. From March through November, private vehicles are not allowed on Zion Canyon Scenic Drive — you must use the free park shuttle to access the main canyon. In winter, the shuttle pauses and you can drive your own car directly into the canyon, stopping wherever you want — which is a completely different and far more flexible experience. We visited in February and had the scenic drive almost entirely to ourselves.

How Long to Spend: One full day covers the main highlights. Two days lets you add hikes like Angels Landing or The Narrows without rushing.
1. Checkerboard Mesa
The first thing you see driving in from the east entrance, and one of the most immediately striking formations in the park — a massive cone-shaped sandstone summit covered in an unmistakable grid of horizontal and vertical lines that make it look like someone drew a giant checkerboard across the rock face. The horizontal lines are caused by cross-bedding of ancient dunes, while the vertical lines are caused by breaks in the cross-bedding from cycles of freezing and thawing over millions of years.
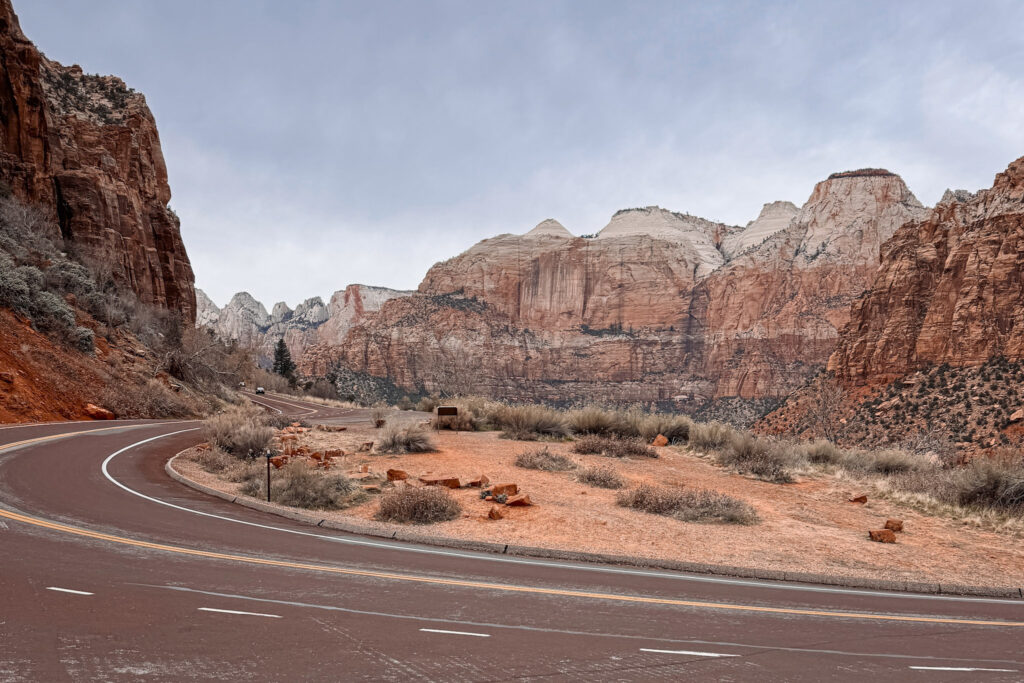
It towers 270 metres above the road, which puts the scale of it into perspective the moment you pull over to look. In the canyon below the mesa, pools of rainwater collect after storms — a vital water source for the resident bighorn sheep population.
Fun Fact: In the 1930s, the then-superintendent of Zion called this formation Checkerboard Mountain. Before that, it was commonly known as Rock Candy Mountain. The geological processes that created the grid pattern are ongoing — very slowly, the massive sandstone will continue breaking down and eventually return to sand dunes. Atlas Obscura

Useful Information: Several pullouts near the mesa provide convenient viewpoints for photography. For those wishing to explore up close, the hiking trailhead is located at the Checkerboard Mesa viewpoint parking lot — a 3.2 kilometre round trip hike with 270 metres of elevation gain to the summit, rated strenuous. The viewpoint itself requires no hiking at all. AllZion

Jet Lag Jelly Tip: Pull into the parking area and walk toward the base of the formation rather than just photographing from the road — the grid pattern on the rock face is much more impressive and detailed up close than it looks from a distance.
2. Canyon Overlook Trail
A short but properly rewarding hike that starts just past the Zion-Mount Carmel Tunnel — the mile-long tunnel that connects the east and west sections of the park — and climbs through a narrow, rocky canyon before opening onto one of the best viewpoints in the park. Looking out over the full sweep of Zion Canyon, with the scenic road switchbacking far below through the canyon, with the red and white sandstone walls rising on all sides — it’s one of those views that makes the effort entirely worth it.
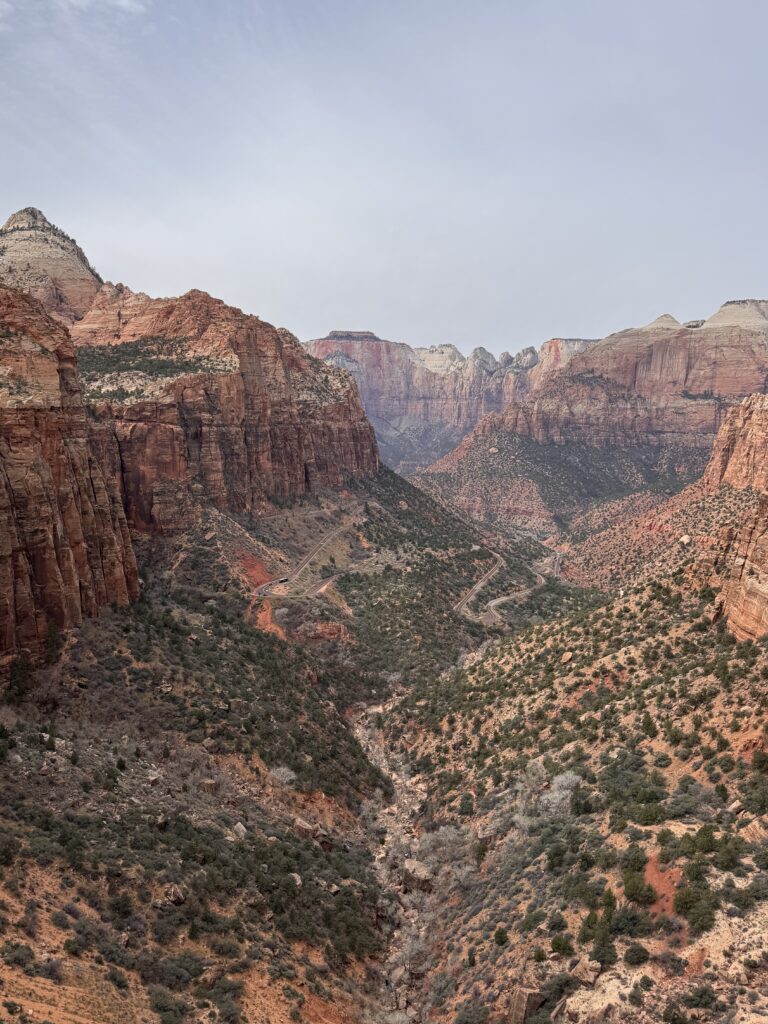
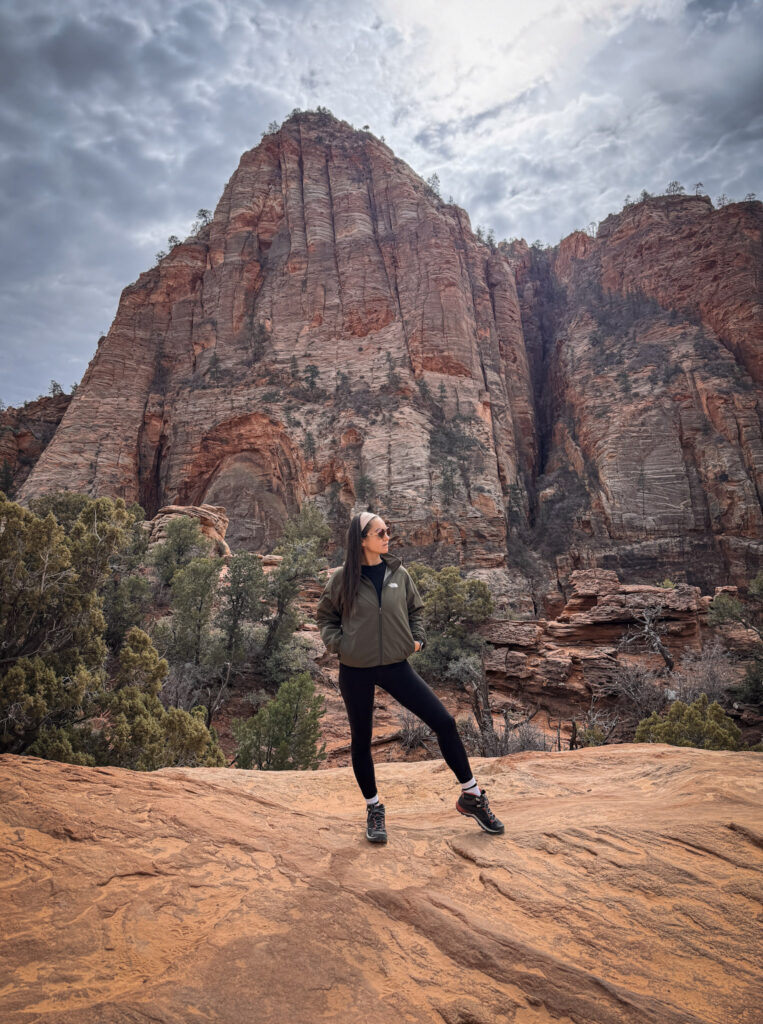
Fun Fact: The Zion-Mount Carmel Tunnel just below the trailhead was completed in 1930 and is just over 1.6 kilometres long — it was the longest tunnel in the US at the time of its construction, and was considered an extraordinary engineering achievement for its era.

Useful Information: The trail is about 1.6 kilometres round trip and takes around 45 minutes to an hour at an easy pace. The trailhead is right near the east entrance, just past the tunnel exit — there's limited parking, so an early start helps even in winter. No permit required.

Jet Lag Jelly Tip: Don't stop at the first lookout you reach — keep going to the very end of the trail where the view fully opens up over the switchbacks below. The difference between the halfway point and the actual viewpoint is significant.
The trail itself is varied and interesting — winding through a slot canyon section, past natural windows in the rock, before the final open viewpoint at the end.
3. Court of the Patriarchs
Three massive, named sandstone peaks standing shoulder to shoulder above the Virgin River — Abraham, Isaac, and Jacob — with a fourth peak, Mount Moroni, visible to the right. From the viewpoint trail, the sheer scale of the formations is immediately apparent, especially with the river and trees in the foreground providing scale.
It’s one of those classic Zion views that looks almost too perfect, like a painting — the red sandstone peaks, the cottonwood trees along the river, the blue sky above. In autumn, the cottonwoods turn gold and the whole scene becomes even more dramatic.
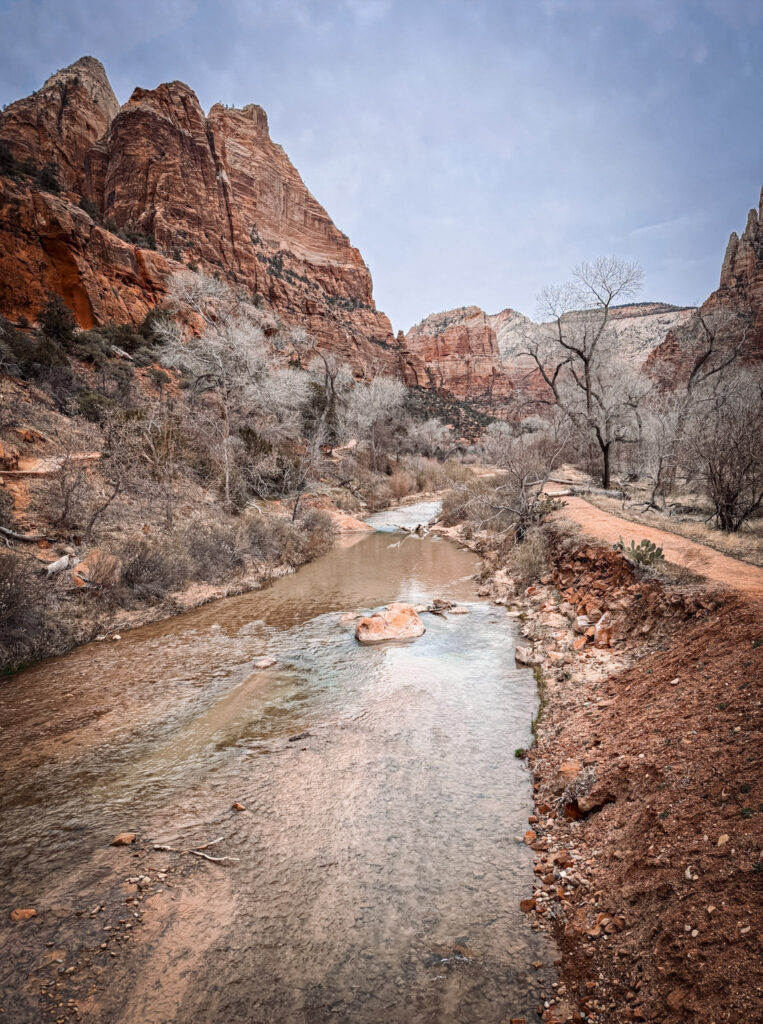
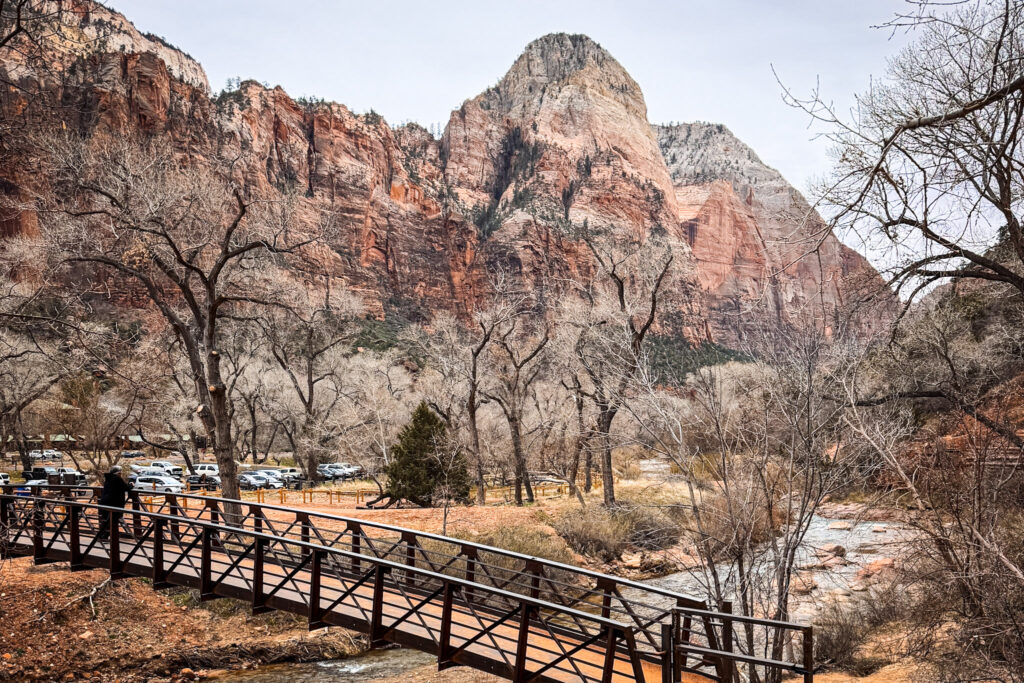
Fun Fact: The peaks were named in 1916 by a Methodist minister, Reverend Frederick Fisher, who visited Zion and was so struck by the formations that he gave them the biblical names they still carry today. The naming happened just two years before Zion was officially designated as a national park.

Useful Information: There's a short, easy viewpoint trail right off the main road — less than 0.5 kilometres to the main viewpoint, no serious hiking required. Accessible via shuttle stop 4 during shuttle season, or by car in winter.

Jet Lag Jelly Tip: Walk down toward the river below the viewpoint rather than just stopping at the main platform — having the Virgin River in the foreground with the three peaks rising behind it is a much more dramatic composition than the official viewpoint angle.
4. Lower Emerald Pools Trail
A relatively easy trail leading through canyon woodland to a series of pools and a quiet waterfall tucked beneath a sweeping rock overhang. After the big panoramic viewpoints earlier in the day, the Emerald Pools trail feels more intimate and close — the canyon walls rising up on either side, the sound of water, and a real sense of being inside the landscape rather than looking at it.
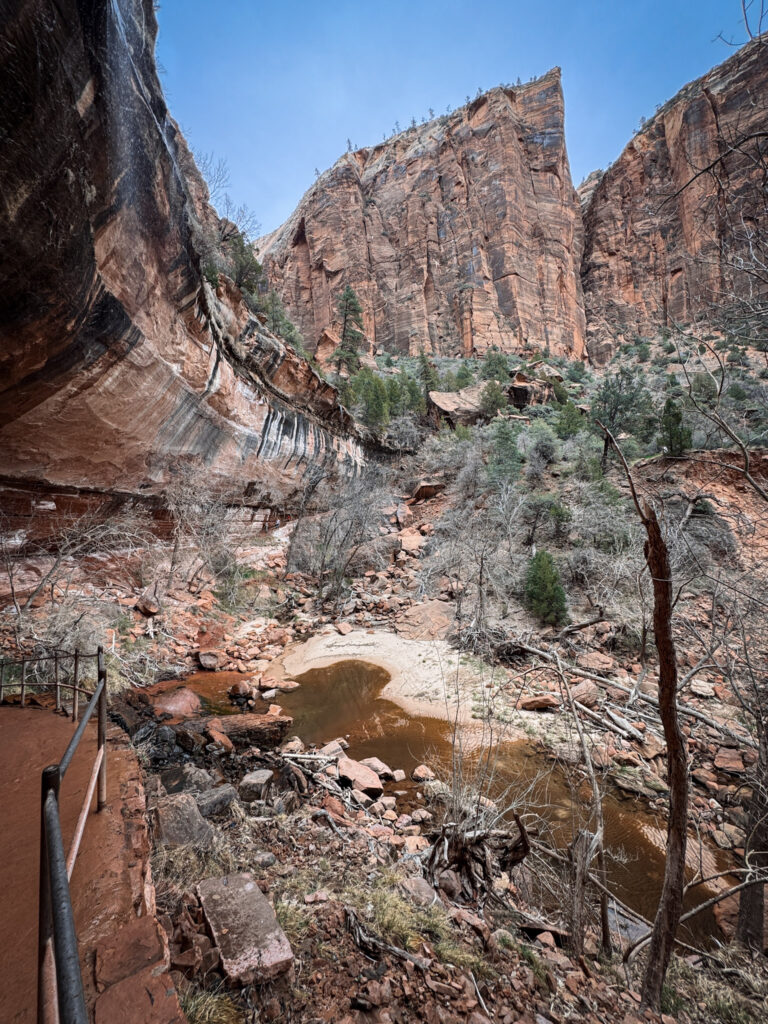
The lower pool has a beautiful reflection of the surrounding cliffs on calm days, and the waterfall that drops from the ledge above creates a natural misting effect that’s genuinely refreshing in warmer months.
Fun Fact: The trail gets its name from the green-tinted pools, coloured by algae growing in the still water — the same algae that gives the pools their distinctive emerald shade in certain light conditions. The area supports hanging gardens of columbines, maidenhair ferns, and monkeyflowers along the dripping cliff walls.

Useful Information: The lower pool trail is about 2.4 kilometres round trip, easy and well-maintained with minimal elevation gain. Accessible via shuttle stop 5 at Zion Lodge during shuttle season. The middle and upper pools involve more elevation and are rated moderate.

Jet Lag Jelly Tip: Time it for late afternoon if you can — the light coming through the overhang and reflecting in the lower pool in the afternoon sun is one of the most quietly beautiful moments in the park. Early morning is also good for calm, glassy reflections before other visitors arrive.
5. Angels Landing
One of the most famous hikes in the entire US National Park system — and one of the most dramatic. The trail climbs steeply up the canyon wall via a series of 21 tight switchbacks known as Walter’s Wiggles, then up onto an exposed ridge to Scout Lookout, before the final half-mile climb up a narrow rock spine with chains bolted into the rock to help hikers navigate the steep, exposed sections.
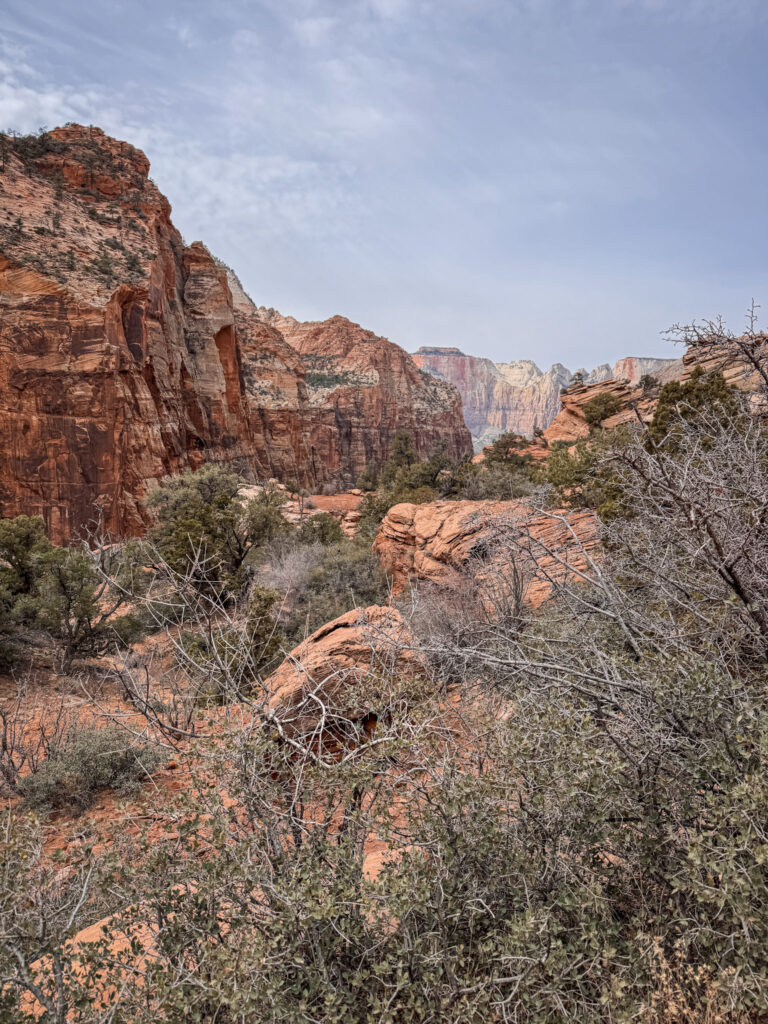
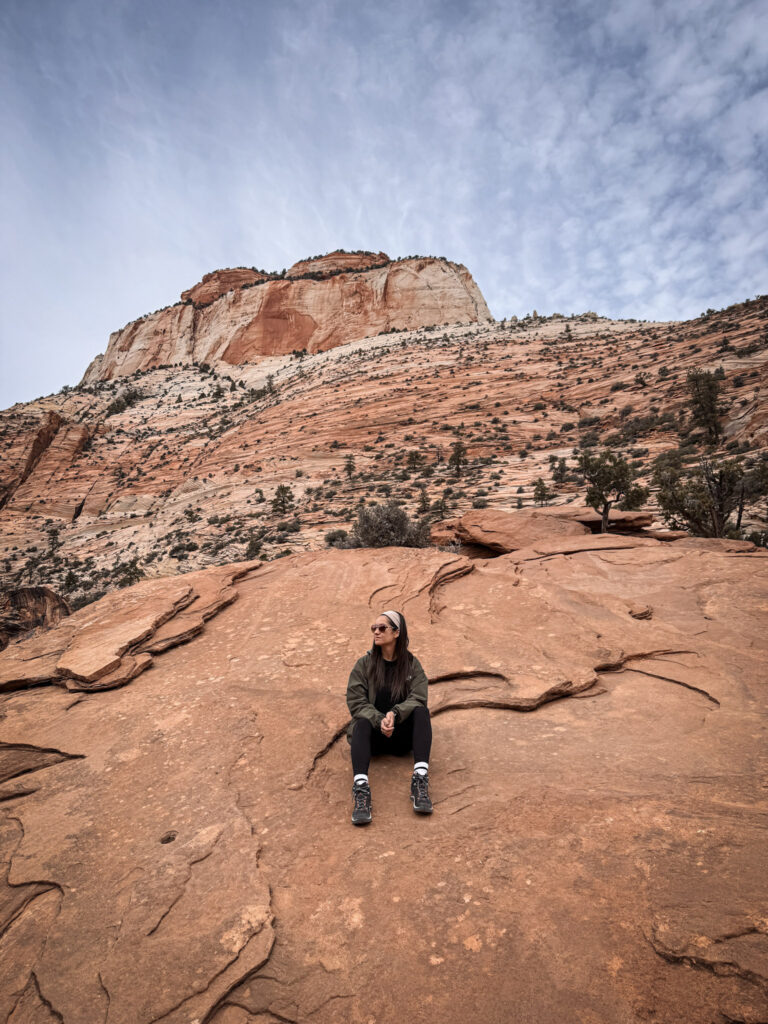
The summit sits 454 metres above the canyon floor and offers a 360-degree view of Zion Canyon that is, without exaggeration, one of the most extraordinary views you can earn with your feet in the US. But this is not a casual hike — the trail has narrow sections with 300-metre drops on both sides, and there have been 13 known deaths from falls at Angels Landing since 2000. Only attempt this if you’re comfortable with heights and in good physical condition.
Fun Fact: The trail was hewn out of the steep rock spine in 1926 and continues to thrill hikers to this day. The name "Angels Landing" was given to the formation by a surveyor who said only an angel could land on something so high and exposed.

Useful Information: A permit is required to hike from Scout Lookout to Angels Landing along the chain section — applied for via a lottery system on Recreation.gov. The seasonal lottery opens on the 1st of the month, two months before your desired hiking month, with a $6 non-refundable application fee plus $3 per person if selected. A day-before lottery also runs for last-minute spots. The hike is 8.7 kilometres round trip with 460 metres of elevation gain. No permit is required to hike to Scout Lookout, which already offers outstanding views. Dogs not permitted.

Jet Lag Jelly Tip: Apply for weekday dates — Saturday permits are the hardest to get, while Tuesday through Thursday have the best odds. Winter months have dramatically better odds since fewer people apply, and the trail is still hikeable in winter, though icy conditions require microspikes. If you don't get a permit, Scout Lookout is genuinely worth the climb on its own.
6. Weeping Rock
One of Zion’s most unusual stops — a short but steep trail up to a large bowl-shaped alcove in the canyon wall where water literally seeps out of the rock face, creating a constant gentle rain beneath the overhang and nourishing a lush hanging garden of ferns, mosses, and wildflowers that cling to the vertical cliff.
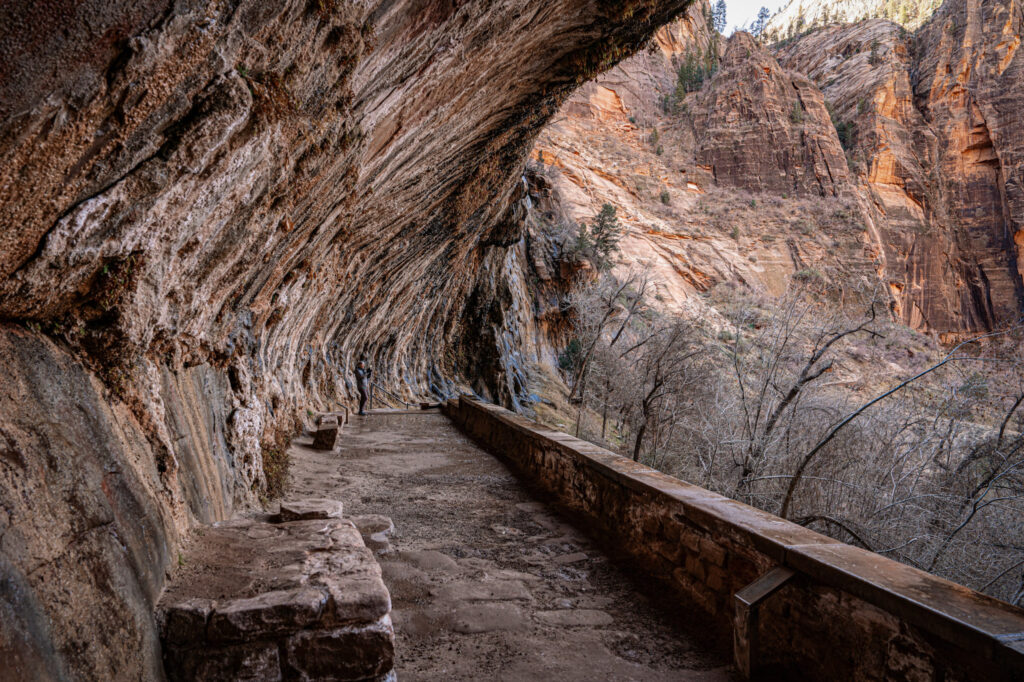
The water that seeps out of the rock here has filtered through the Navajo Sandstone for around 1,200 years before emerging at the point where it meets the harder Kayenta Shale below. Standing under the dripping overhang looking back at the canyon spread out below you is one of those simple moments that stays with you.
Fun Fact: The Weeping Rock Trail was closed for nearly two years following a rockfall in November 2023 and only officially reopened in September 2025 — worth checking the NPS website for current status before your visit, as this trail has a history of rockfall-related closures.

Useful Information: The trail is 0.6 kilometres round trip — short but steep, gaining 30 metres of elevation with several stairs involved. Accessible via shuttle stop 7. No permit required. Bring a light layer — it's genuinely 15 to 20 degrees cooler under the rock alcove, and you will get lightly sprinkled on.

Jet Lag Jelly Tip: Late afternoon is the optimal time to visit — the sun illuminating the water droplets as they fall from the overhang creates a beautiful sparkling effect that you don't get at other times of day.
7. Observation Point
The highest viewpoint accessible by trail on the east side of the canyon, Observation Point sits at 2,100 metres elevation and looks straight down into the full length of Zion Canyon — including Angels Landing, which looks tiny far below on its knife-edge ridge. The perspective from here is completely different from any other viewpoint in the park, and many experienced hikers consider it the best view in Zion.
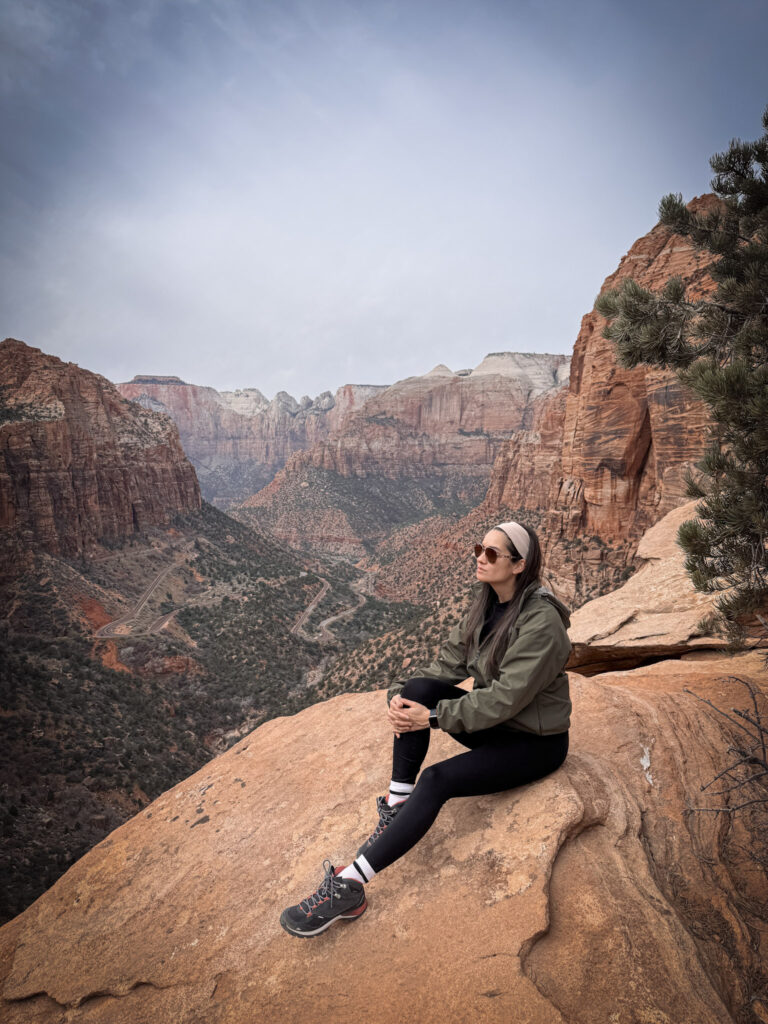
The trail climbs steeply through Echo Canyon — a beautiful narrow slot canyon section — before emerging onto the canyon rim for the final approach to the viewpoint. The canyon section alone is worth the hike even if the viewpoint weren’t there.
Fun Fact: From Observation Point, you look straight down on Angels Landing — the trail that most people consider the definitive Zion hike — and it looks almost insignificant from this height, which gives you a very good idea of just how big the canyon actually is.

Useful Information: The trail is 13.5 kilometres round trip with 640 metres of elevation gain — rated strenuous, with several steep, exposed sections. Note that as of 2026, the direct trail from the Weeping Rock trailhead up to Observation Point remains closed following rockfall damage — access is currently via the East Mesa Trail from outside the park. Check the NPS website for current trail status before planning this hike.

Jet Lag Jelly Tip: The East Mesa Trail approach (currently the only open access route) is actually flatter and less strenuous than the original trail, and many hikers now prefer it — but you'll need a car to reach the trailhead, as it's outside the main canyon shuttle system.
8. Temple of Sinawava and the Riverside Walk
The end of the scenic drive, where the canyon narrows dramatically and the North Fork of the Virgin River cuts through the valley floor between walls that rise hundreds of metres on both sides. The Temple of Sinawava is both the name of this section of canyon and the starting point for the Riverside Walk — a flat, paved 3.2 kilometre trail along the river that leads to the entrance of The Narrows.
Even without going into The Narrows, the Riverside Walk is one of the most atmospheric trails in the park — the canyon walls closing in above you, the river rushing alongside, the willows and cottonwoods lining the banks. In winter, the bare trees and lower water levels give it a quieter, more austere beauty.
Fun Fact: "Sinawava" refers to a coyote deity in Southern Paiute mythology — the towering natural rock walls here were considered a natural amphitheatre by early visitors, which is why the name "temple" stuck despite its indigenous spiritual origins being quite different.

Useful Information: Accessible via shuttle stop 9 — the last stop on the shuttle route. The Riverside Walk is flat, paved, and accessible for most visitors including pushchairs and mobility aids. No permit required for the Riverside Walk itself.

Jet Lag Jelly Tip: Go late in the afternoon when the light drops into the canyon and turns the walls gold. The canyon narrows most dramatically in the final kilometre before the Narrows entrance — keep walking to the end of the paved trail rather than turning back at the first bend.
9. The Narrows
The most famous hike in Zion National Park — and arguably in the entire Southwest — The Narrows is where you walk directly in the Virgin River through a slot canyon with walls up to 300 metres high and sometimes just 6 metres wide. There’s no trail — the river is the trail — and you wade, sometimes chest-deep, through the water while the extraordinary canyon closes in around you.
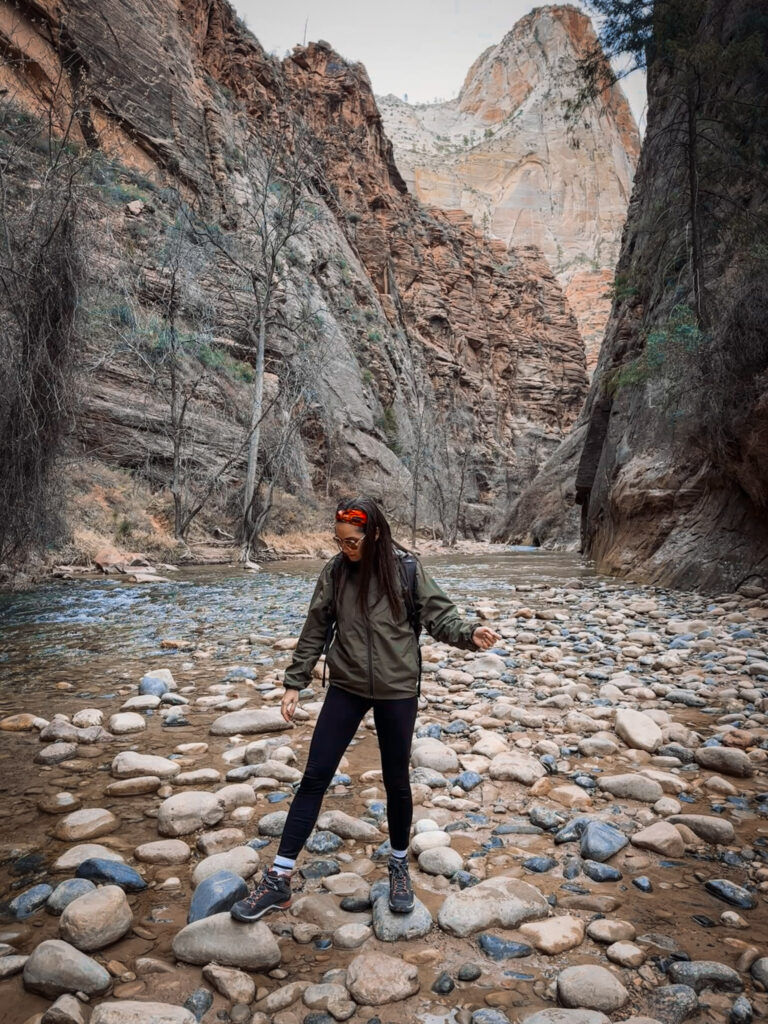
The bottom-up route from Temple of Sinawava requires no permit and no advance planning — you simply walk in as far as you want and turn around. The top-down 26-kilometre through-hike from Chamberlain’s Ranch does require a permit and serious preparation.
Fun Fact: The Narrows is part of the Virgin River Narrows, which was carved over millions of years by the river cutting down through the Navajo Sandstone — the same sandstone that makes up the walls of the entire Zion Canyon. The walls in the narrowest sections are so close that the sun barely reaches the river below, creating a cool, shaded microclimate even in summer.

Useful Information: The bottom-up day hike requires no permit — you simply start at the Temple of Sinawava and walk upriver. The top-down 16-mile through-hike does require a wilderness permit, available via lottery on Recreation.gov, with only 40 permits issued per day. Water shoes or canyoneering boots are essential — regular hiking boots will be destroyed. Neoprene socks are highly recommended. The Narrows closes when the Virgin River flow exceeds 150 cubic feet per second — always check conditions at the visitor center before going in.

Jet Lag Jelly Tip: Rent canyoneering boots and a walking stick from one of the outfitters in Springdale before you go — the river bottom is extremely uneven and slippery, and a walking stick makes an enormous difference to both safety and enjoyment. Even just the first kilometre into The Narrows gives you a taste of one of the most extraordinary landscapes in the world.
Best Time to Visit
Zion is doable almost year-round, but conditions swing a lot. Spring (April-May) and fall (September-October) hit the sweet spot — mild temps, flowing water for The Narrows, and the canyon isn’t packed. Summer (June-August) gets brutally hot (35°C+/95°F+) and crowded, especially at Angels Landing and The Narrows. Winter (December-February) is quiet and beautiful with possible snow on the rim, but The Narrows can be too cold/icy to hike without a wetsuit.
Jet Lag Jelly Tip: If you want to hike The Narrows, check the Virgin River flow rate before you go — anything above 150 cubic feet per second and the park may close the trail for safety.
Where to Stay
Springdale is the obvious base — it sits right at the south entrance, so you can walk into the park without dealing with parking or the shuttle from farther out.
Right at the entrance: Cliffrose Springdale, Desert Pearl Inn, and Zion Park Motel are all within easy walking distance of the park gate, with several backing right onto the Virgin River.
Inside the park: Zion Lodge is the only in-park accommodation, and it’s the only way to skip the shuttle entirely if you’re staying overnight — but it books out extremely far in advance, especially spring through fall.
Budget-friendly: a handful of motels and smaller inns are scattered along Zion Park Blvd in Springdale, generally cheaper than the riverside properties but still walkable to the entrance.
Browse places to stay in Springdale as early as you can if Zion Lodge is the plan — often 6+ months ahead for peak season.
Budget
Backpacker: ~$35–55/day — camping (Watchman or South Campground), gas, park fee, self-catered food
Mid-range: ~$100–160/day — rental car, hotel in Springdale, mix of dining
Luxury: $250+/day — upscale lodges near the park entrance, guided canyoneering tours, private transfers
Fun Fact: Zion's shuttle system is mandatory during peak season (spring through fall) — private vehicles aren't allowed into the main canyon, so budget a little extra time for parking and shuttle waits.
FAQ
Do you need a permit for Angels Landing? Yes — a permit is required for the chain section from Scout Lookout to the summit, awarded through a seasonal lottery on Recreation.gov. Winter months have much better odds since fewer people apply.
Is The Narrows hard to hike? The bottom-up route from Temple of Sinawava requires no permit — you just walk as far into the river as you’re comfortable with and turn around. It’s not technically hard, but you’re wading through water, sometimes chest-deep, so proper footwear matters.
Do you need a car to get around Zion? Not during peak season — private vehicles aren’t allowed on the main canyon road from March through November, so the free shuttle is mandatory. In winter, the shuttle pauses and you can drive yourself.
What’s the best time of year to visit Zion? Spring (April–May) and fall (September–October) — mild temperatures, flowing water for The Narrows, and thinner crowds than summer.
Is one day enough to see Zion National Park? It covers the highlights, but Zion rewards more time — two days lets you add a longer hike like Angels Landing or The Narrows without rushing.
Summary
Zion is the kind of park you spend a day in and immediately start planning how to come back. Every trail feels different from the last, every viewpoint reveals something new about the canyon, and every bend in the river shows you another angle of those extraordinary red and white walls.
Here’s the quick rundown of everything covered:
Checkerboard Mesa — The first impression, and a good one. Look closely at the grid pattern in the rock.
Canyon Overlook Trail — Best view-to-effort ratio in the park. Do not skip this one.
Court of the Patriarchs — Walk down to the river for the best angle on the three peaks.
Lower Emerald Pools — The most peaceful stop in the park. Go late afternoon.
Angels Landing — Enter the lottery. If you don’t get a permit, Scout Lookout is still worth every step.
Weeping Rock — Short, strange, and genuinely beautiful. Check it’s open before you go.
Observation Point — The view that puts everything else in perspective.
Temple of Sinawava and Riverside Walk — Walk all the way to the end. Every time.
The Narrows — Rent the boots. Go in. Even for just an hour.
One day is enough for the highlights. But Zion deserves more than one day.
Part of my Southwest national parks series — check out my Exploring Antelope Canyon, Horseshoe Bend Overlook Guide, Grand Canyon South Rim Guide, Valley of Fire Day Trip from Las Vegas, and Death Valley Must-See Stops posts too if you’re building out a bigger Arizona/Nevada itinerary — or start with my Best National Parks You Can Visit From Las Vegas roundup for the full picture.